Lancia Stratos 1979 J Bagration – Hasegawa (1/24)
Posted: Mon Jan 16, 2023 8:56 am
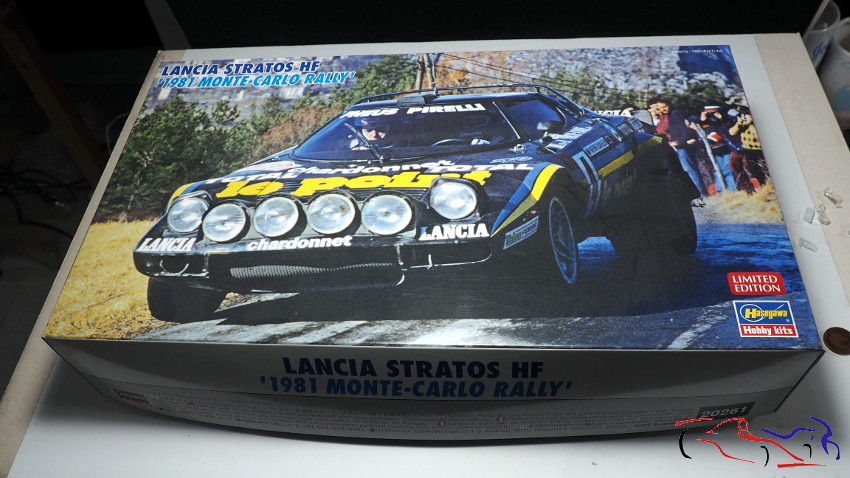
Una vez terminado el Ferrari GTC4, vamos a ir comenzando un kit que no me voy a complicar mucho en cuanto a añadidos: Lancia Stratos Hasegawa a escala 1/24. Para ello, tomaremos este kit correspondiente al rally de Montecarlo del año 1981:
Once finished the Ferrari GTC4, we are going to start a kit that It will not be complicated too much in terms of additions: Lancia Stratos Hasegawa in 1/24 scale. For this, we will take this kit corresponding to the 1981 Montecarlo rally:
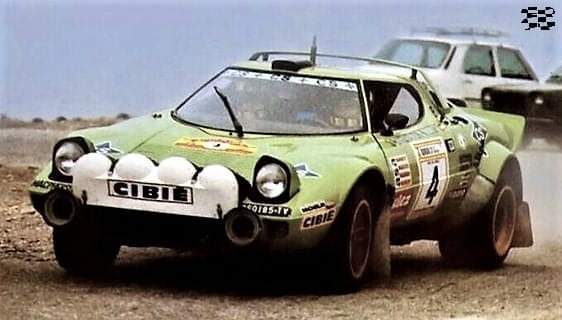
Y la versión escogida es la verde que usó Jorge de Bagration en los rallyes de España del año 1979:
And the version chosen is the green one used by Jorge de Bagration in the 1979 Spanish rallies:
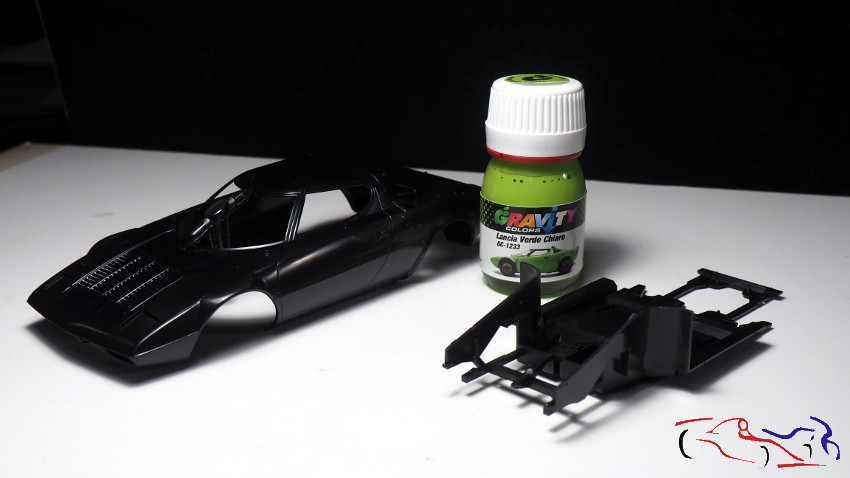
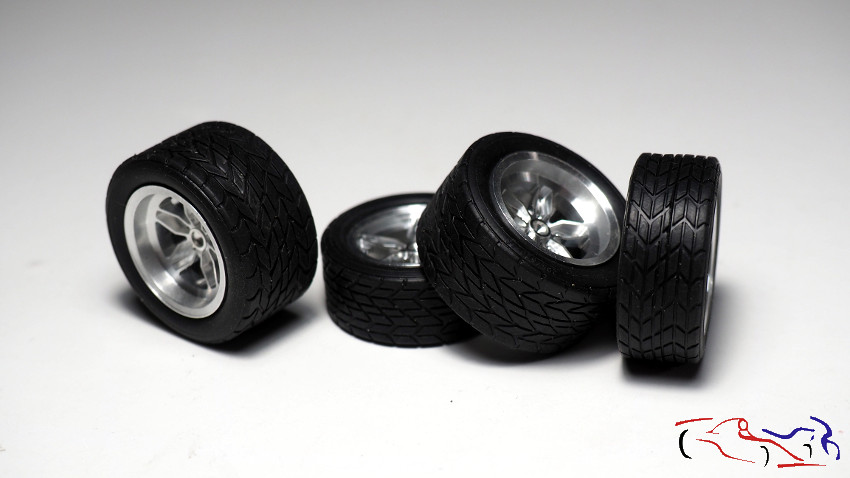
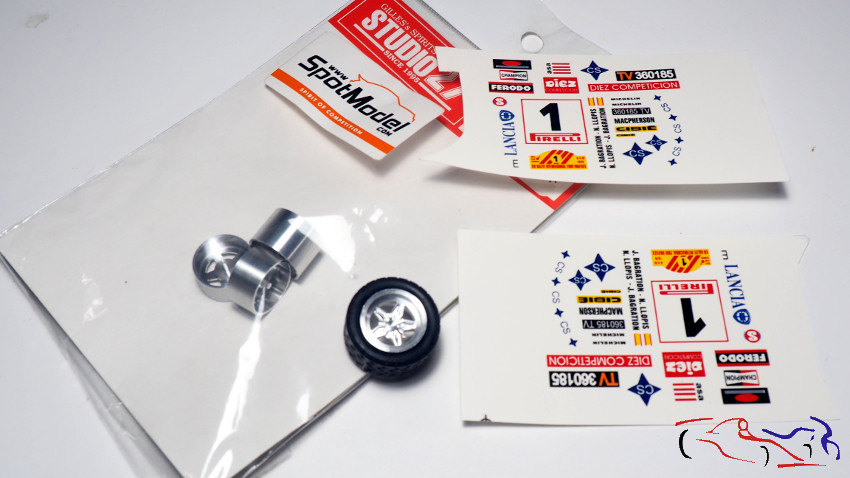
Y como complementos, tenemos la pintura de Gravity-Colors Spain, las llantas de aluminio de Studio27, y las calcas específicas realizadas para el rally “2000 Virajes”, que desafortunadamente, tuvo que retirarse por accidente.
And as complements, we have the paint by Gravity-Colors Spain, the aluminium rims by Studio27, and the specific decals made for the rally “2000 Virajes”, which unfortunately, he had to be withdrawn by accident.
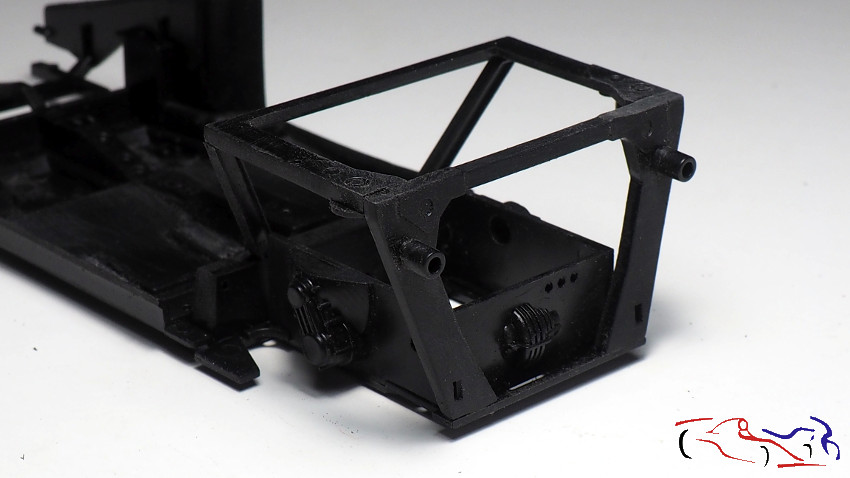
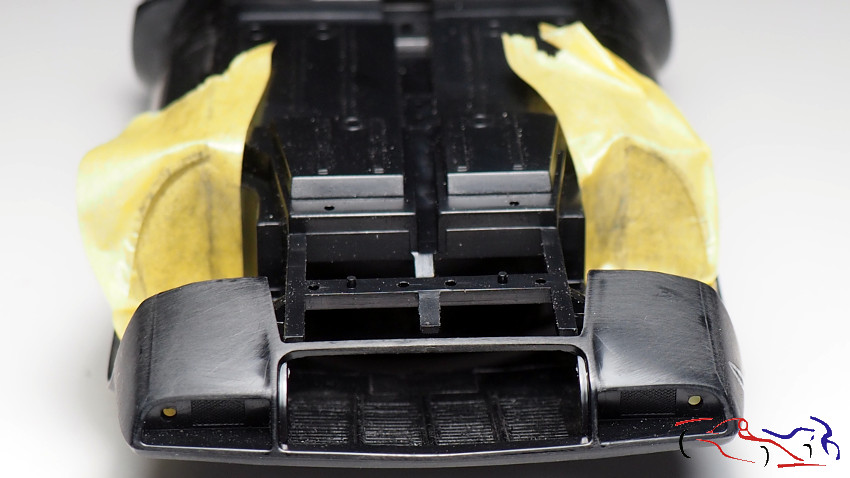
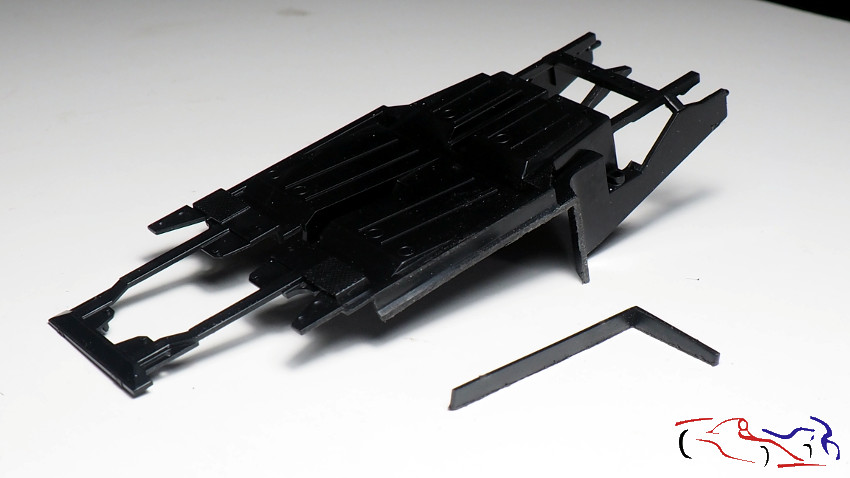
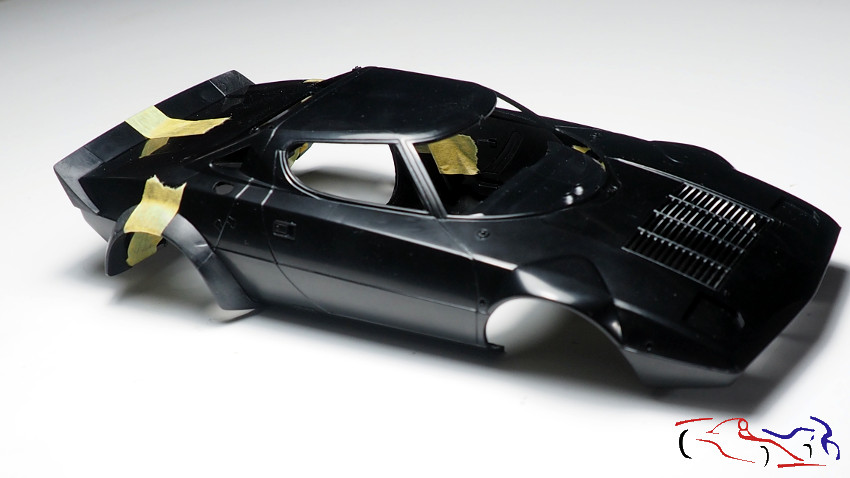
Lo primero que hago es revisar el encaje del chasis en la carrocería, pues viendo un video de un japonés que está haciendo un trabajo increible, se decide a cortar el capó y el portón trasero proque el chasis no encaja. Y es cierto: es muy dificil encajarlo. Y auqnue yo lo conseguí, no quiero ni pensar como se haría con toda la carrocería terminada!! Vemos en las siguientes imágenes, como el interior del paso de rueda no termina de entrar, porque los bajos de la carrocería se redondean hacía el centro.
The first thing I do is to check the fit of the chassis to the bodywork, because watching a video of a Japanese guy who is doing an incredible job, he decides to cut the bonnet and the tailgate because the chassis doesn’t fit. And it’s true: it’s very difficult to fit it. And although I managed to do it, I don’t even want to think about how it would be done with the whole bodywork finished! We can see in the following pictures, how the inside of the wheel arch doesn’t fit, because the underbody is rounded towards the centre.
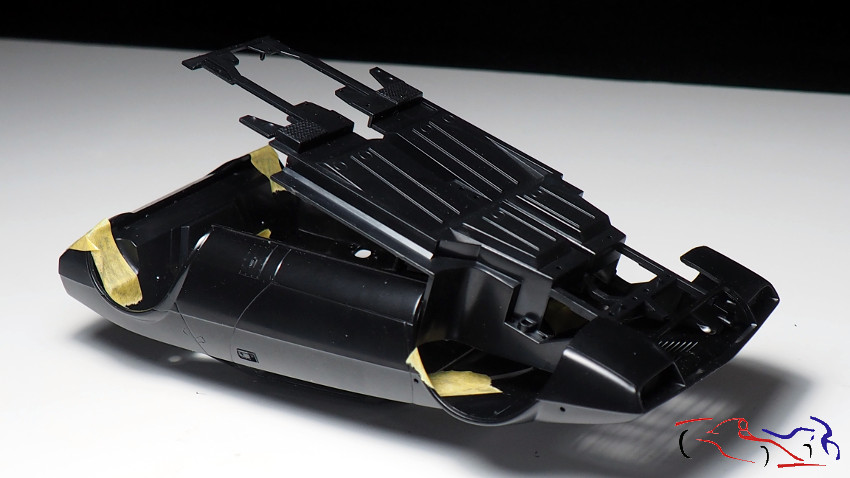
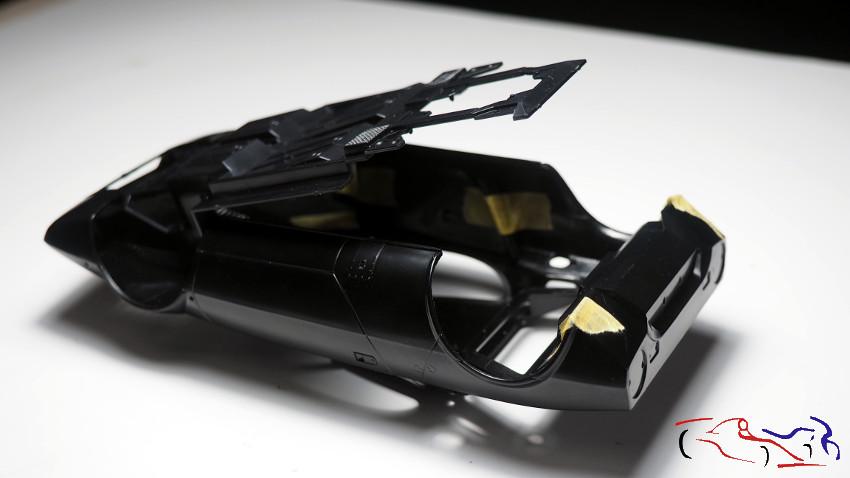
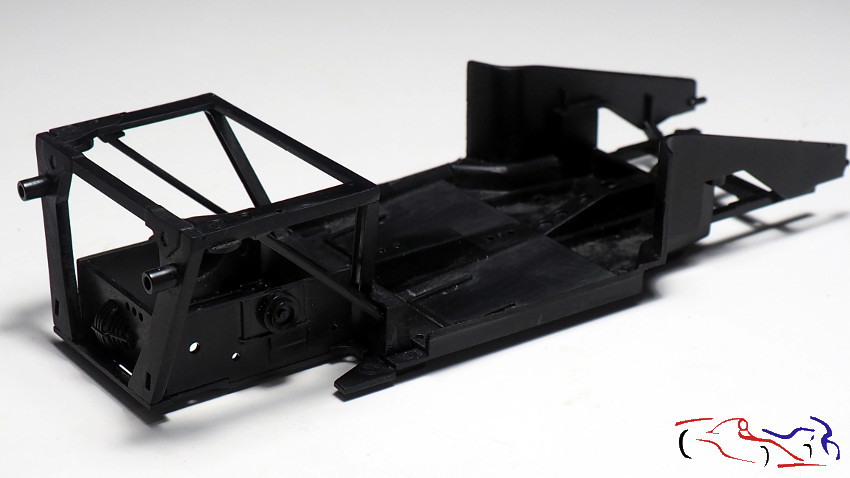
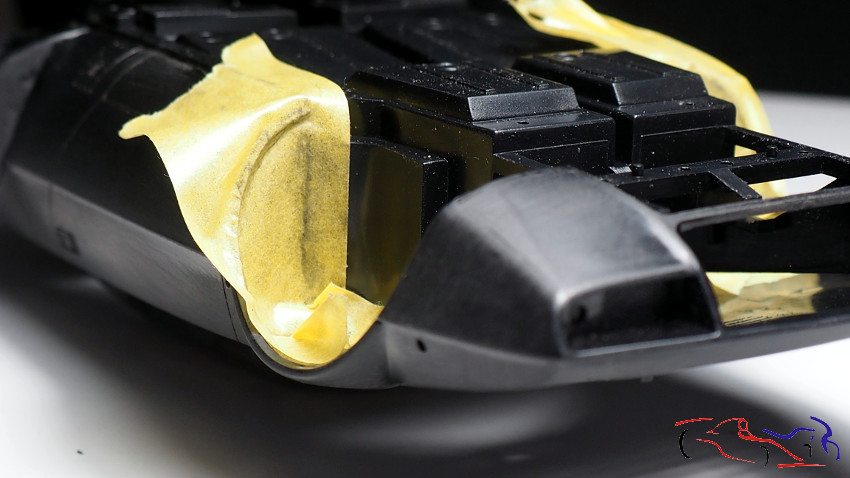
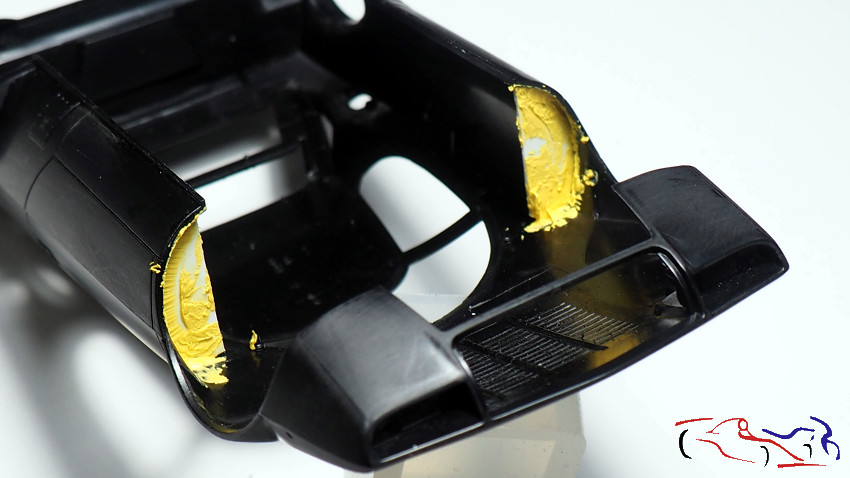
Entonces, lo que he hecho es cortar una L en os laterales del chasis para que entre bien, aunque tendré que rellenar los pasos de rueda interiores de delante, y hacer un apoyo del chasis en el interior de la carrocería.
So, what I’ve done is to cut an L in the sides of the chassis to make a good fit, although I’ll have to fill the front inner wheel arches, and make a support for the chassis inside the body.
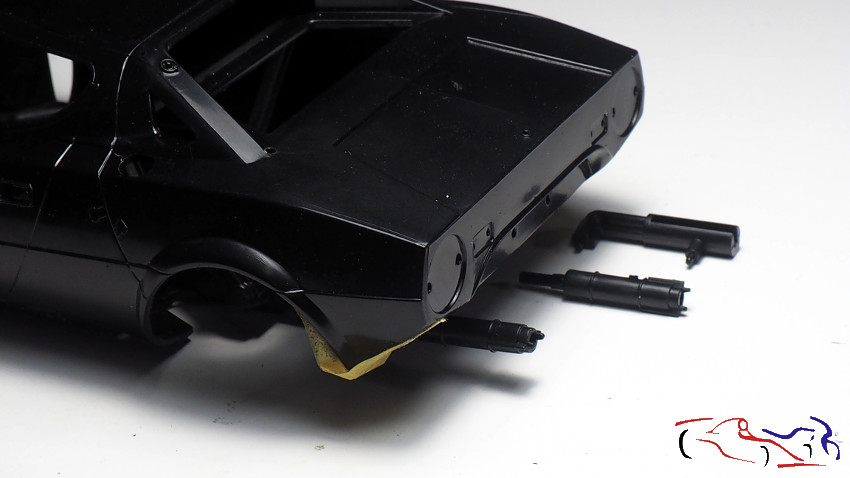
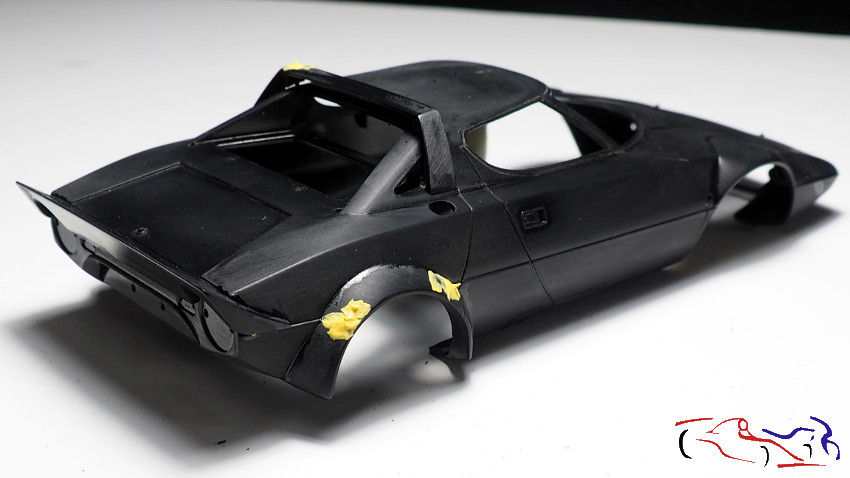
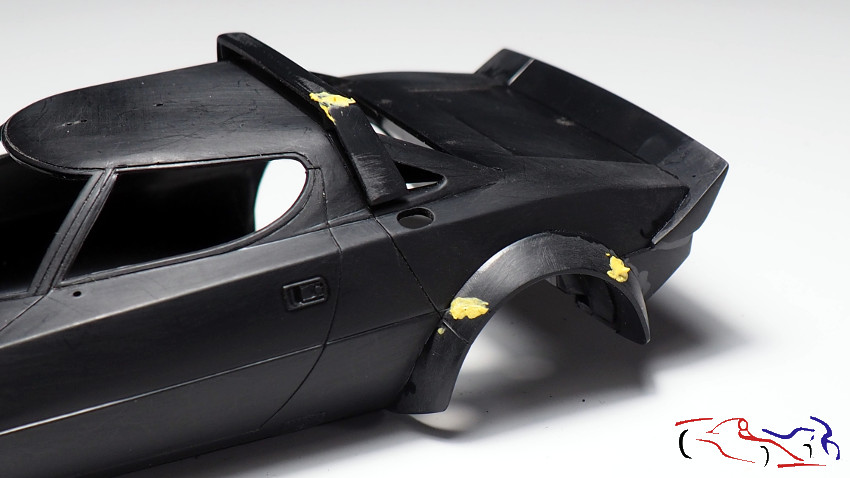
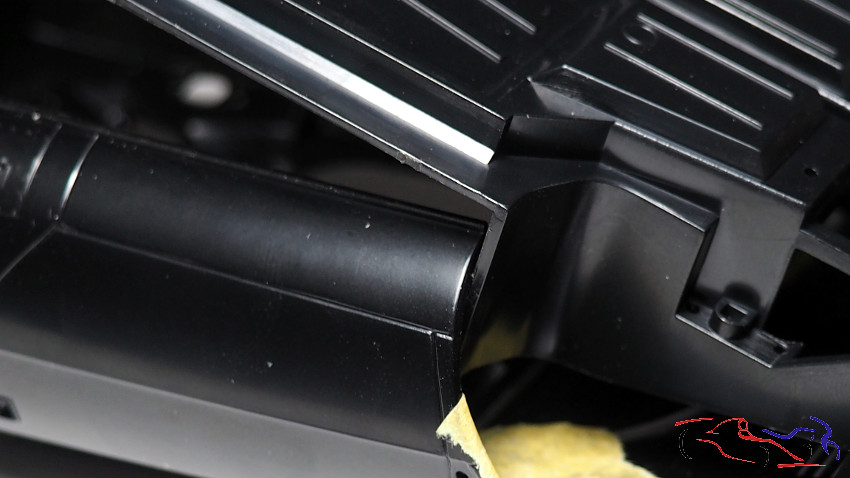
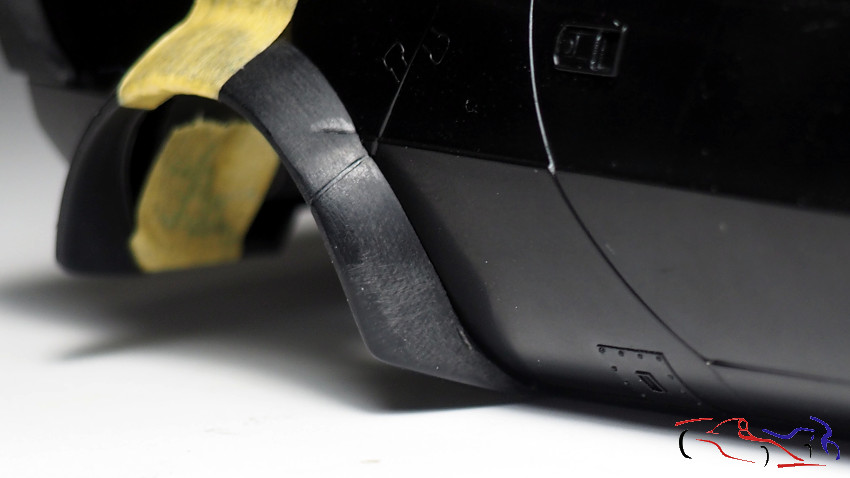
Más piezas que retocar: los pasos de reuda traseros vienen con una curvatura en el plano inclinado que no se corresponde al original, por lo que toca lijar e igualar. A su vez, vienen con unas marcas que corresponden a la linea longitudinal lateral de la carrocería, que existen, por lo que habrá que enmasillar.
More parts to touch up: the rear wheel arches come with a curvature in the inclined plane that does not correspond to the original, so they need to be sanded and levelled. At the same time, they come with some marks that correspond to the lateral longitudinal line of the bodywork, which they do not exist, so it will be necessary to putty them.
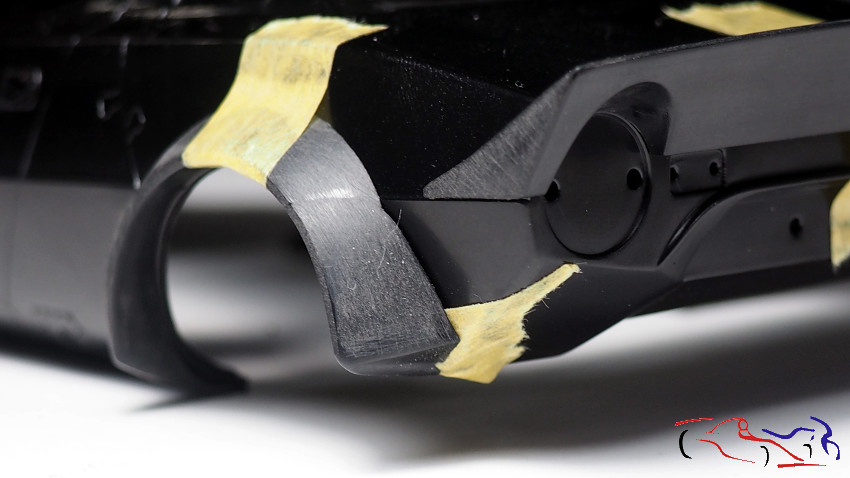
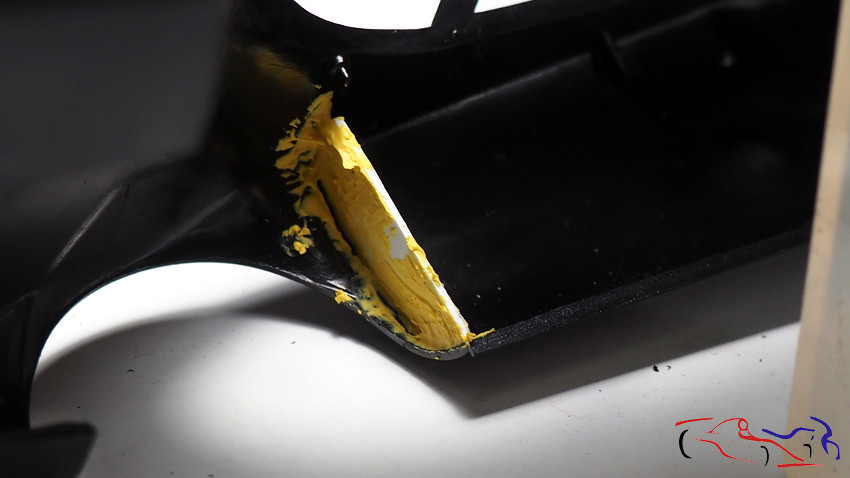
Aquí vemos bien la marca que hay que rellenar, manteniendo la linea d epanel que viene del porton trasero. También hay que redondear la esquina inferior delantera, que no tiene esa forma de pico:
Here we can clearly see the mark to be filled in, keeping the panel line coming from the tailgate. The lower front corner, which does not have that beak shape, also needs to be rounded:
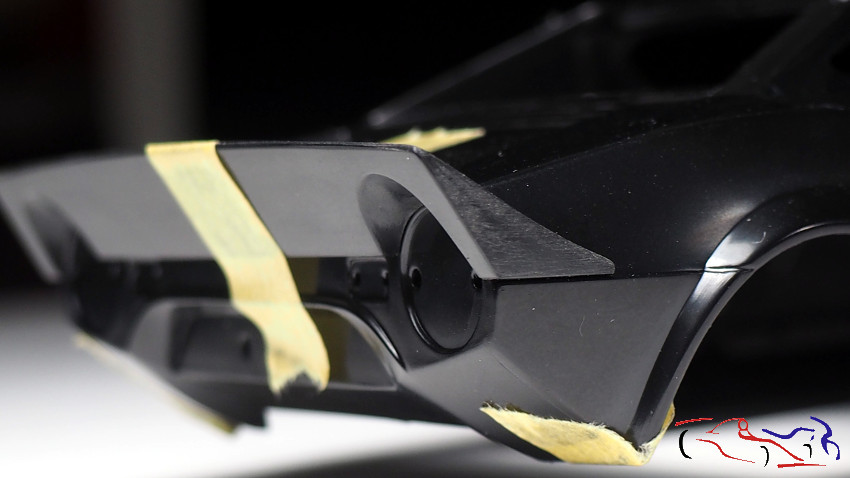
Y respecto a la deriva trasera, en genral las formas no son tan rectas, y hay que redondearlas un poco:
And with regard to rear drift, in general the shapes are not so straight, and need to be rounded off a little:
En cualquier caso, el coche es un clásico de los rallys con unas formas increibles. Una pena que sea negra la maqueta porque el negro para trabajarlo es muy malo!!
In any case, the car is a rally classic with incredible shapes. It’s a pity that the model is black, because black is very bad to work with!

Gracias por ver y comentar!.
Thanks for watching and commenting!
Once finished the Ferrari GTC4, we are going to start a kit that It will not be complicated too much in terms of additions: Lancia Stratos Hasegawa in 1/24 scale. For this, we will take this kit corresponding to the 1981 Montecarlo rally:
Y la versión escogida es la verde que usó Jorge de Bagration en los rallyes de España del año 1979:
And the version chosen is the green one used by Jorge de Bagration in the 1979 Spanish rallies:
Y como complementos, tenemos la pintura de Gravity-Colors Spain, las llantas de aluminio de Studio27, y las calcas específicas realizadas para el rally “2000 Virajes”, que desafortunadamente, tuvo que retirarse por accidente.
And as complements, we have the paint by Gravity-Colors Spain, the aluminium rims by Studio27, and the specific decals made for the rally “2000 Virajes”, which unfortunately, he had to be withdrawn by accident.
Lo primero que hago es revisar el encaje del chasis en la carrocería, pues viendo un video de un japonés que está haciendo un trabajo increible, se decide a cortar el capó y el portón trasero proque el chasis no encaja. Y es cierto: es muy dificil encajarlo. Y auqnue yo lo conseguí, no quiero ni pensar como se haría con toda la carrocería terminada!! Vemos en las siguientes imágenes, como el interior del paso de rueda no termina de entrar, porque los bajos de la carrocería se redondean hacía el centro.
The first thing I do is to check the fit of the chassis to the bodywork, because watching a video of a Japanese guy who is doing an incredible job, he decides to cut the bonnet and the tailgate because the chassis doesn’t fit. And it’s true: it’s very difficult to fit it. And although I managed to do it, I don’t even want to think about how it would be done with the whole bodywork finished! We can see in the following pictures, how the inside of the wheel arch doesn’t fit, because the underbody is rounded towards the centre.
Entonces, lo que he hecho es cortar una L en os laterales del chasis para que entre bien, aunque tendré que rellenar los pasos de rueda interiores de delante, y hacer un apoyo del chasis en el interior de la carrocería.
So, what I’ve done is to cut an L in the sides of the chassis to make a good fit, although I’ll have to fill the front inner wheel arches, and make a support for the chassis inside the body.
Más piezas que retocar: los pasos de reuda traseros vienen con una curvatura en el plano inclinado que no se corresponde al original, por lo que toca lijar e igualar. A su vez, vienen con unas marcas que corresponden a la linea longitudinal lateral de la carrocería, que existen, por lo que habrá que enmasillar.
More parts to touch up: the rear wheel arches come with a curvature in the inclined plane that does not correspond to the original, so they need to be sanded and levelled. At the same time, they come with some marks that correspond to the lateral longitudinal line of the bodywork, which they do not exist, so it will be necessary to putty them.
Aquí vemos bien la marca que hay que rellenar, manteniendo la linea d epanel que viene del porton trasero. También hay que redondear la esquina inferior delantera, que no tiene esa forma de pico:
Here we can clearly see the mark to be filled in, keeping the panel line coming from the tailgate. The lower front corner, which does not have that beak shape, also needs to be rounded:
Y respecto a la deriva trasera, en genral las formas no son tan rectas, y hay que redondearlas un poco:
And with regard to rear drift, in general the shapes are not so straight, and need to be rounded off a little:
En cualquier caso, el coche es un clásico de los rallys con unas formas increibles. Una pena que sea negra la maqueta porque el negro para trabajarlo es muy malo!!
In any case, the car is a rally classic with incredible shapes. It’s a pity that the model is black, because black is very bad to work with!
Gracias por ver y comentar!.
Thanks for watching and commenting!