

I take up this old war cry of fellow french modelers.... OSONS!! (LET´S DARE!!!!)
I joined the adventure of two f1passion friends, so only once, I'm going to advance them (I hope it's not a problem), and since mine will probably be simpler (less details) I can finish sooner.
When you are asked to make decals, it is difficult to resist the temptation.
It is very curious. I started racing F1 in the fall of 1981. I had read LES GRANDS PRIX II by Gerard Flocon, and I was impressed. My first works were 1-32, with Scalextric wheels. Some were used on the track and after a FW08, I was interested in the JS19, it was so simple and beautiful, after seeing the tech analysis at GPI, I said. Let's go! A little plastic from the lids of washing machine detergent cans (which I found out to be the correct polystyrene) and voila. It must be sleeping inside some lost box.
So, 40 years later, we will do with bigger plastic and 2,666 times larger.
Next, the first drawings
Let's go!
Not much here, just drawings. But it is a very simple, very linear car. We can go from drawing to plastic, to editing and to the final form very quickly.
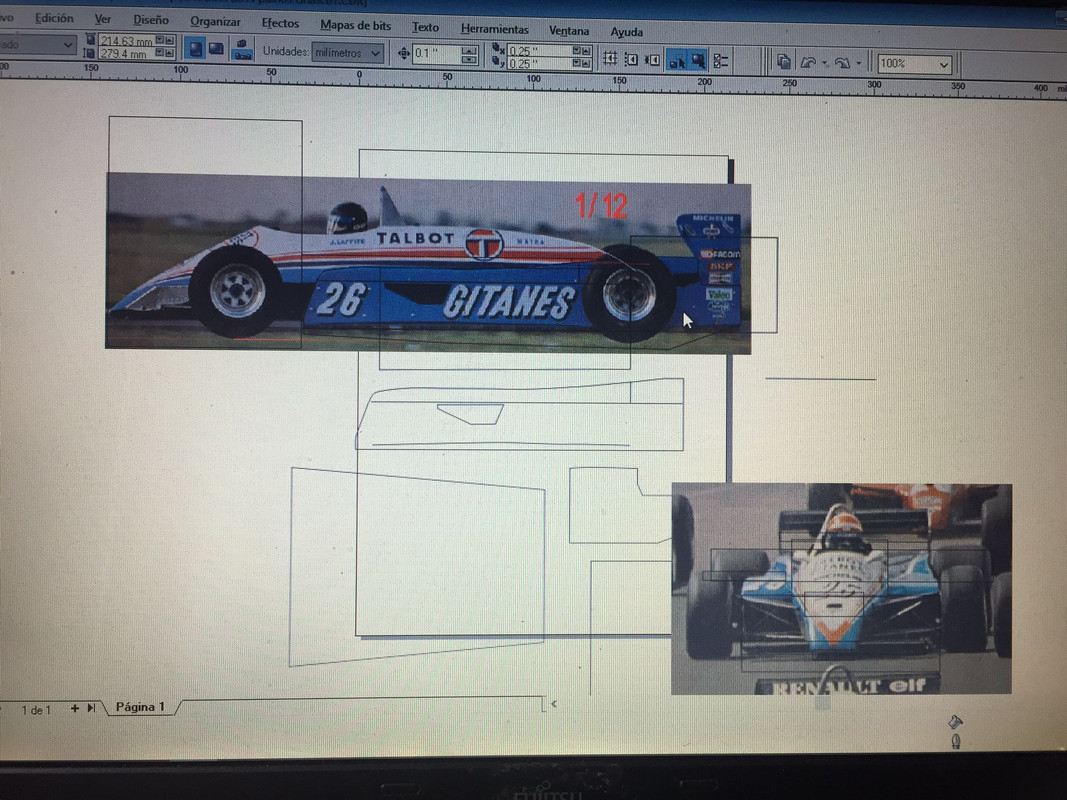
A very, very good picture. And we start. You have to scale the size WELL. We can refer to the wheelbase, the rear overhang, the diameter of the rims... the height of the rear spoiler, all well-designed dimensions. We obtain a very coherent correlation in this case, proof that the image is taken from far, far away... so very little distortion.
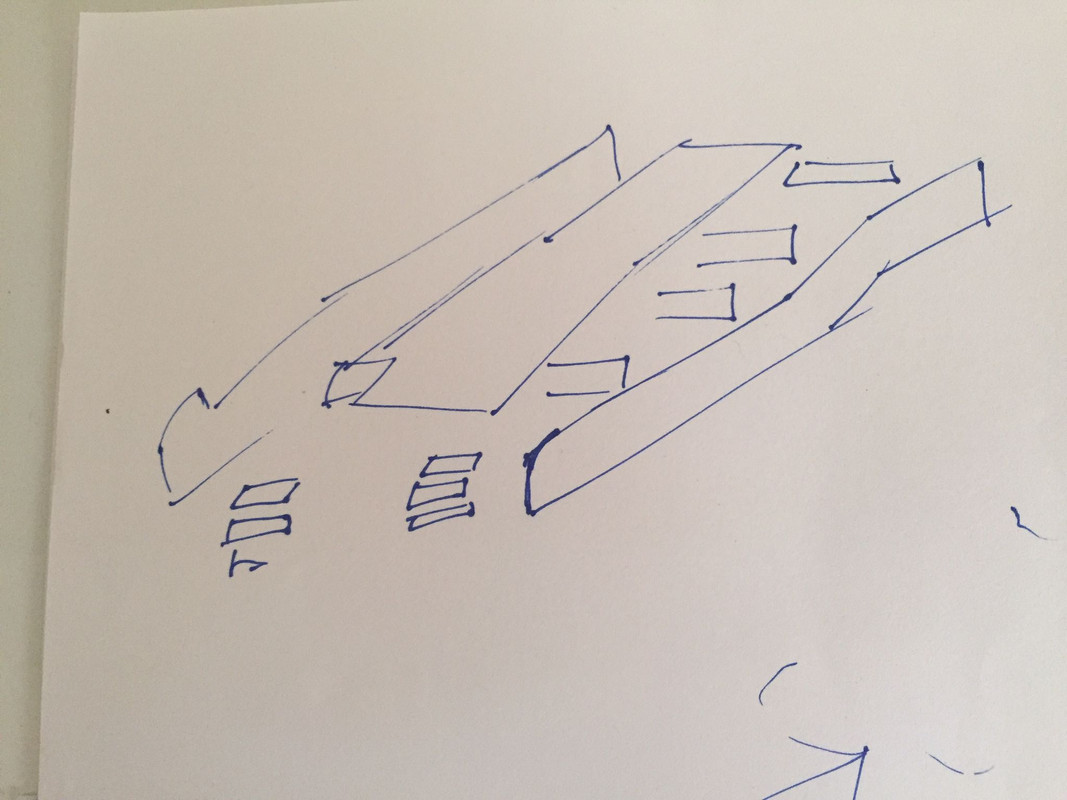
The general idea of how the main construction will be. As we don't want to do interiors or be able to mold the result, we have a lot of freedom. Priority to ease of construction and robustness.
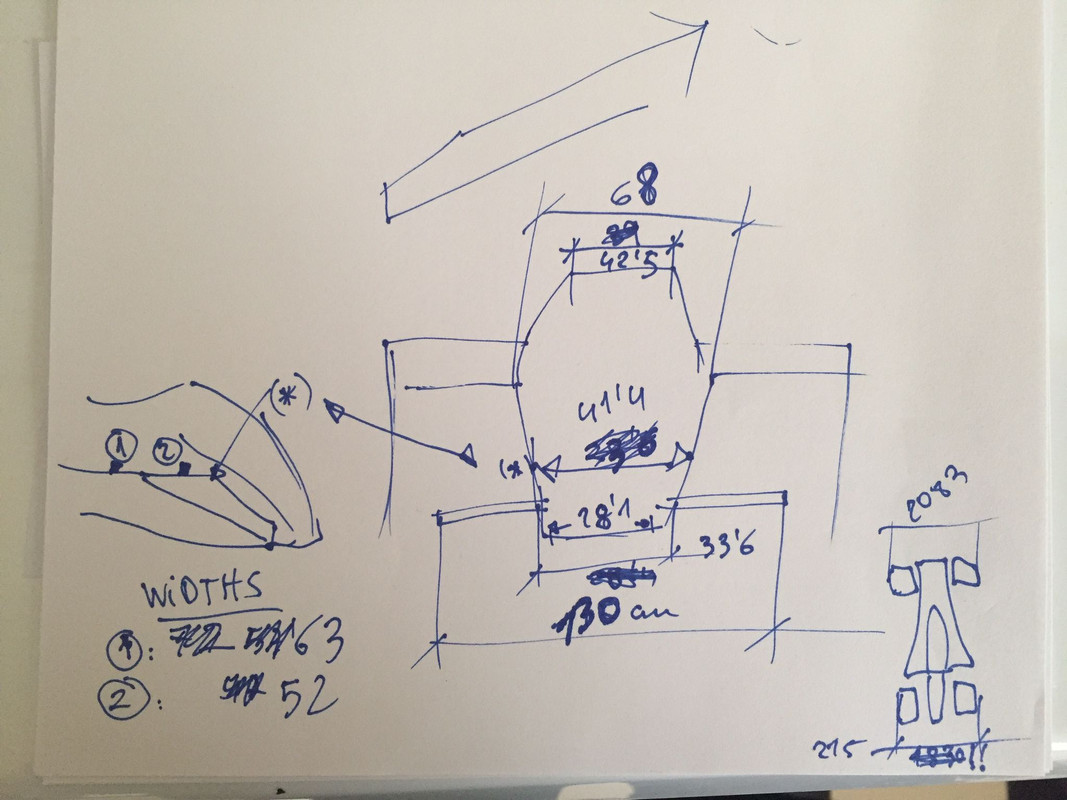
Very interesting measurements. The bodywork starts at the rules enforced 140cm to go up to the rear 110cm. Almost in a straight line. We will come back to this "almost" later
Also note... front wing measures 130cm. Not the 150 per rules, not the 140 for the body either. front overall width, the 215cm max of the regulations, but rear only 208.
Also some measurements of the nose.
Next time, we'll see plastic!!
BR mates THX for looking
J


