Ferrari GTC4 Lusso – Alpha (1/24)

Models in progress... including non-F1 models.
User avatar

Topic author
JesusM
Backmarker
Backmarker
Posts: 341
Joined: Thu Oct 28, 2010 4:24 am
Favorite F1 Team or Driver: Ferrari, Tyrrell
Location: Madrid - Spain
Contact:
Status: Offline
Spain

Ferrari GTC4 Lusso – Alpha (1/24)

Post by JesusM »

Comenzamos un proyecto nuevo a raiz del Concurso Fuengirola 2021, cuya temática será “coches deportivos de calle”. Yo he elegido esta maqueta de resina de la marca Alpha Models, el Ferrari GTC4 Lusso, un deportivo de 4 plazas y dos puertas, con un perfil precioso:

We started a new project as a result of the Fuengirola 2021 Contest, whose theme will be “street sports cars”. I have chosen this resin model from the Alpha Models brand, the Ferrari GTC4 Lusso, a 4-seater two-door sports car, with a beautiful lines:

Image

La maqueta es un multimedia kit, con piezas en resina, fotograbados, calcas, neumáticos de goma, y cristales de acetato precortados. Comentar como punto especial, que trae dos tipos de llantas, para elegir la que nos guste más. Pero vamos con las primeras fotos del detalle:

The model is a multimedia kit, with resin and photo-etched parts, decals, tires rubber, and pre-cut acetate crystals. Comment as a special point, that it brings two types of tires, to choose the one we like the most. But let’s go with the first photos of the detail:

La carrocería es de resina, como todas las piezas, bien formada y acabada, sin poros aunque es bien pesada. Pocas rebabas que se pueden eliminar fácilmente, siendo las lineas de los paneles bien definidas, a las que profundizaremos más.

The bodywork is made of resin, like all the parts, well formed and finished, without pores although it is very heavy. Few burrs that can be easily removed, being the lines of the panels well defined, to which we will delve further.

Image

Image

Image

Image

Pasando a lo que no es carrocería, el kit viene con el cockpit, el chasis, y dos piezas para el frontal y la trasera, que encajan muy bien. Aun así, la fijación de todo el conjunto se realiza con tornillos.

Moving on to what is not the bodywork, the kit comes with the cockpit part, the chassis, and two pieces for the front and the rear, which fit very well. Even so, the fixing of the entire set is done with screws.

Image

Image

Image

Image

Y para terminar, el resto de bolsas que vienen en el kit, empezando por las piezas en general, los dos tipos de llantas y sus neumáticos, y los fotograbados y acetatos. Decir que los cristales vienen pregortados con las lineas del borde ya pintadas en negro.

And finally, the rest of the bags that come in the kit, starting with the parts in general, the two types of rims and their tires, and the photo-etched and acetates. Say that the crystals come pre-embossed with the edge lines already painted in black.

Image

Image

Image

En definitiva, parece un gran kit, con buena calidad y del que se puede sacar mucho partido, tal y como otros modelistas lo han hecho!! Gracias por ver y comentar!!

So it seems like a great kit, with good quality and from which you can do a great model, just as other modelers have done! Thanks for viewing and commenting!!
User avatar

Topic author
JesusM
Backmarker
Backmarker
Posts: 341
Joined: Thu Oct 28, 2010 4:24 am
Favorite F1 Team or Driver: Ferrari, Tyrrell
Location: Madrid - Spain
Contact:
Status: Offline
Spain

Re: Ferrari GTC4 Lusso – Alpha (1/24)

Post by JesusM »

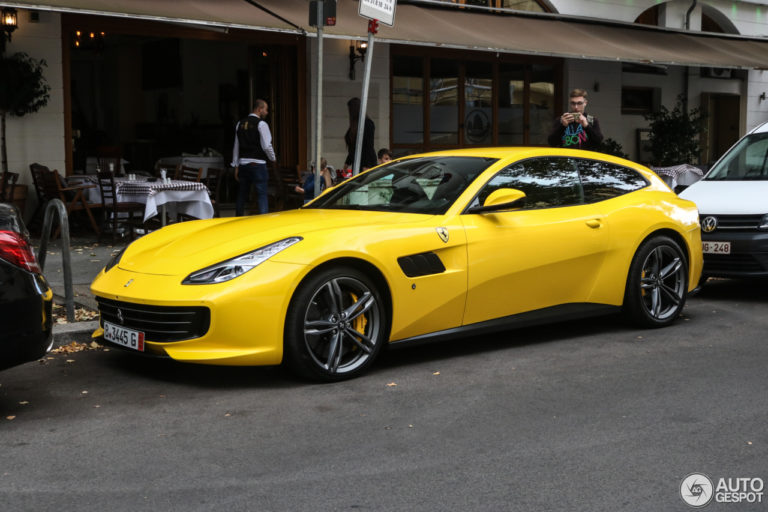
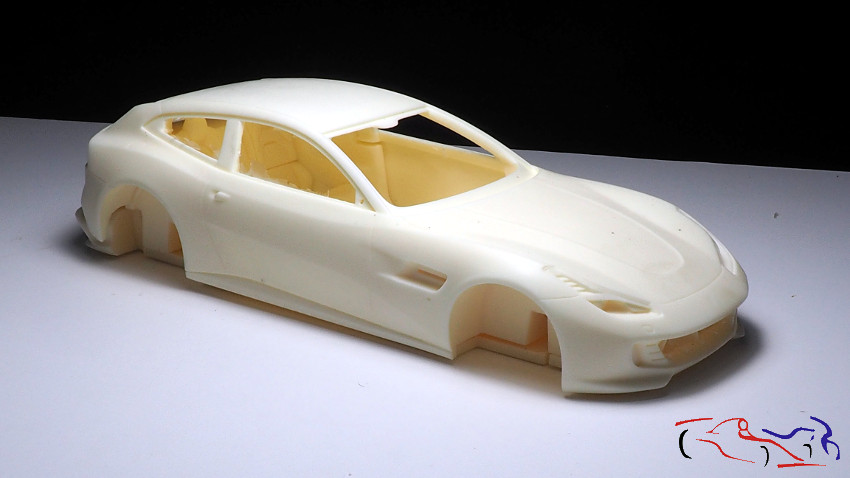
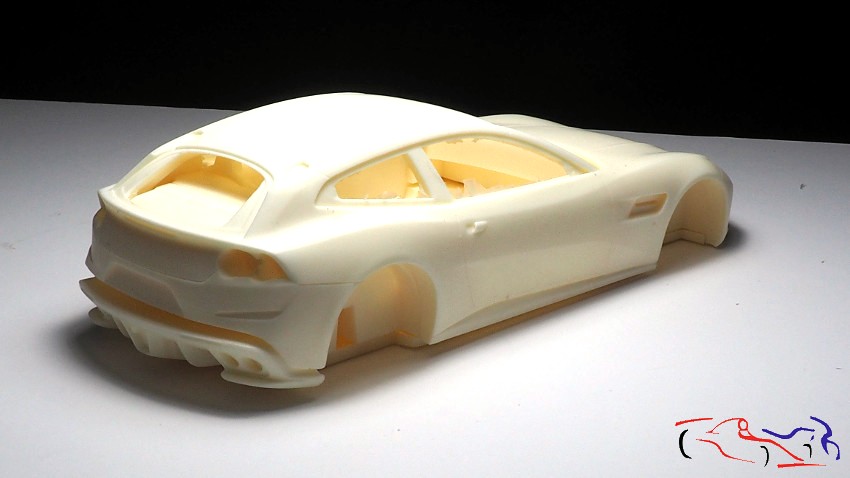
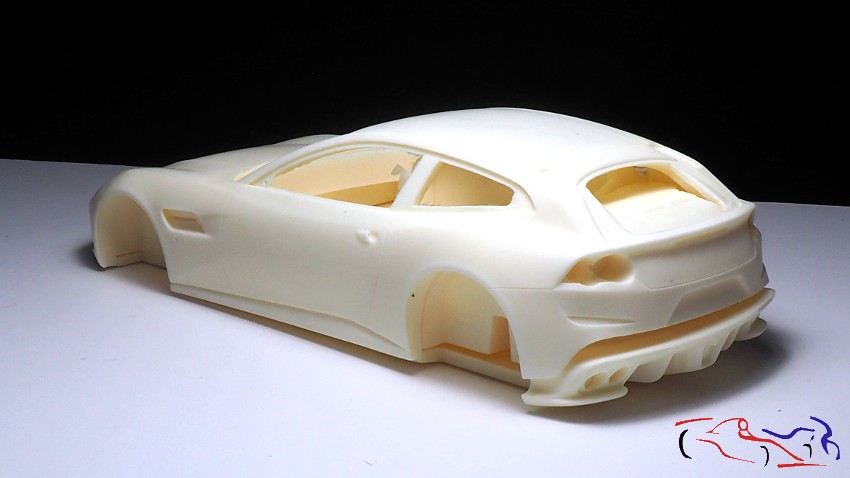
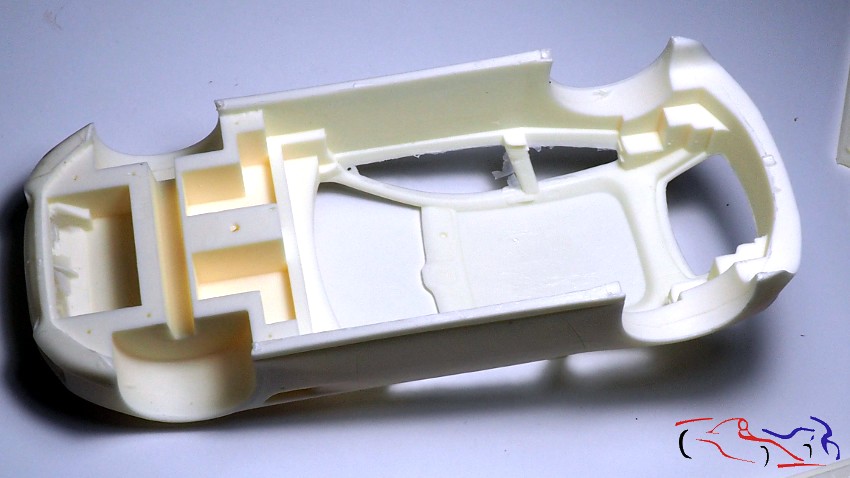
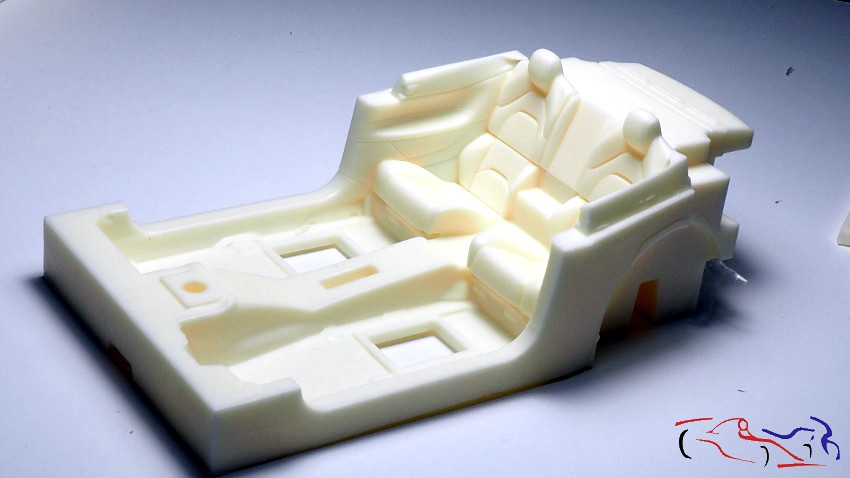
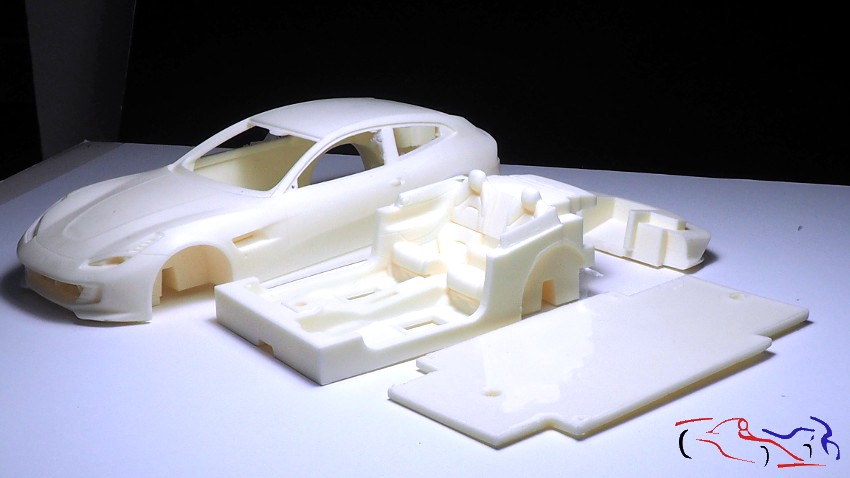
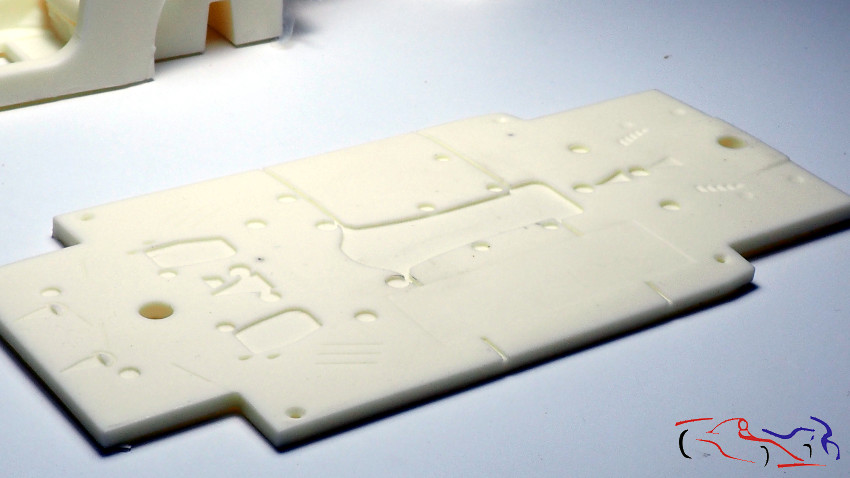
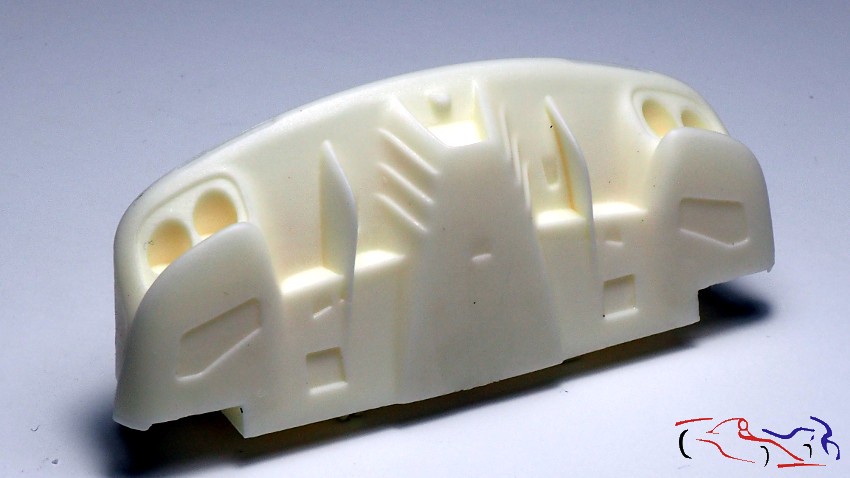
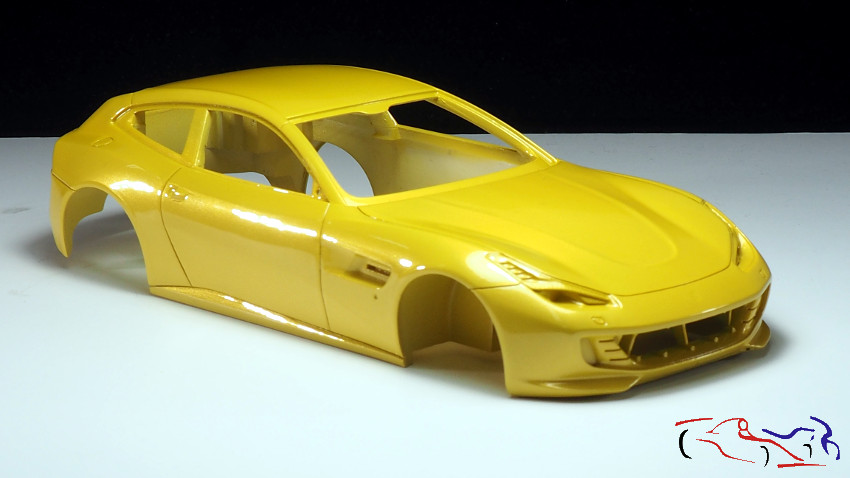
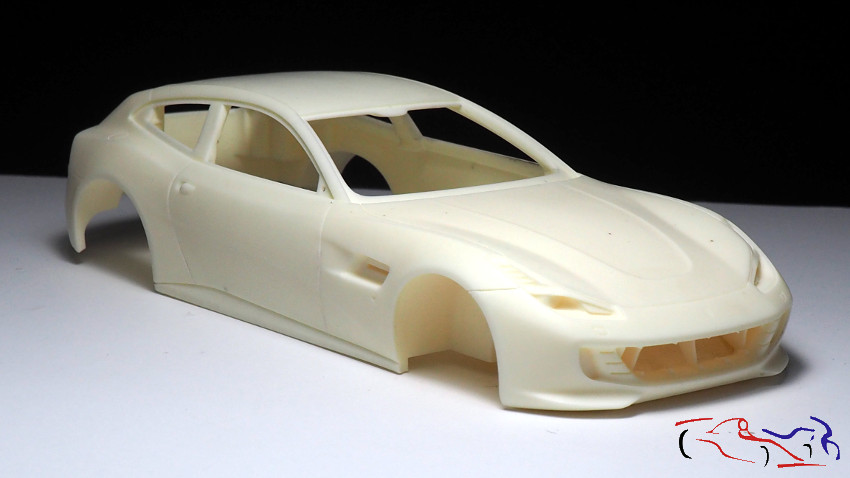
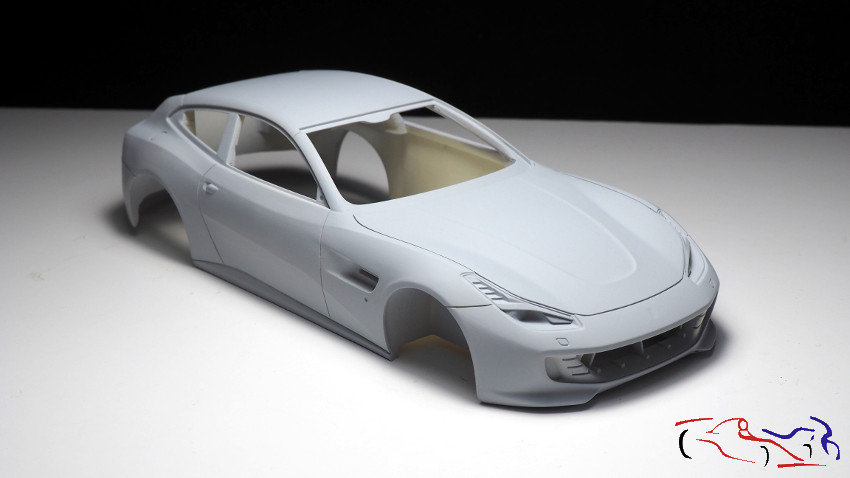
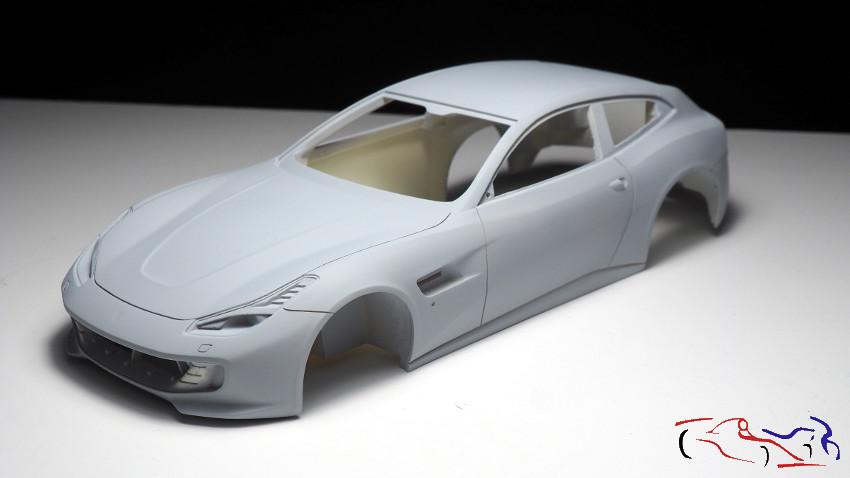
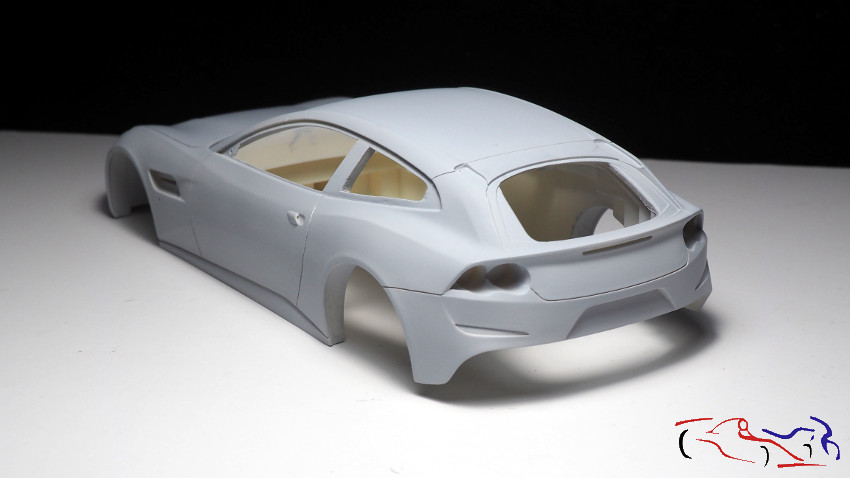
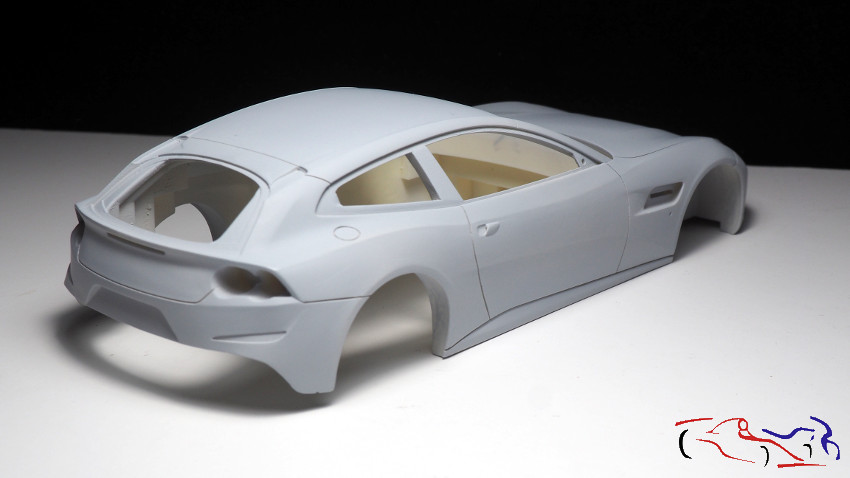
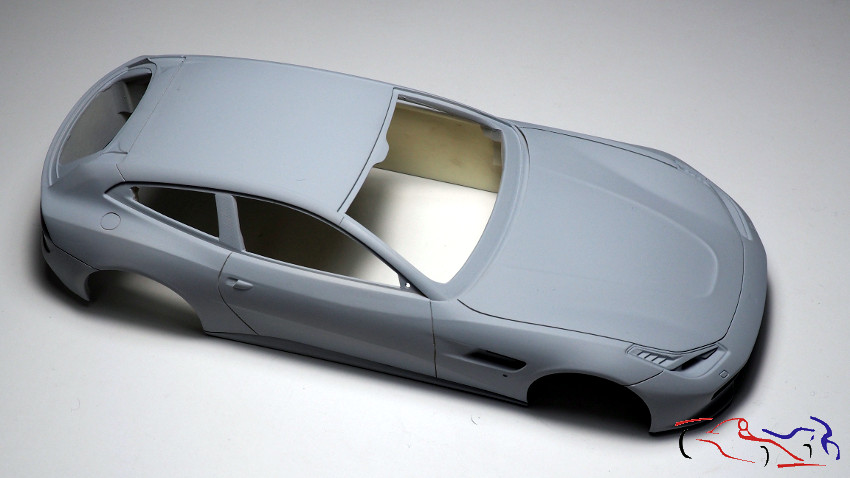
Comenzamos el Ferrari, y después de una limpieza de rebabas, un panelado de las líneas y una lijada con esponja de grano 600, lavamos las piezas con detergente para eliminar restos de polvo y grasas de la resina:

We started the Ferrari, and after cleaning the burrs, paneling the lines and sanding with a 600-grit sponge, we washed the parts with detergent to remove traces of dust and grease from the resin:

Image

Image

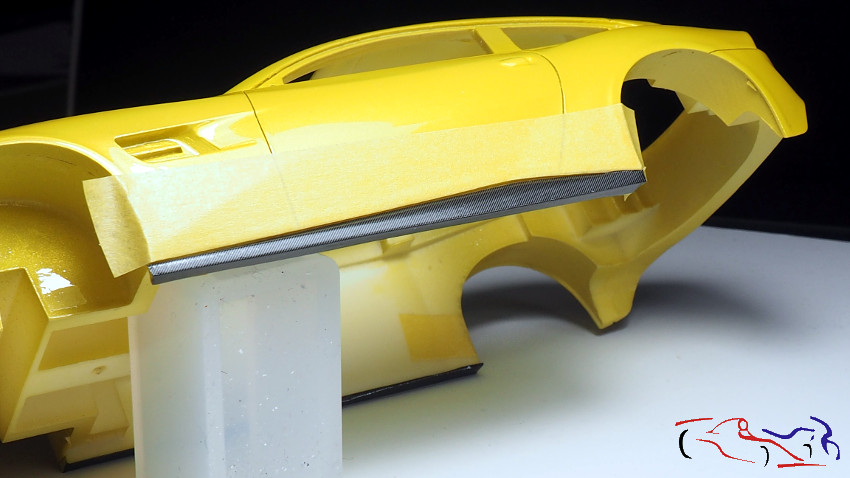
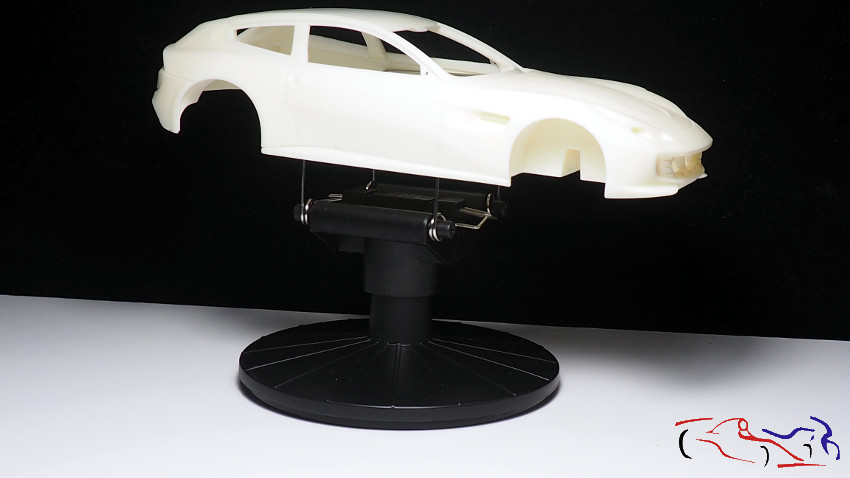
Pero esta carrocería es grande, pesa mucho y mis bases que uso para pintar no me daban seguridad para atacar a esta carrocería, por lo que tuve que comprarme el útil de Tamiya, que muestro a continuación:

But this bodywork is large, it weighs a lot and my bases that I use to paint did not give me the security to attack this bodywork, so I had to buy the Tamiya tool, which I show below:

Image

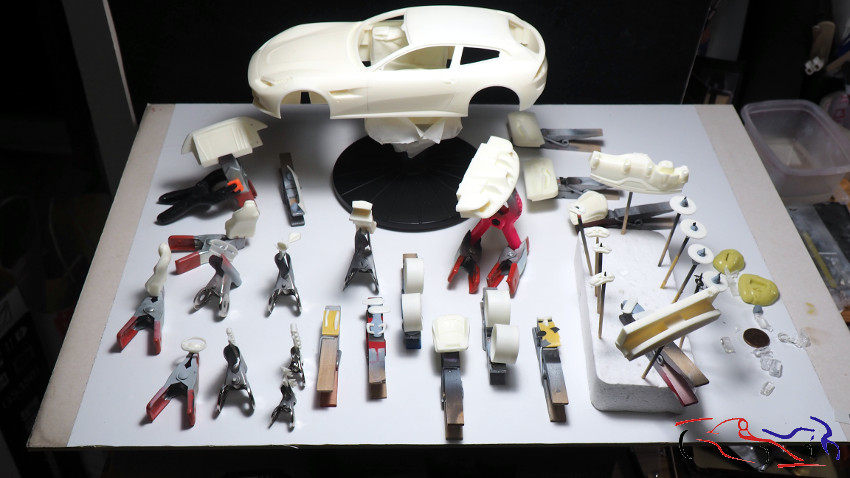
Y ya tengo todas las piezas en sus soportes, listas para imprimar. Destacar que la base de Tamiya en la que está colocada la carrocería, está recubierta con cinta de enmascarar industrial, de pintor, para que las pinturas, imprimaciones y barnices que aplique a las carrocerías, no la dañen y se pueda usar mucho tiempo.

And I already have all the pieces in their supports, ready to prime. It should be noted that the Tamiya base on which the bodywork is placed is covered with industrial painter’s masking tape, so the paints, primers and varnishes that I’ll apply to the bodywork, do not damage it and can be used for a long time.

Image

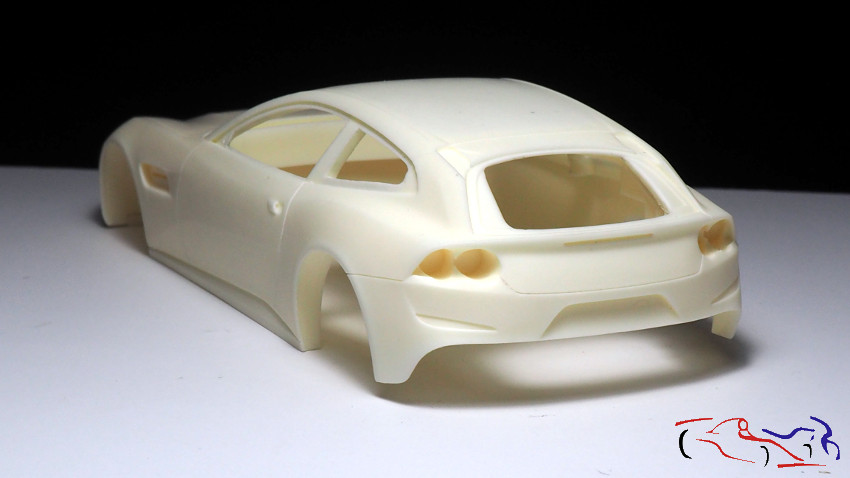
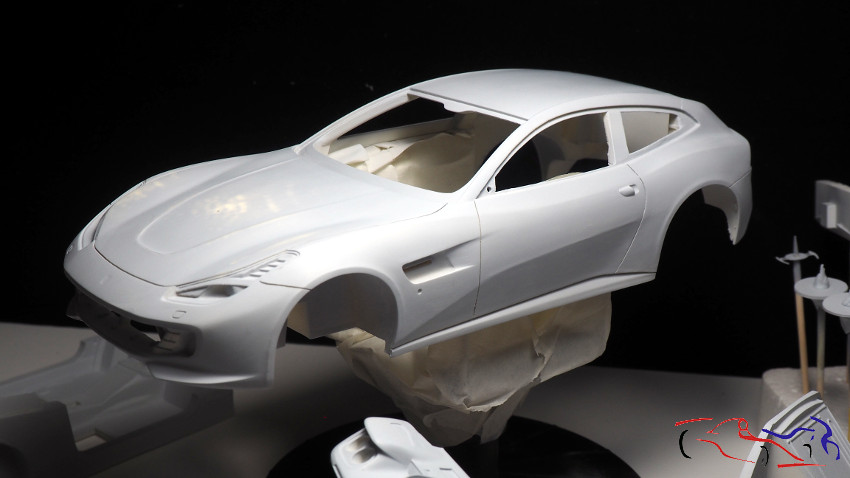
Y después de un día, ya están todas las piezas imprimadas con Gravity-Color de España:

And after one day, all the pieces are already primed with Gravity-Color from Spain:

Image

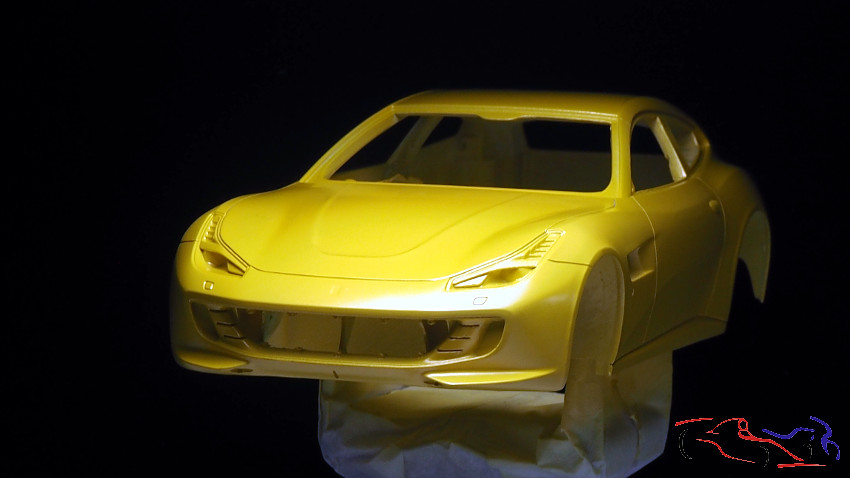
Podemos ver en la carrocería, unas manchas en el morro debidas a un percance que tuve. Hay que lijar para igualar e imprimar de nuevo.

We can see on the bodywork, some spots on the nose due to a mishap I had. Must sand to level the surface and prime again.

Image

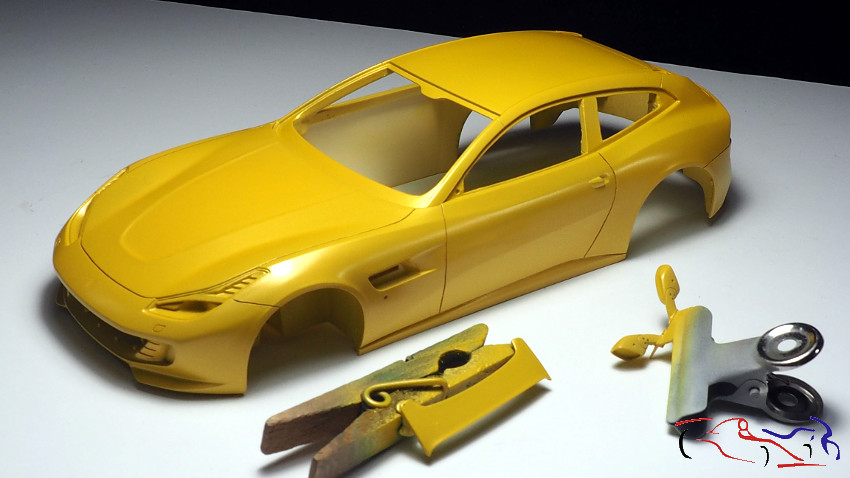
Una vez arreglada, le he aplicado una esponja de grano 1200 para alisar toda la superficie, y aquí teneis la carrocería lista para pintar.

Once fixed, I applied a 1200 grit sponge to smooth the entire surface, and here you have the body ready to paint.

Image

Image

Image

Image

Image

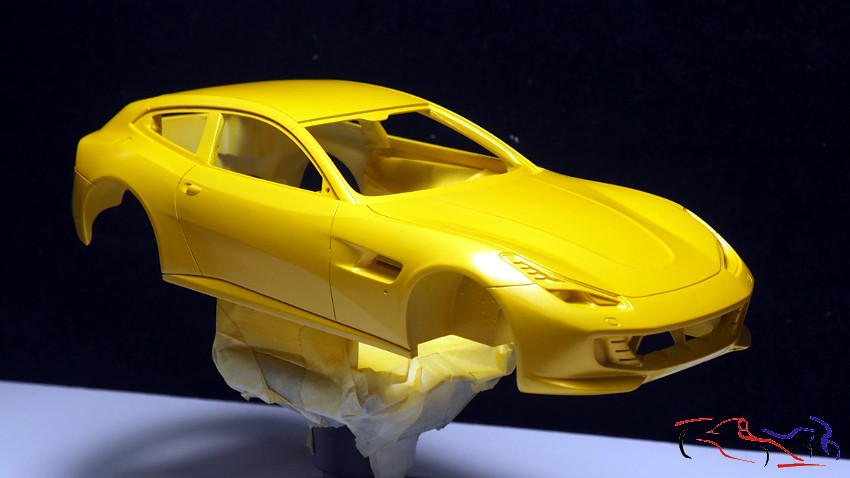
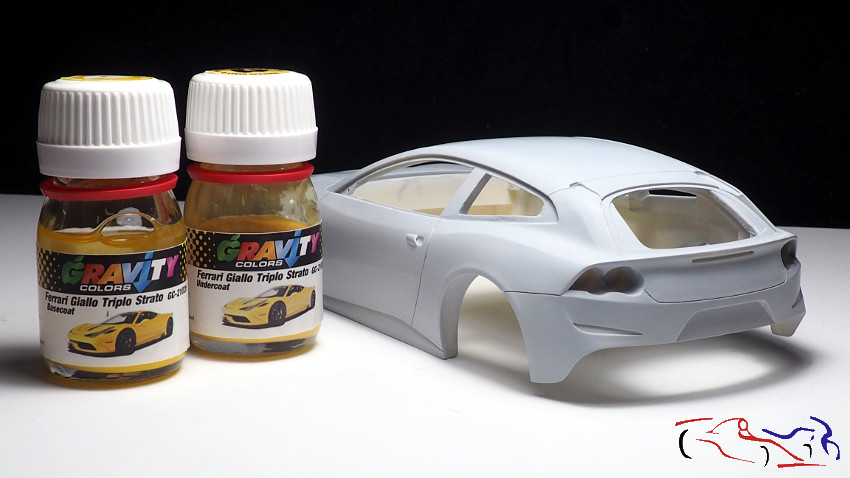
Para la pintura, voy a utilizar el amarillo Ferrari triple strato de Gravity España, que contiene una base y un metalizante que se aplica sobre la base. Aquí os muestro los botes correspondientes:

For the paint, I am going to use the triple strato Ferrari yellow from Gravity Spain, which contains a base and a metallizer that is applied over the base. Here I show you the corresponding boats:

Image

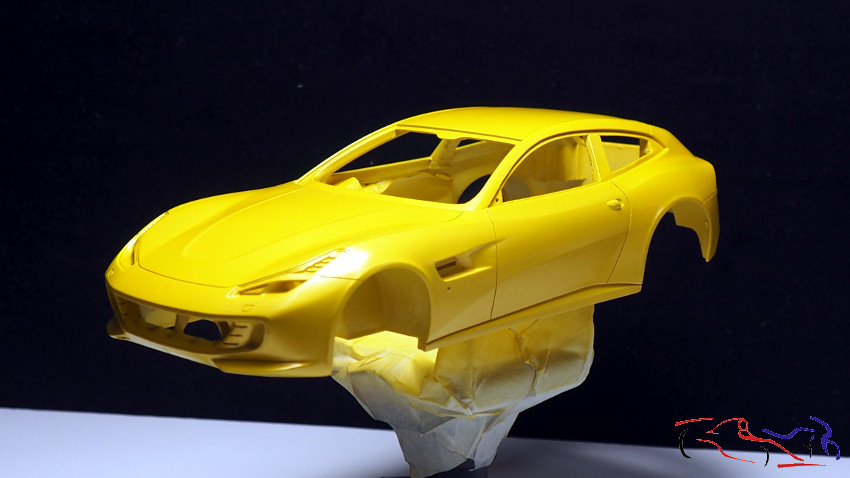
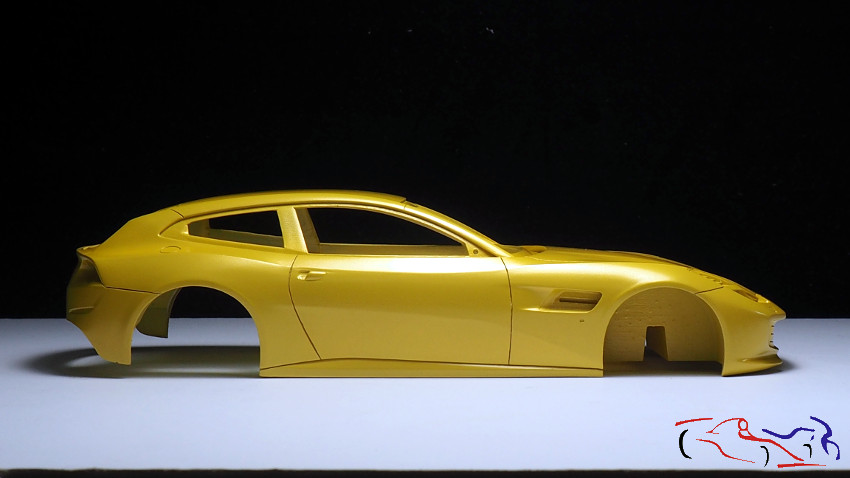
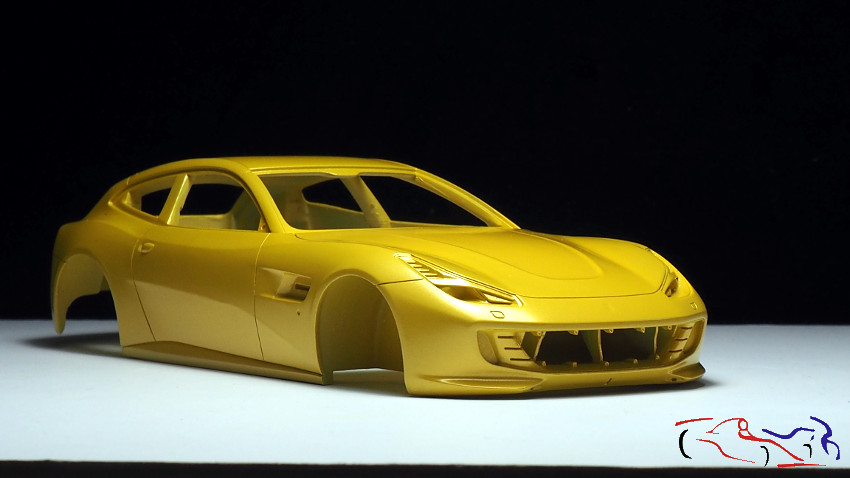
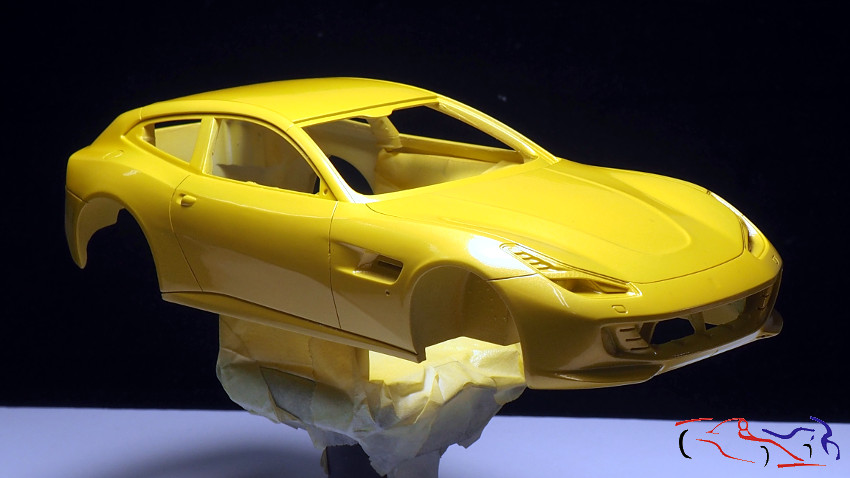
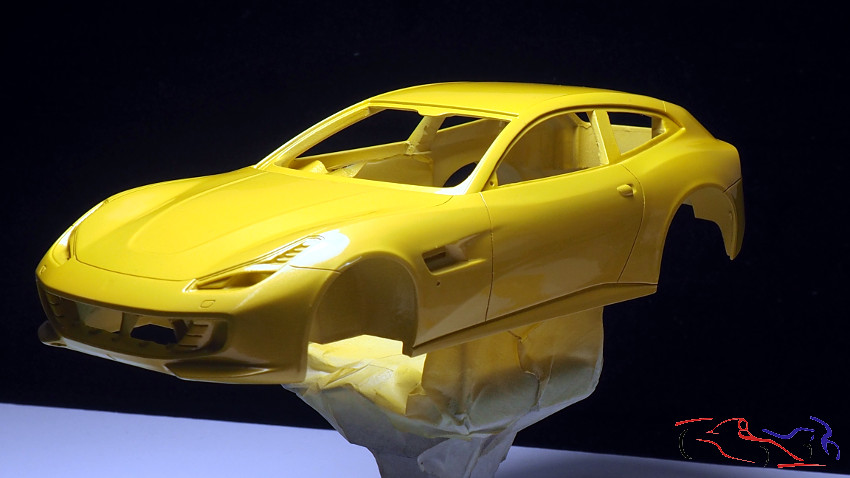
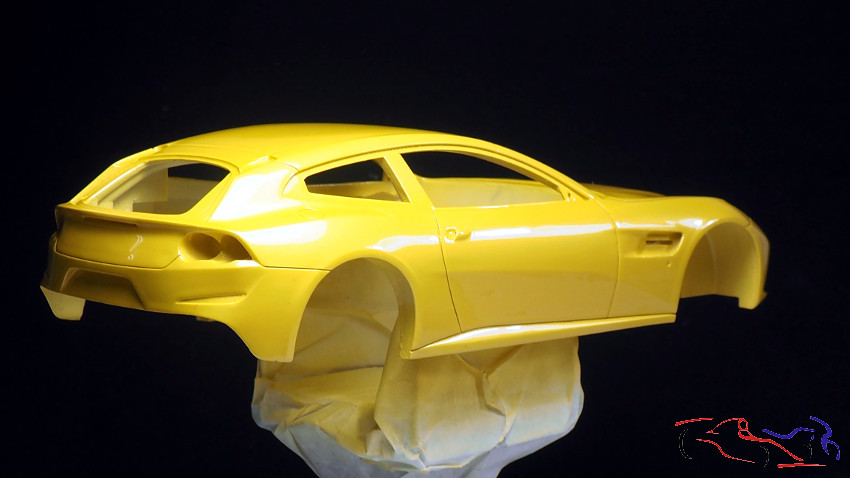
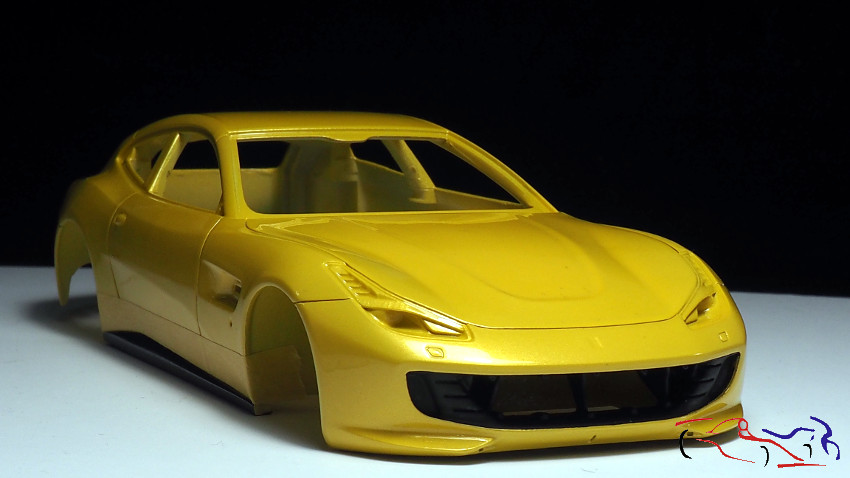
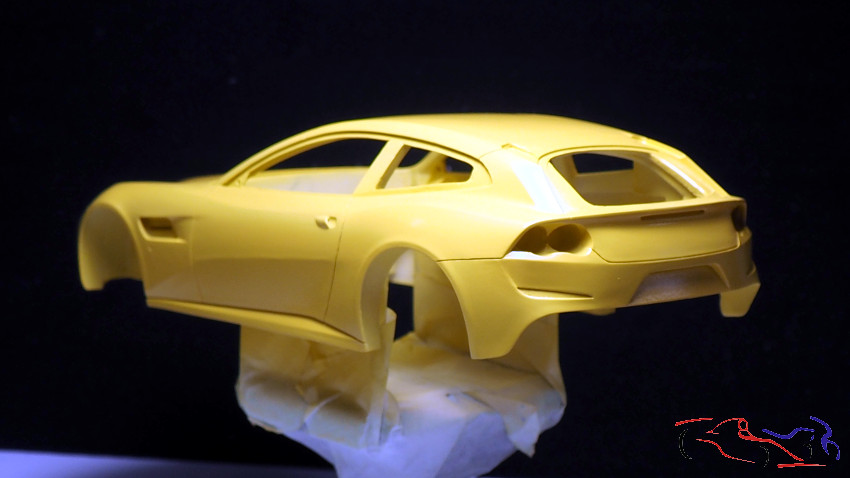
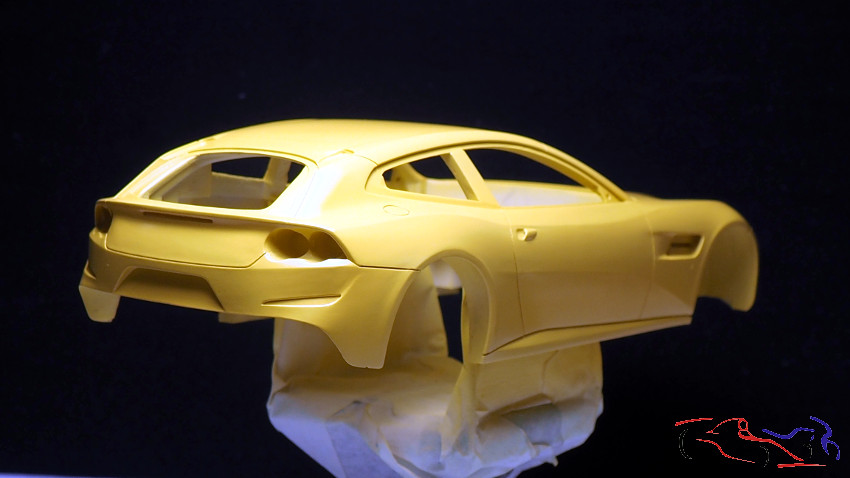
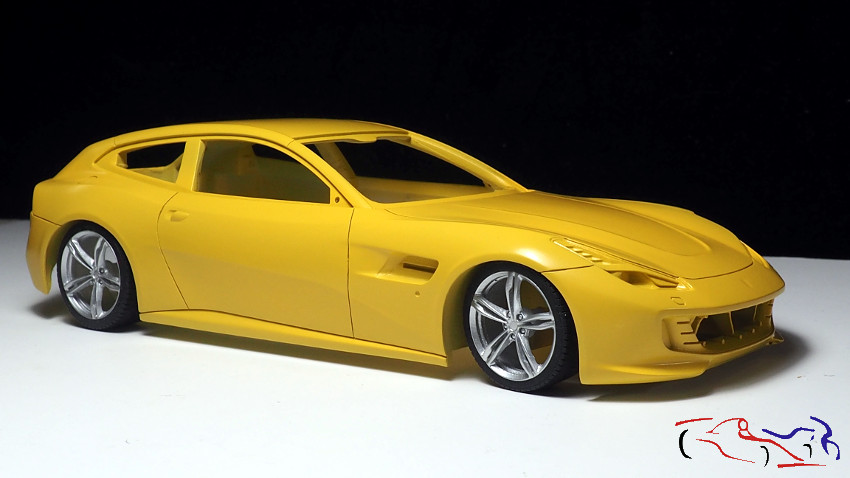
Y ya aplicamos la base. Tres capas de pintura como se pueden ver a continuación, en una vista lateral y en otra del angulo delantero.

And we already applied the base. Three coats of paint as seen below, in a side view and a front angle view.

Image

Image

Image

Image

Image

Image

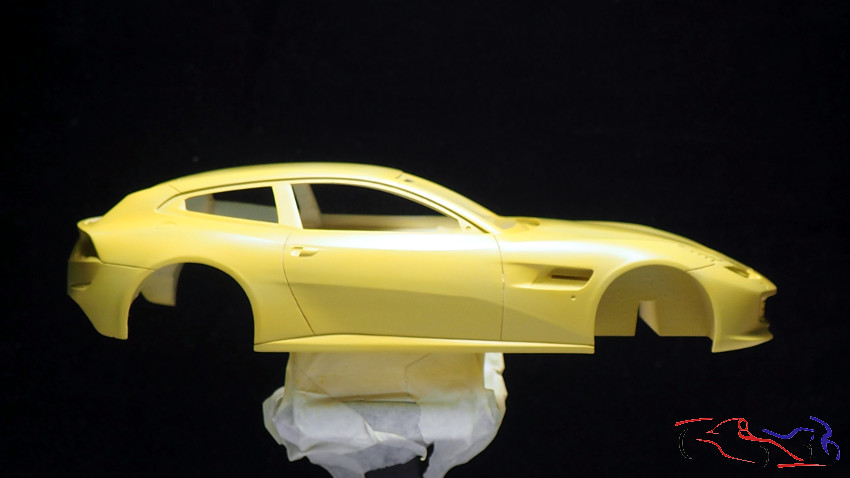
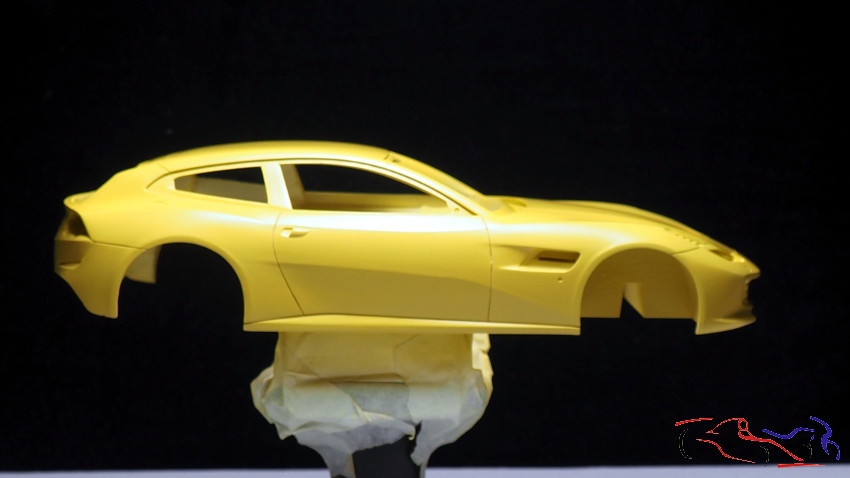
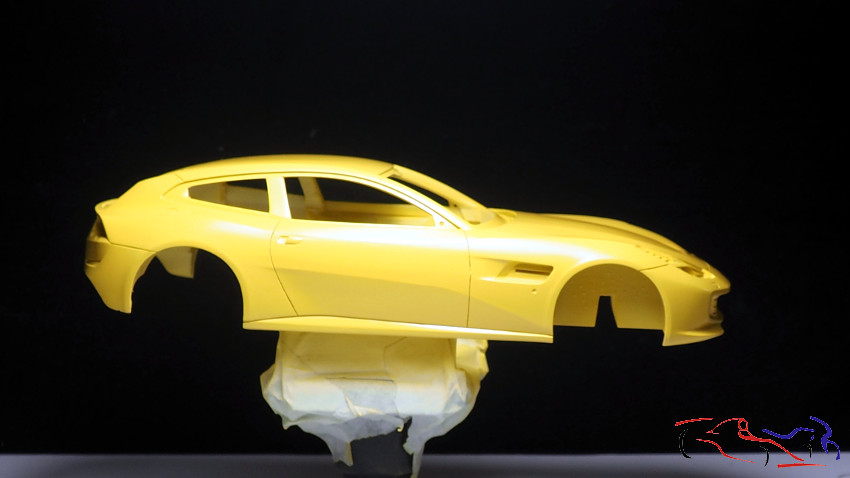
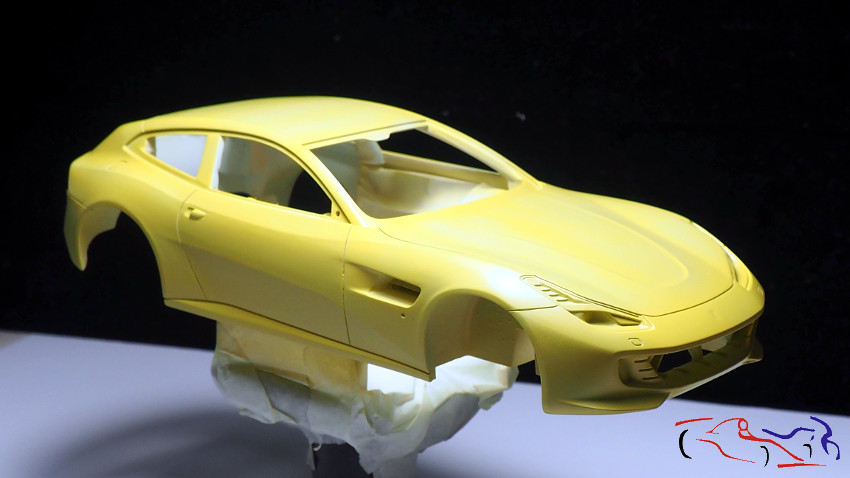
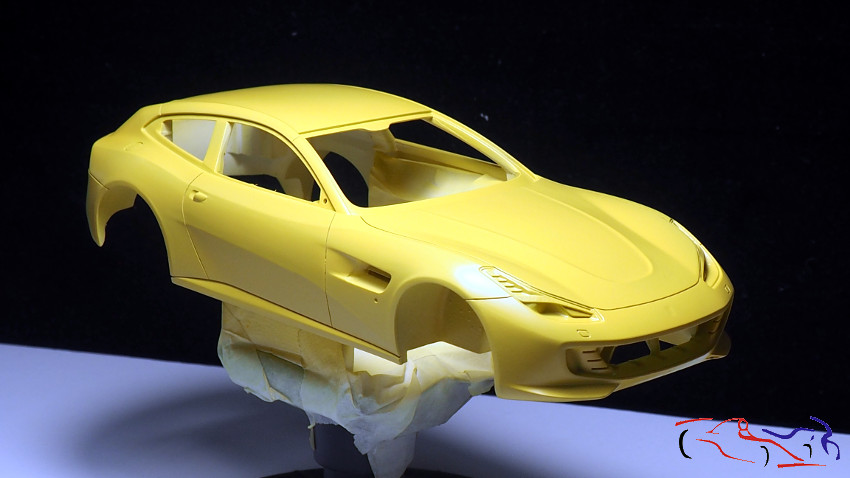
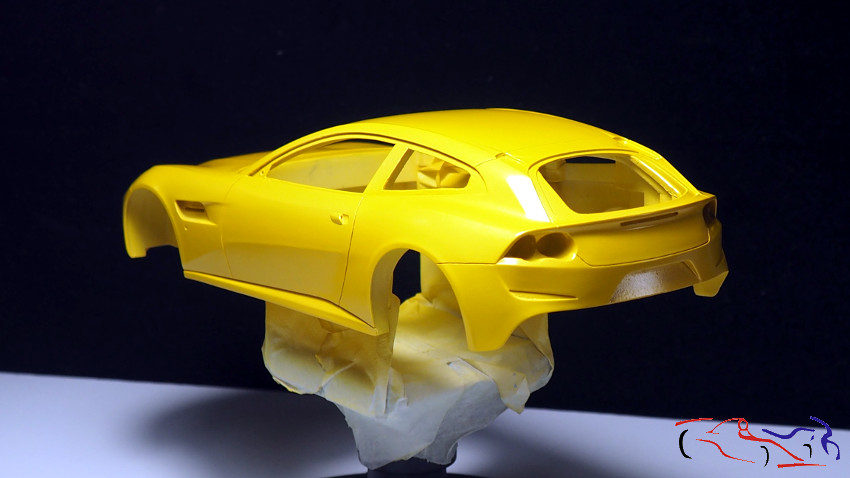
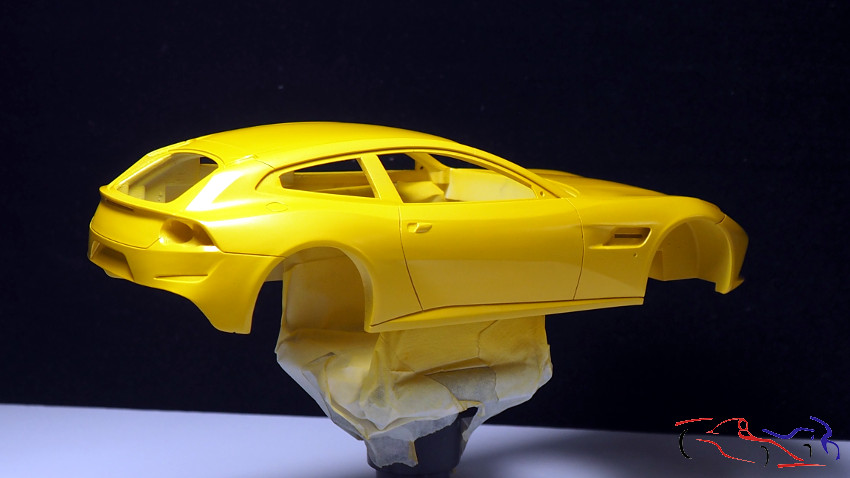
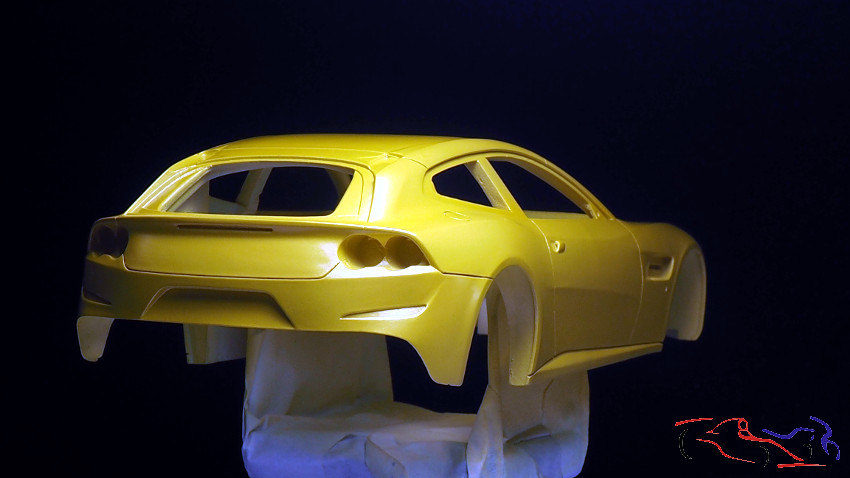
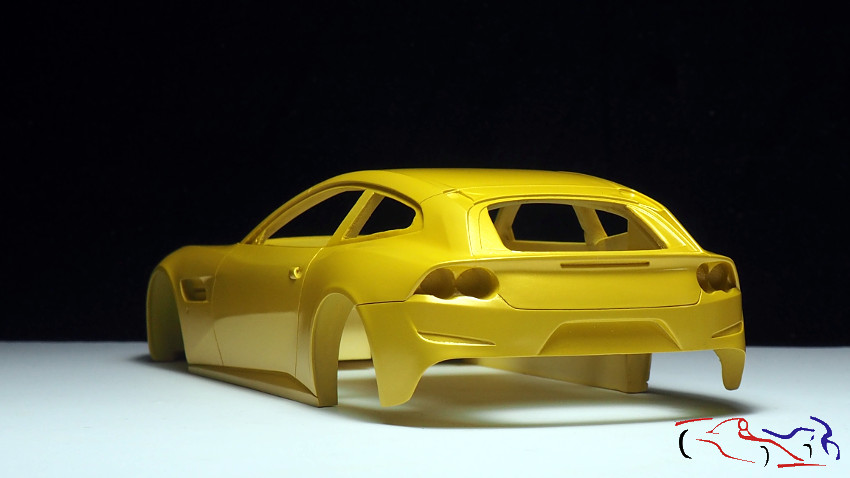
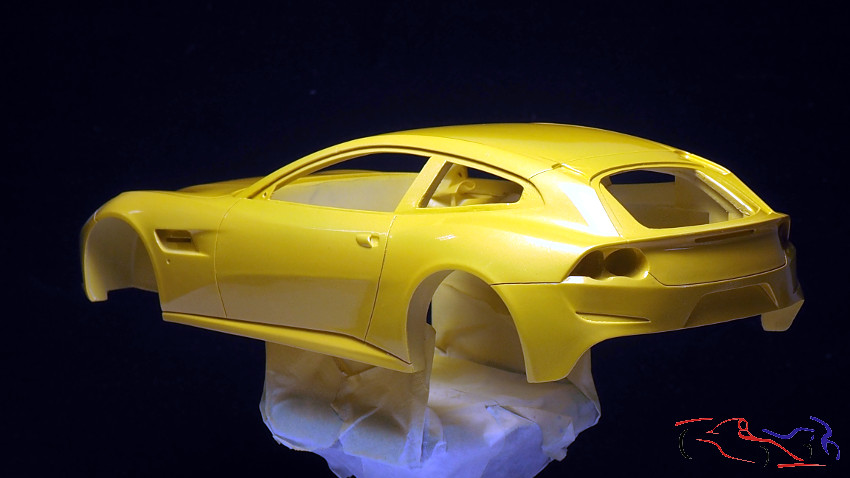
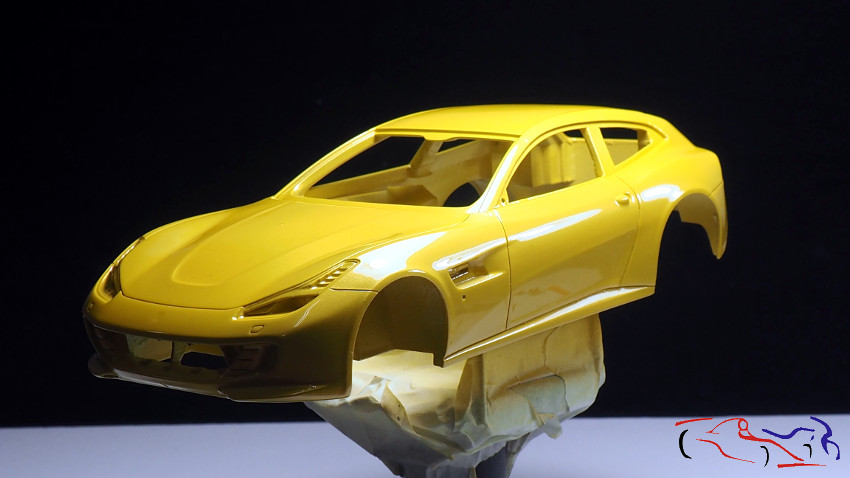
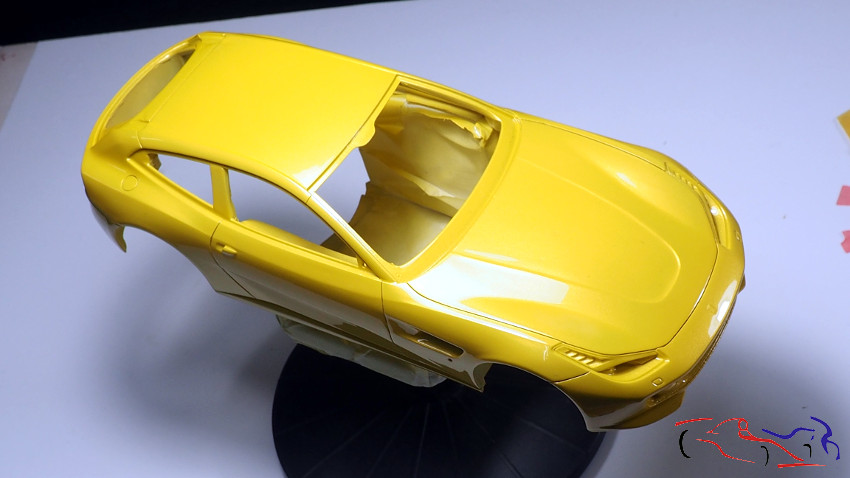
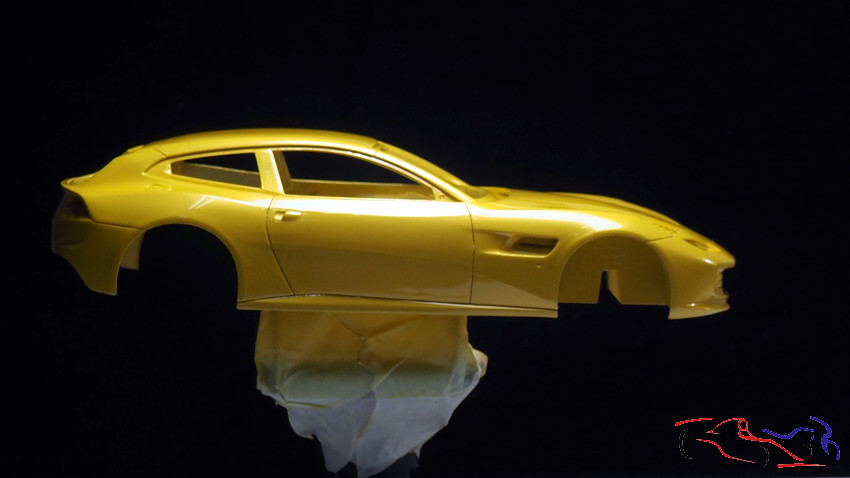
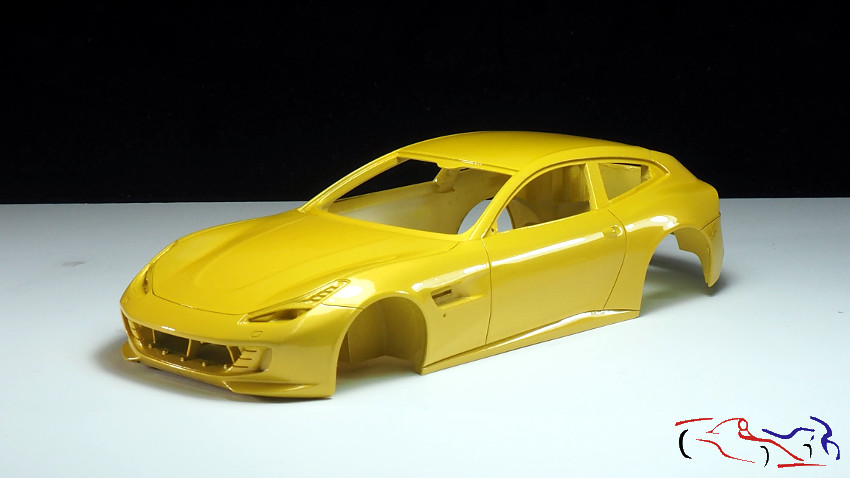
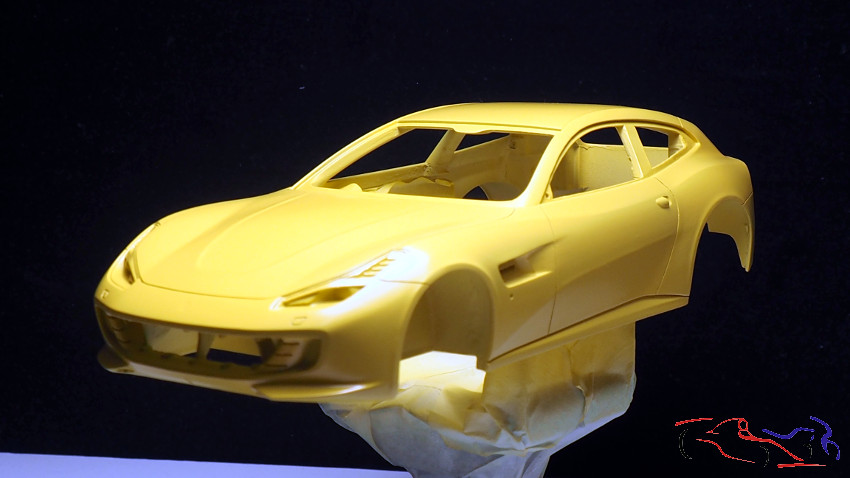
Las siguientes fotos, nos muestran desde distintos ángulos, la carrocería ya pintada con la base, a la espera del segundo color que nos dará un acabado metálico:

The following photos show us from different angles, the bodywork already painted with the base, waiting for the second color that will give it the metallic finish:

Image

Image

Image

Image

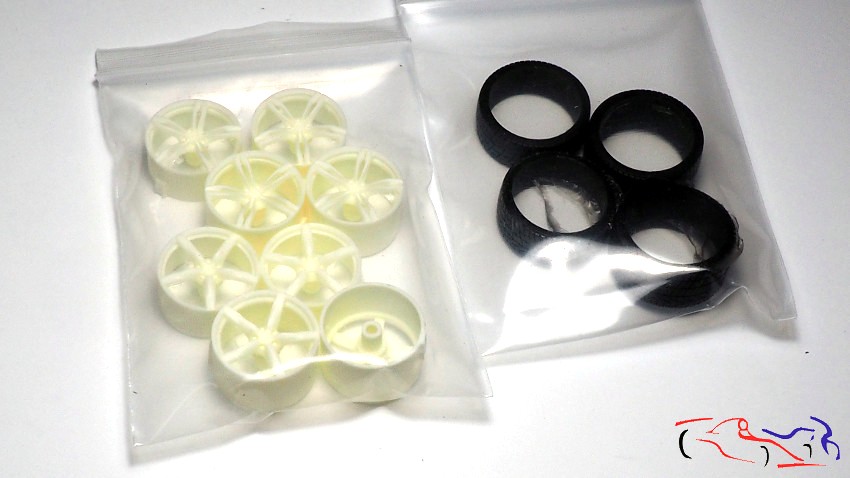
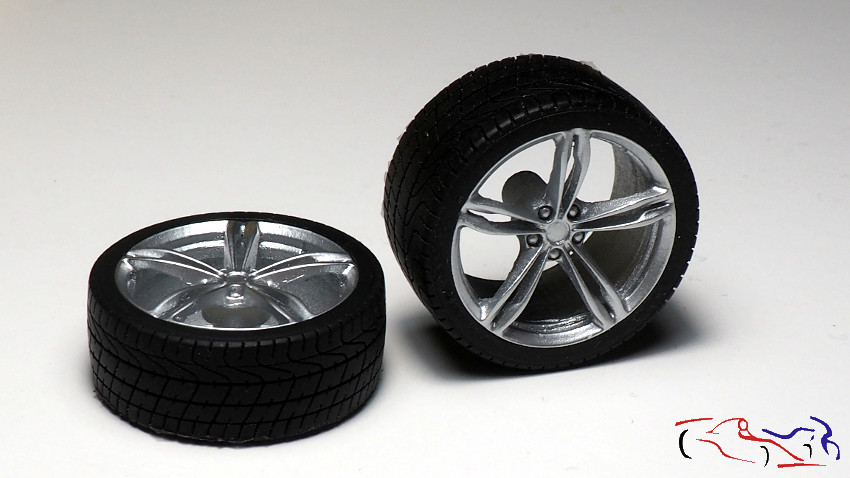
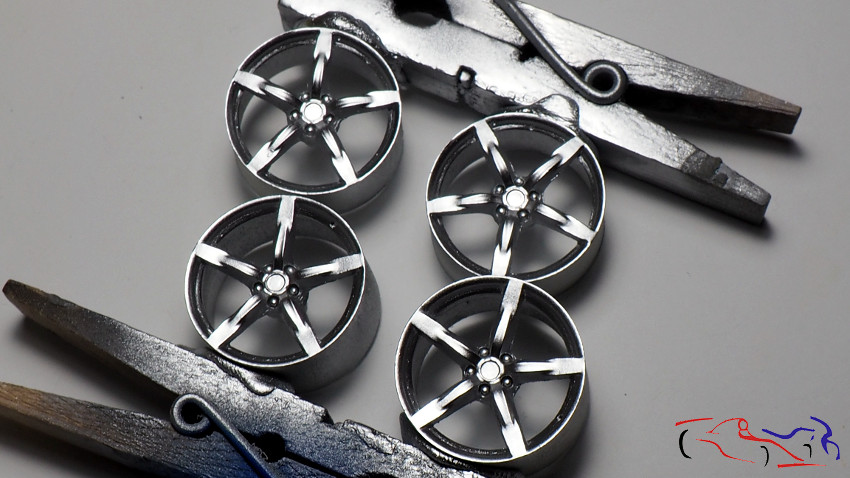
Recordad que había opción de elegir dos llantas diferentes, y de las que yo elegí las siguientes, que os muestro con la imprimación aplicada:

Remember that there was an option to choose two different tires, and that I chose the following, which I show you with the applied primer:

Image

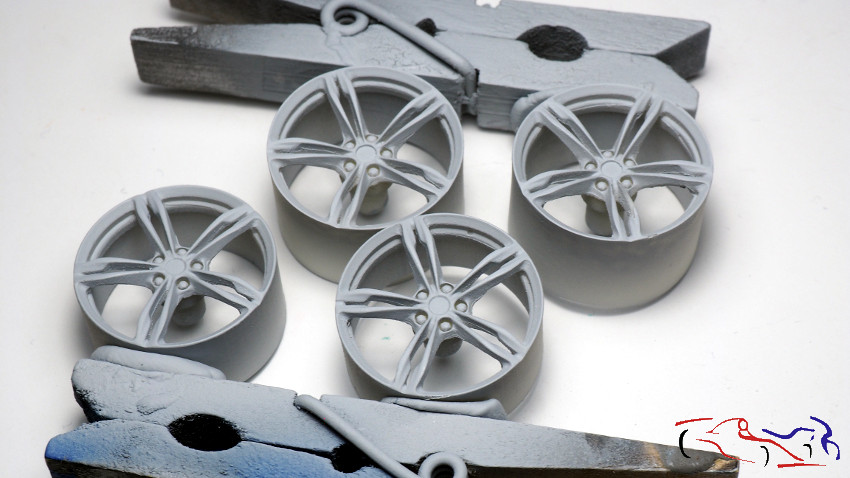
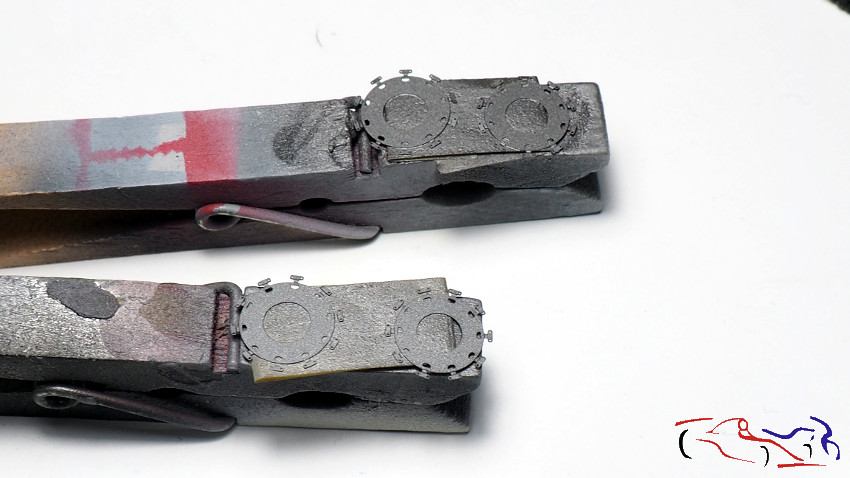
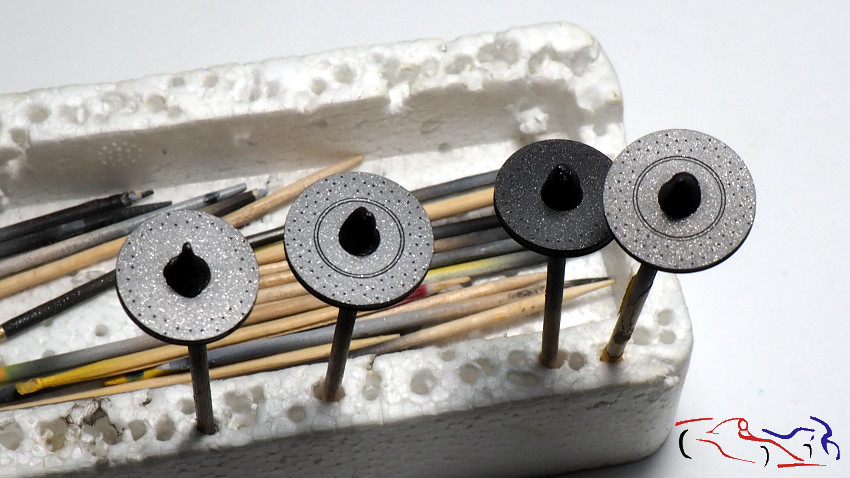
Y una vez secas, les paso la esponja de grano 1200, y las pinto con el aluminio de Zero, de la gama Metal: ZP-M1009. Están pintadas junto a las salidas de aire del habitáculo y de los escapes.

And once they are dry, I sanded them with 1200 grit sponge, and painted them with Zero’s aluminum, from the Metal range: ZP-M1009. They are painted next to the passenger compartment air vents and the exhausts.

Image

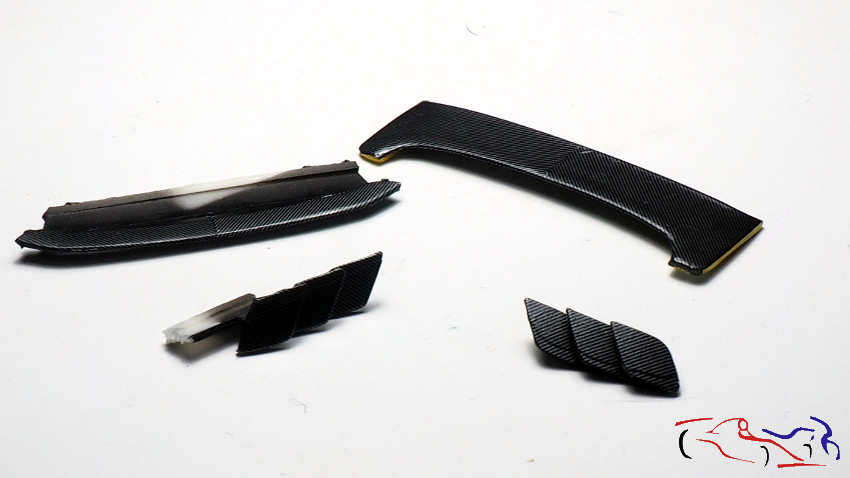
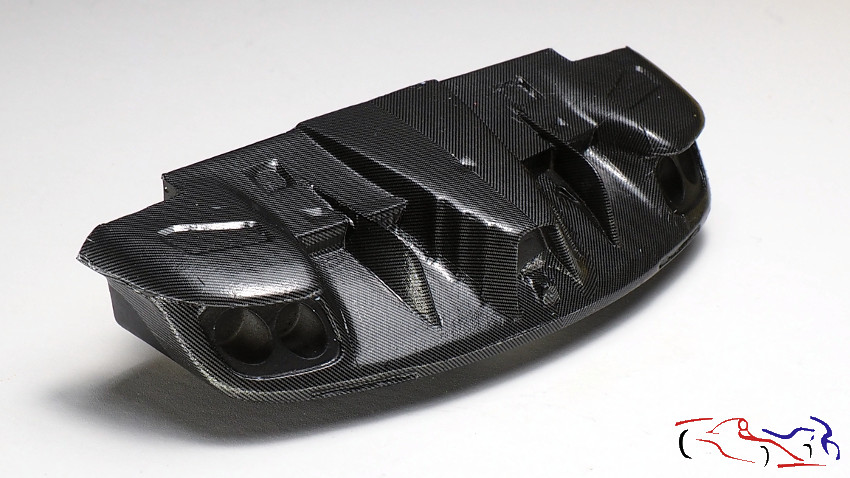
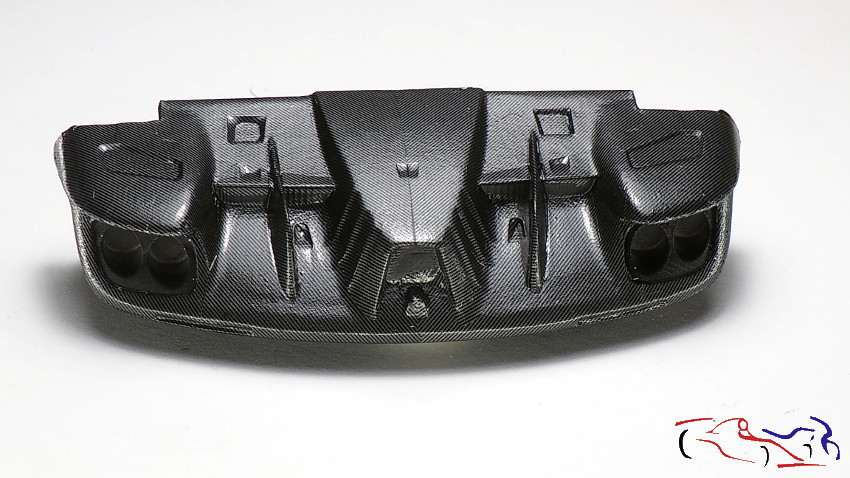
Pasamos a la pieza trasera del chasis, que os presento ya imprimada…

We move on to the rear part of the chassis, which I present to you already primed …

Image

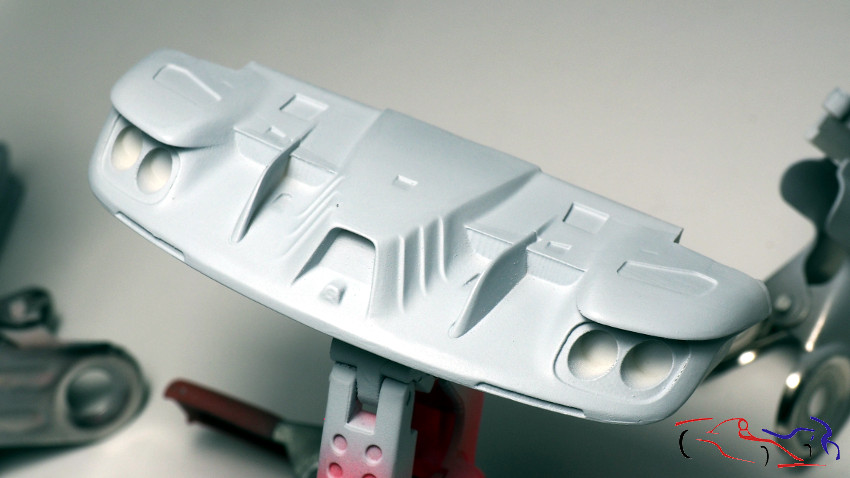
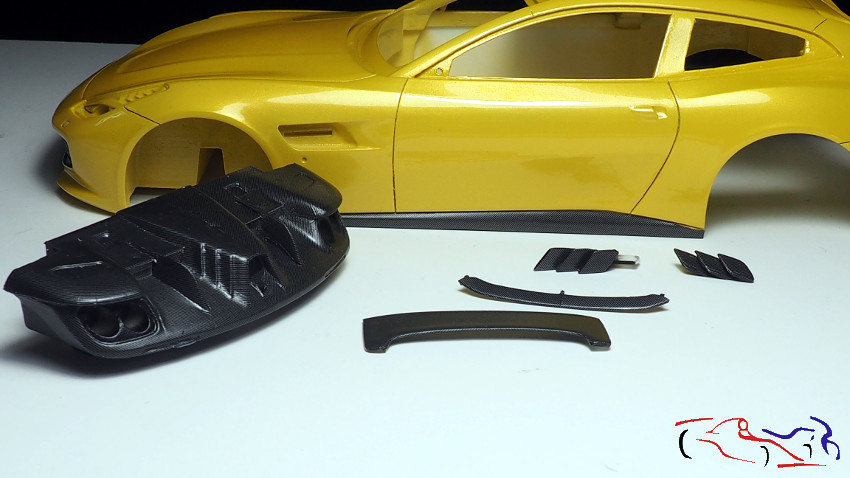
..y que ha sido pintada de negro semi mate junto a otras piezas más:

..and that has been painted semi-matt black along with other pieces:

Image

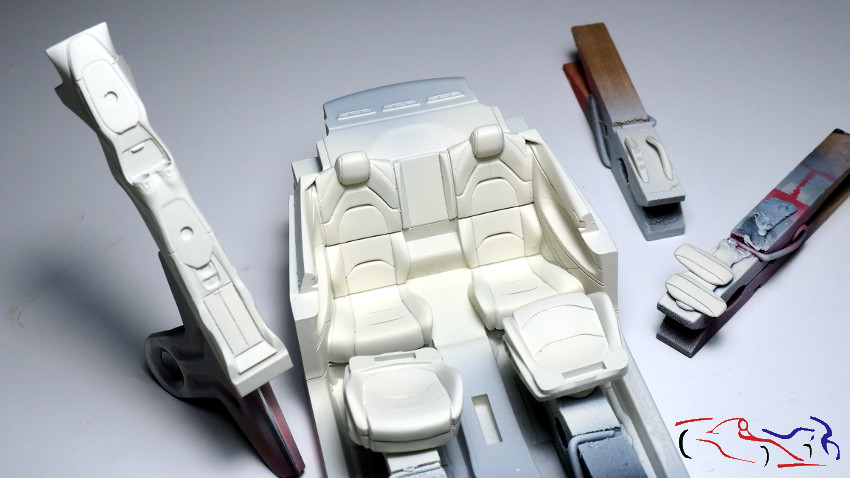
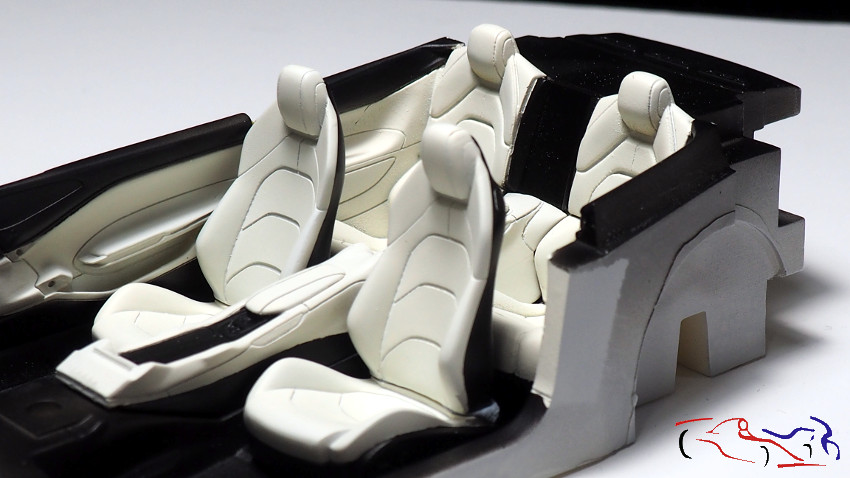
Pasamos al habitáculo, que va a ir pintado en blanco y negro. Primero, pintamos del blanco de Ferrari de Zero, ZP-1007-7754-04 todos los asientos, el interior, los paneles de las puertas y el salpicadero:

We move to the cabin, which will be painted in black and white colors. First, we painted Zero’s Ferrari white, ZP-1007-7754-04 all the seats, interior, door panels and dashboard:

Image

Image

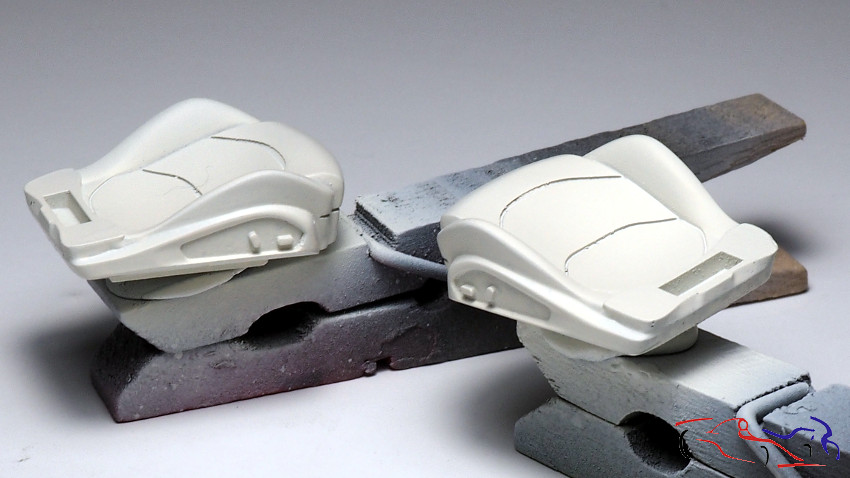
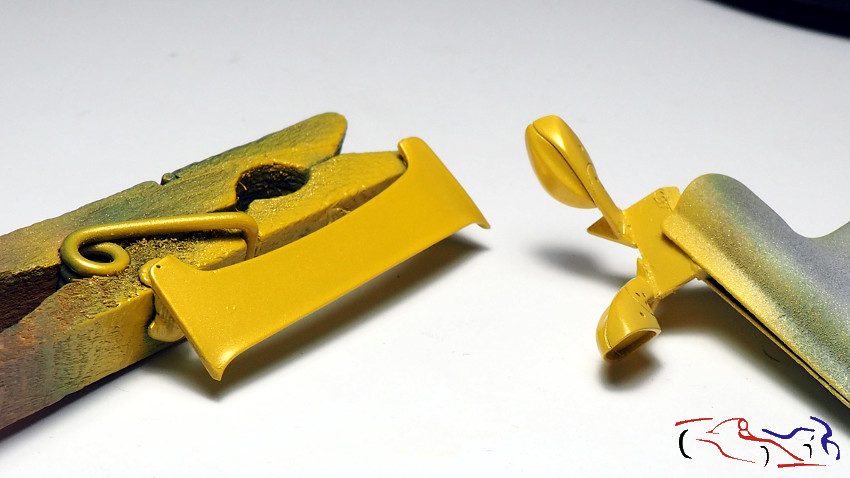
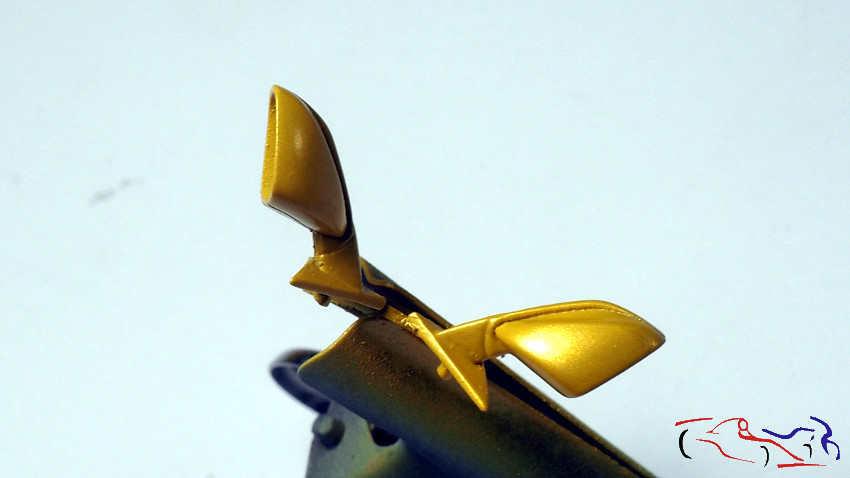
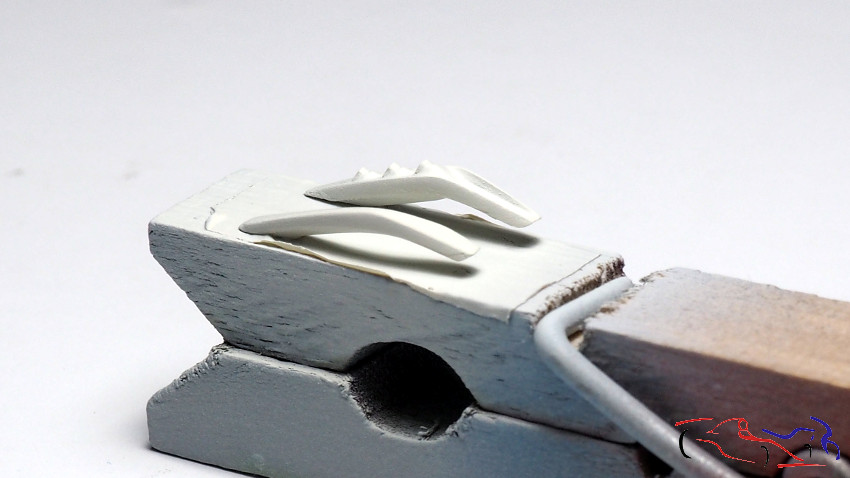
Incluso pintamos las asas delanteras de la consola central. Notad, que están fijadas solo por un lado, y con el otro extremo en el aire. Esto es debido a que he usado una cinta autoadhesiva por los dos lados, transparente y muy fina, de la marca Hasegawa, que tiene suficiente fuerza para ello.

We even painted the front handles of the center console. Notice, that they are fixed only on one side, and the other ends are in the air. This is due to the fact that I have used a self-adhesive tape on both sides, transparent and very thin, from Hasegawa, which has enough strength for it.

Image

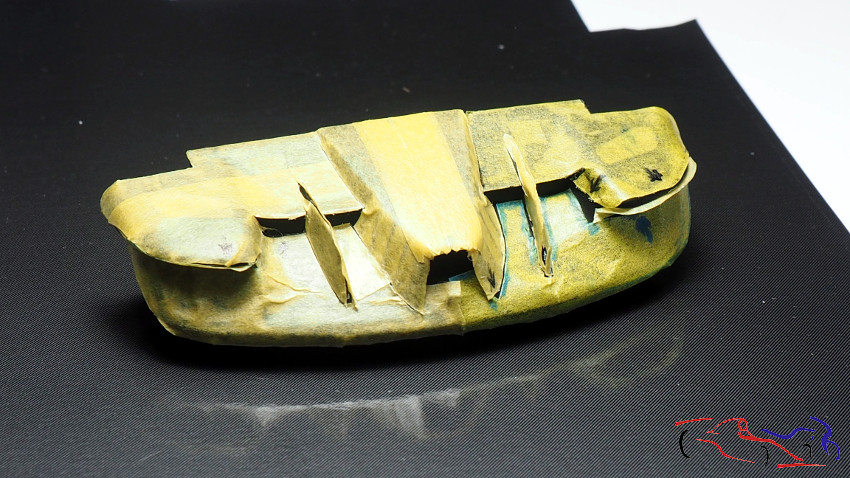
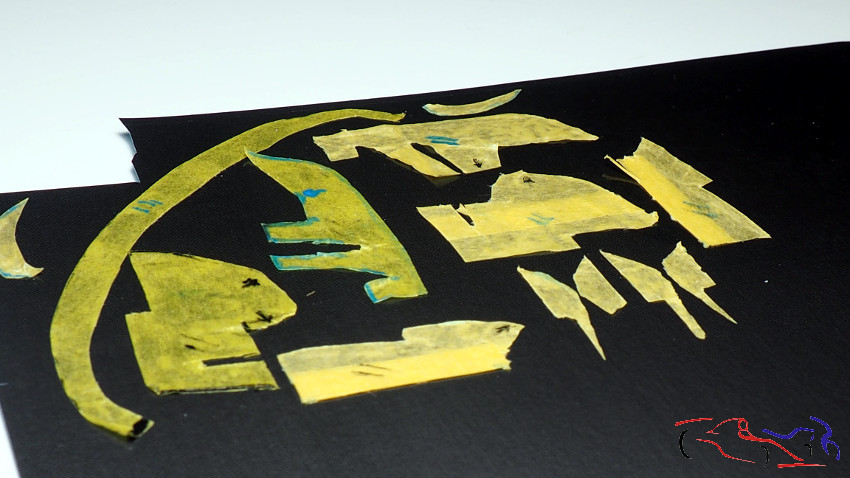
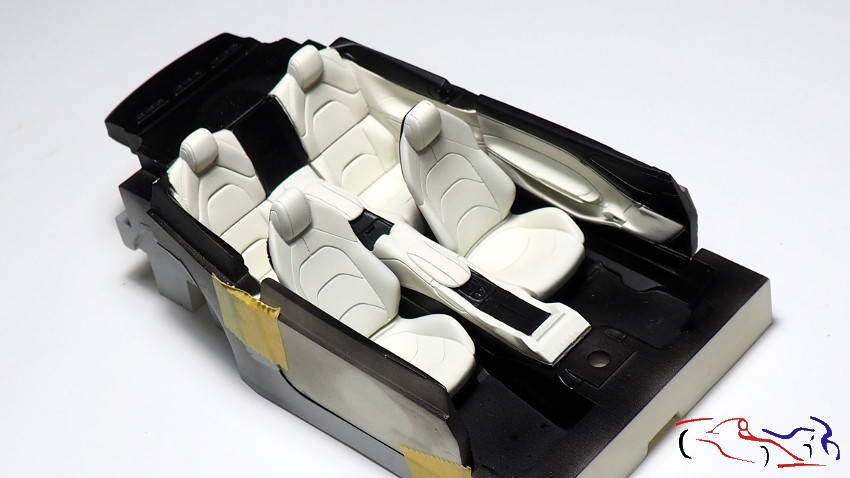
Y una vez seco, enmascaramos y pinamos de negro semi mate. Lo colocamos todo sin pegamento para ver el efecto:

And once dry, we mask and paint them with semi-matte black. We put it all without glue to see the effect:

Image

El siguiente paso será aplicar efectos de sombras y claros con éleos:

The next step will be to apply shadows and light effects with oils:

Image

Y si ponemos las gomas en las llantas, y todo en la carrocería, éste es el resultado:

And if we put the tires on the rims, and everything on the body, this is the result:

Image

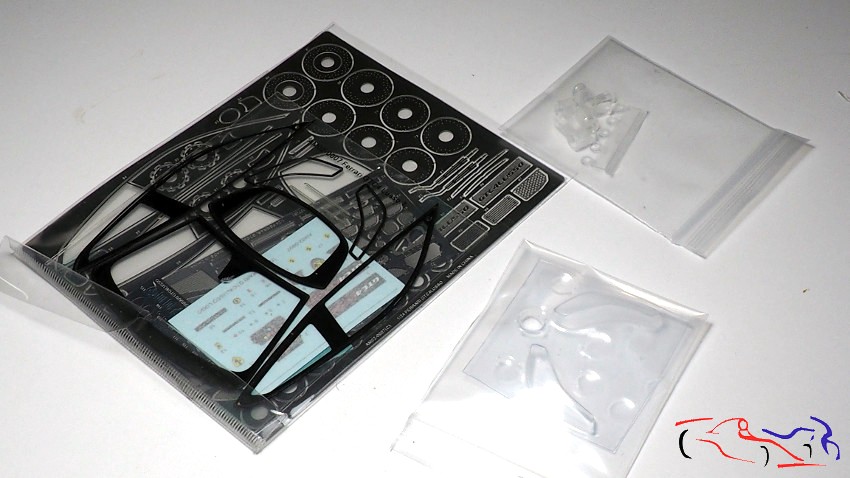
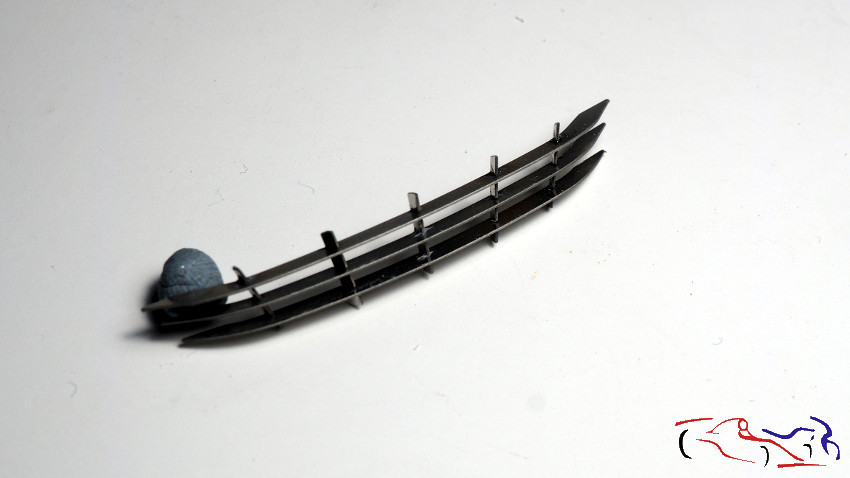
Otra pieza que he terminado es la rejilla delantera. Como eran piezas de fotograbado que encajaban entre si, las puse sobre blue tack y las fui encajando hasta que todas las piezas cuadraron, y entonces fui poniendo gotas de ciano con un palillo de madera….

Another piece that I have finished is the front grill. As they were pieces of photoengraving that fit together, I put them on blue tack and I was fitting them until all the pieces were square, and then I was putting drops of cyano with a wooden toothpick …

Image

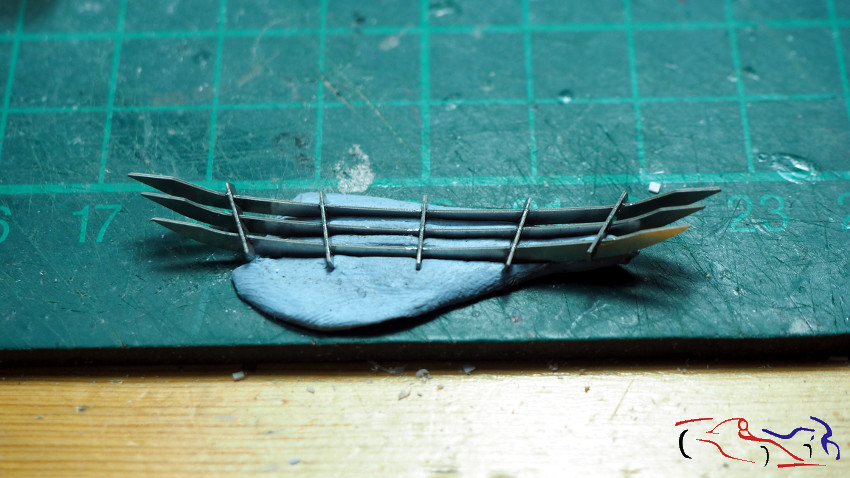
…hasta que terminé y se pegó entero:

… until I finished it and it was pasted whole:

Image

Lo siguiente será terminar la pintura de la carrocería y del interior.

The next thing will be to finish the body painting and interior.

Gracias por ver y comentar!!

Thanks for viewing and commenting!!
User avatar

Topic author
JesusM
Backmarker
Backmarker
Posts: 341
Joined: Thu Oct 28, 2010 4:24 am
Favorite F1 Team or Driver: Ferrari, Tyrrell
Location: Madrid - Spain
Contact:
Status: Offline
Spain

Re: Ferrari GTC4 Lusso – Alpha (1/24)

Post by JesusM »

Un pequeño avance del Ferrari, referente a la pintura, ya que le he dado la capa de pintura metálica. Os muestro todas las que he hecho, para que véis como se nota ese metalizado. Le he dado tres capas finas, y este es el resultado:

A small preview of the Ferrari, regarding the paint, since I have given it the metallic paint layer. I show you all the ones I have made, so you can see how that metallic is noticeable. I have given it three thin coats, and this is the result:

Image

Image

Image

Image

Image

Image

Image

Image

Image

En las siguientes fotos, podéis ver los espejos y el pequeño alerón que tiene el coche, todo pintado también con este amarillo metalizado. Los espejos, llevan una parte en negro, que no se si lo sustituiré con fibra.

In the following photos, you can see the mirrors and the small spoiler that the car has, all also painted with this metallic yellow. The mirrors have a part in black, which I don’t know if I will replace it with fiber or not.

Image

Image

Image

Más piezas pintadas: vemos las llantas pintadas con el Metal color Aluminio de Zero:

More painted parts: we see the rims painted with Zero’s Aluminum-colored Metal:

Image

Y también he pintado las otras llantas, pero esta vez, he utilizado la pintura Tamiya LP48, Sparking Silver, dando un grano mínimo:

And I have also painted the other rims, but this time, I have used Tamiya LP48 paint, Sparking Silver, giving minimal grain:

Image

Más piezas: el centro de los discos de freno, un fotograbado que he imprimado con Gravity, y he aplicado Steel de Alclad:

More pieces: the center of the brake discs, a gravure that I have primed with Gravity, and I have applied Alclad Steel:

Image

Y para terminar, los discos de carbono. He pegado los fotograbados, he imprimado con Gravity, y un par de capas finales de la pintura de frenos de carbono de Zero (ZP-1323), que tiene un acabado muy bueno!

And finally, the carbon discs. I glued the etch to them, primed with Gravity, and a final couple of coats of Zero’s carbon brake paint (ZP-1323), which has a very good finish!

Image

Esto es todo por el momento. Lacaré la carrocería junto al Lancia Delta S4 para ahorrar tiempos de pintado, por lo que ahora me dedicaré al S4. Gracias por ver y comentar.

That’s all for now. I will lacquer the body at the same time than the Lancia Delta S4 to save painting time, so now I will dedicate myself to the S4. Thanks for viewing and commenting.
Last edited by JesusM on Wed Nov 18, 2020 4:43 am, edited 1 time in total.
User avatar

racingkars
FOTA Chairman
FOTA Chairman
Posts: 2378
Joined: Mon May 21, 2012 1:55 pm
Favorite F1 Team or Driver: Ferrari
Location: Assen; The Netherlands
Contact:
Status: Offline
Netherlands

Re: Ferrari GTC4 Lusso – Alpha (1/24)

Post by racingkars »

I can see no images at all.... is it just me?
Kars

http://www.racingkars.nl (WIPs)
http://www.racingkars.com (sales)
Websites in Nederlands/English
English is not my native language, so sorry for any incorrect words or style... I have no intention to offend you.
User avatar

Topic author
JesusM
Backmarker
Backmarker
Posts: 341
Joined: Thu Oct 28, 2010 4:24 am
Favorite F1 Team or Driver: Ferrari, Tyrrell
Location: Madrid - Spain
Contact:
Status: Offline
Spain

Re: Ferrari GTC4 Lusso – Alpha (1/24)

Post by JesusM »

racingkars wrote:I can see no images at all.... is it just me?
Hi,
I can not see my images from my pc, but I can see them from my mobile. I'll ask to my pictures store provider.
Sorry for that!!
User avatar

pgarat
Major Constructor
Major Constructor
Posts: 1178
Joined: Wed Apr 18, 2007 12:18 pm
Your Name: PGarat
Favorite F1 Team or Driver: Ferrari, McLaren, Lotus…
Chris Amon, P.Depailler, James Hunt, Jim Clark, Tazio Nuvolari, Ascari…
Location: SW of France
Status: Offline
France

Re: Ferrari GTC4 Lusso – Alpha (1/24)

Post by pgarat »

Hi,

Great work!

Pascal
I'd rather be flying!

If only Closed Minds came with Closed Mouth

Image
User avatar

Topic author
JesusM
Backmarker
Backmarker
Posts: 341
Joined: Thu Oct 28, 2010 4:24 am
Favorite F1 Team or Driver: Ferrari, Tyrrell
Location: Madrid - Spain
Contact:
Status: Offline
Spain

Re: Ferrari GTC4 Lusso – Alpha (1/24)

Post by JesusM »

pgarat wrote:Hi,

Great work!

Pascal
Thanks Pascal!! :D
User avatar

Daryl_Huhtala
F1 Test Driver
F1 Test Driver
Posts: 289
Joined: Fri Feb 10, 2012 6:07 am
Your Name: Daryl Huhtala
Favorite F1 Team or Driver: Gurney Stewart Andretti Clark Hill McLaren Hulme Villeneuve Fittipaldi
Location: Xenia (Hooterville Heights) Ohio USA
Status: Offline
United States of America

Re: Ferrari GTC4 Lusso – Alpha (1/24)

Post by Daryl_Huhtala »

Beautiful and an excellent idea for the grille assembly
SUMUS QUOD SUMUS
User avatar

Topic author
JesusM
Backmarker
Backmarker
Posts: 341
Joined: Thu Oct 28, 2010 4:24 am
Favorite F1 Team or Driver: Ferrari, Tyrrell
Location: Madrid - Spain
Contact:
Status: Offline
Spain

Re: Ferrari GTC4 Lusso – Alpha (1/24)

Post by JesusM »

Daryl_Huhtala wrote:Beautiful and an excellent idea for the grille assembly
Happy if you will use it in the future projects!! :D
User avatar

Topic author
JesusM
Backmarker
Backmarker
Posts: 341
Joined: Thu Oct 28, 2010 4:24 am
Favorite F1 Team or Driver: Ferrari, Tyrrell
Location: Madrid - Spain
Contact:
Status: Offline
Spain

Re: Ferrari GTC4 Lusso – Alpha (1/24)

Post by JesusM »

Hola a todos, y de nuevo con este proyecto, que tenía parado desde hace dos años. El motivo fue el que vais a ve a continucaion: un problema con la laca en el capo delantero. Pero vayamos al principio….Dejé la carrocería completamente pintada y le di una capa de laca:

Hello everybody, and back to this project, which I had stopped two years ago. The reason was the one you are going to see next: a problem with the lacquer on the front bonnet. But let’s go to the beginning….I left the body completely painted and gave it a coat of lacquer:

Image

Image

Image

Image

Image

Image

Image

Image

Image

Image

Image

Entonces puse cinta de enmascarar para crear una plantilla de las taloneras del coche. Objetivo? Pasar las plantillas a fibra. Aquí las vemos ya colocadas:

Then I put masking tape to create a template of the heel pads of the car. Objective? To transfer the templates to fibre. Here they are already in place:

Image

A su vez, también creamos las plantillas para calca de fibra del aleron trasero, y también para las salidas laterales de aire, o la faldilla delantera. Primero ponemos cintas de enmascarar en la pieza, dibujamos el contorno y la llevamos a la hoja de fibra. Despué, la colocamos de la manera habitual:

At the same time, we also create the templates for the fibre decals for the rear spoiler, and also for the side air vents, or the front valance. First we put masking tape on the part, draw the outline and take it to the fibre sheet. Then we place it in the usual way:

Image

Image

Image

De la misma forma, ponemos cinta de enmascarar en la pieza trasera: y cortamos con el cutter, colocando las plantillas en la hoja de fibra:

In the same way, we put masking tape on the back piece: and cut with the cutter, placing the templates on the fibre sheet:

Image

Image

Se cortan las formas de la hoja, y ponemos las calcas con cuidado en la pieza:

Cut out the shapes from the sheet, and carefully place the decals on the piece:

Image

Image

Image

Aquí vemos la carroceria con las piezas de fibra de carbono:

Here we see the bodywork with the carbon fibre parts:

Image

Aprovecho para pintar el hueco frontal de negro….

I take this opportunity to paint the front black hole….

Image

,,,y limpiar la rejilla que irá delante de la carrocería.

…and clean the grille that will go in front of the bodywork.

Image

En la proxima entrada, mostraré cual fue el problema. Gracias por ver y comentar!

In the next post, I will show what the problem was. Thanks for watching and commenting!
Post Reply
  • Similar Topics
    Replies
    Views
    Last post