goood evening, i follow you with discretion but great interrest!
cheers
Cédric
Renault RE20 1_12 Shelf of Doom WIP


Re: Renault RE20 1_12 Shelf of Doom WIP
Thank you Cedric! I have renewed interest in finishing this project. Almost all the pieces have at least one coat of paint and the fun of polishing, decaling, wiring is coming....
"To finish first you must first finish" -Rick Mears
-
Chinamalc
- Best of the Rest

- Posts: 514
- Joined: Fri Oct 14, 2005 11:06 am
- Location: about 1985
- Status: Offline
Re: Renault RE20 1_12 Shelf of Doom WIP
Great work on the 20! First one of these I have seen being built and its looking great.
-
 Eagle50
- FOTA Chairman

- Posts: 4038
- Joined: Sun Apr 03, 2011 12:05 pm
- Location: Tokyo Japan
- Status: Offline
Re: Renault RE20 1_12 Shelf of Doom WIP
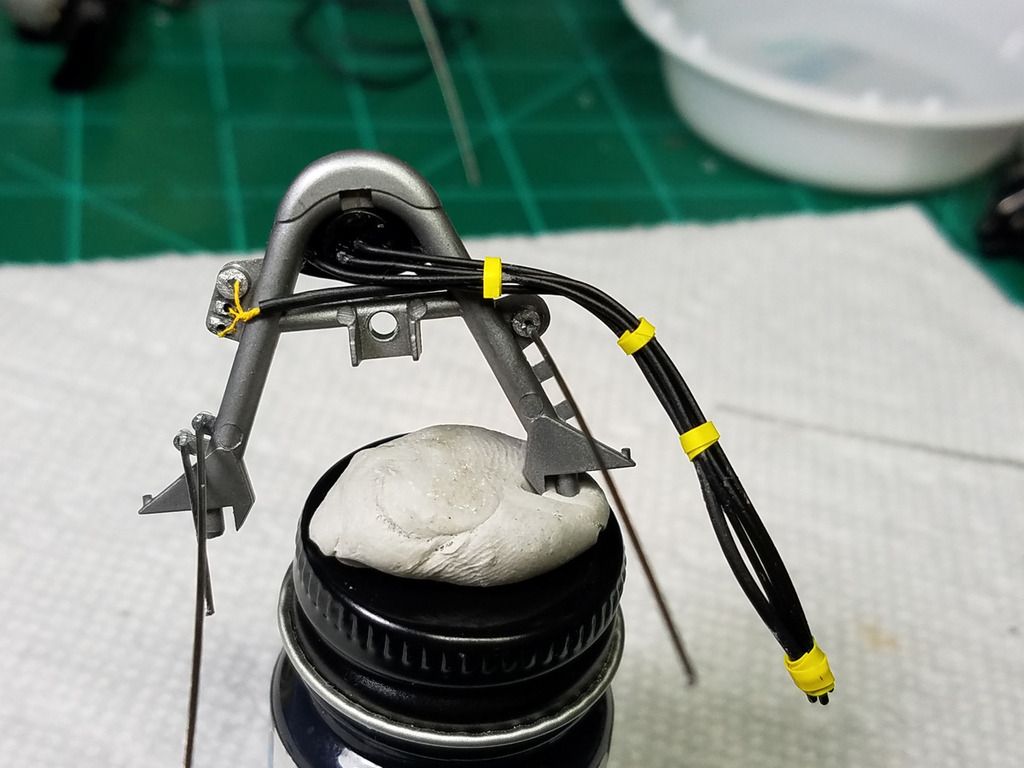
Great work. And great tips too. Like using putting your gauges in bottle caps with Blu Tack, for easier handling.
This car is coming along nicely!
Cheers, Chris
This car is coming along nicely!
Cheers, Chris
-
 Daryl_Huhtala
- F1 Test Driver
- Posts: 289
- Joined: Fri Feb 10, 2012 6:07 am
- Your Name: Daryl Huhtala
- Favorite F1 Team or Driver: Gurney Stewart Andretti Clark Hill McLaren Hulme Villeneuve Fittipaldi
- Location: Xenia (Hooterville Heights) Ohio USA
- Status: Offline

Re: Renault RE20 1_12 Shelf of Doom WIP
This is an excellent treatise on building the RE20. The bottle cap handling is a brilliant idea. I have Spaz-tix chrome but have not used it yet. The wings you've painted with it look great. I'm looking forward to your engine/suspension work.
Krylon Nickel is now on my shopping list.
Krylon Nickel is now on my shopping list.
SUMUS QUOD SUMUS
Re: Renault RE20 1_12 Shelf of Doom WIP
Thanks for the nice comments and encouragement, I wish I had more time to spend on it! I spend a lot of time at ACE hardware and Hobby Lobby thinking of different things I can do with what is lying around the shelves! I will do some tomorrow! Cheers!
"To finish first you must first finish" -Rick Mears
Re: Renault RE20 1_12 Shelf of Doom WIP
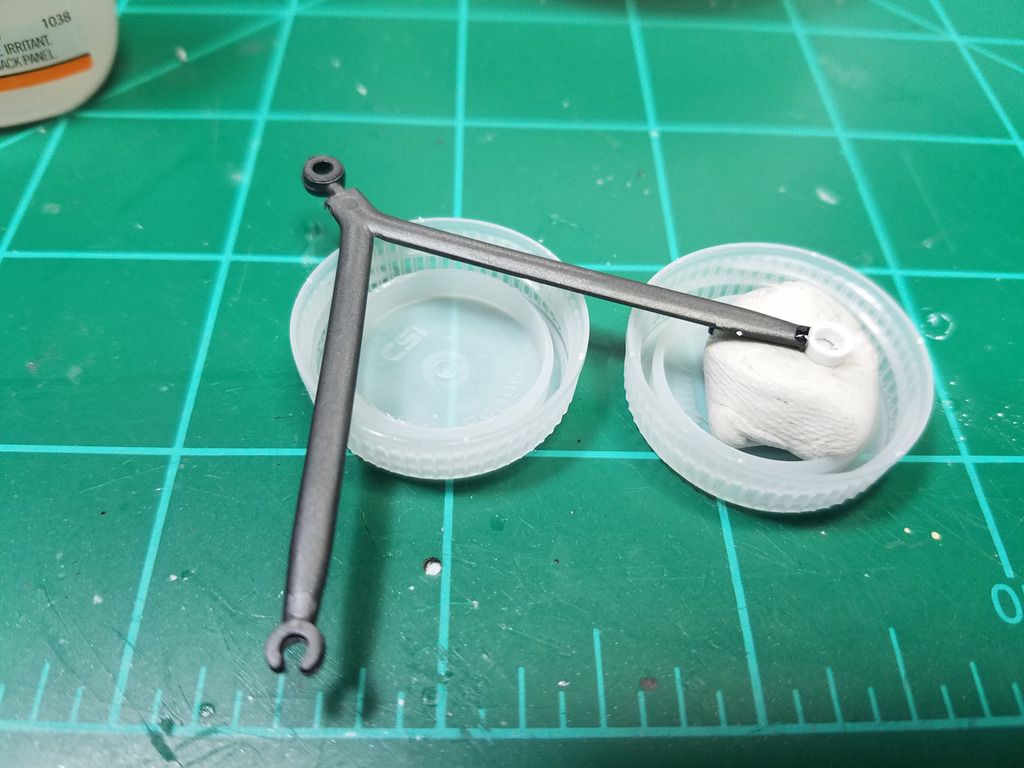
Back again for another update on the RE 20. Started final assembly of the front suspension and cockpit. This effort started with repairing a lower front wishbone joint that broke, I just glued a piece of plastic rod.
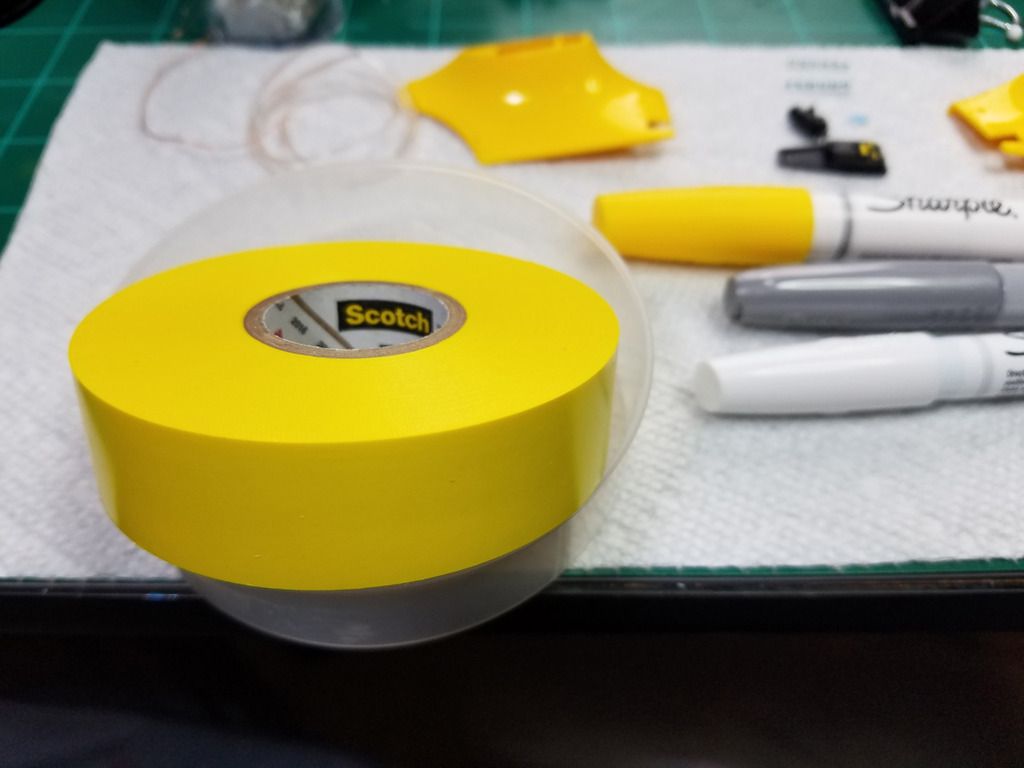
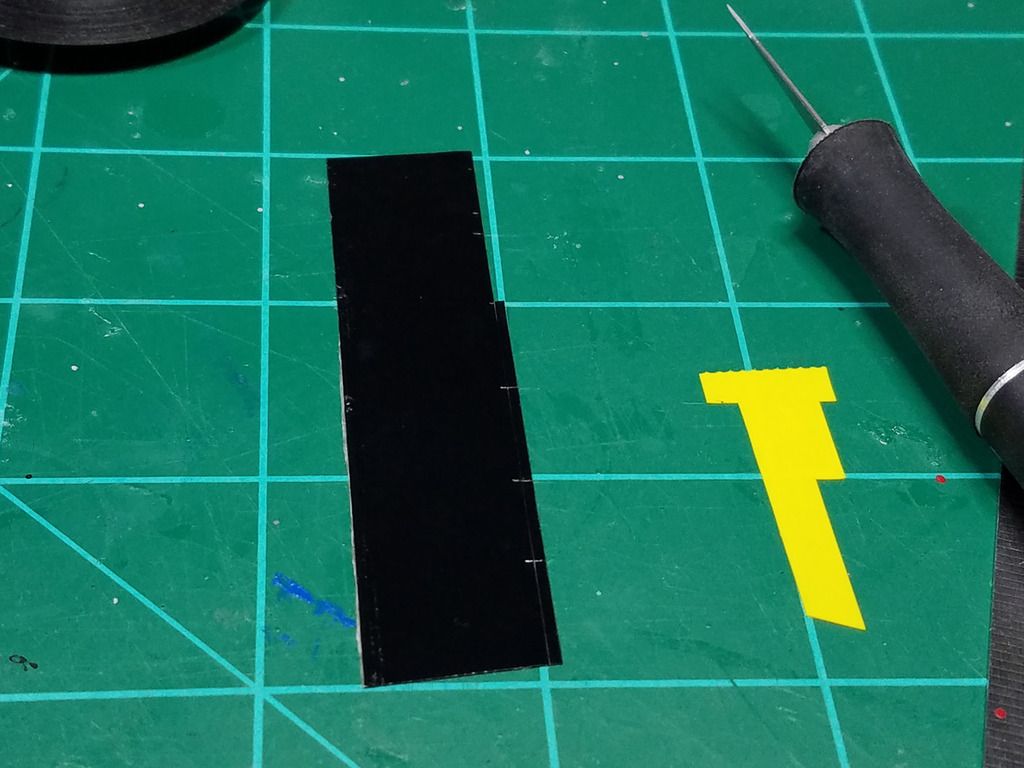
Some of the items I am using for this session are yellow 3M electrical tape as wire management with some color pop and some Sharpie paint pens for quick detail of raised detail on the electrical boxes, knobs and bolts I don't want to use PE
on.....
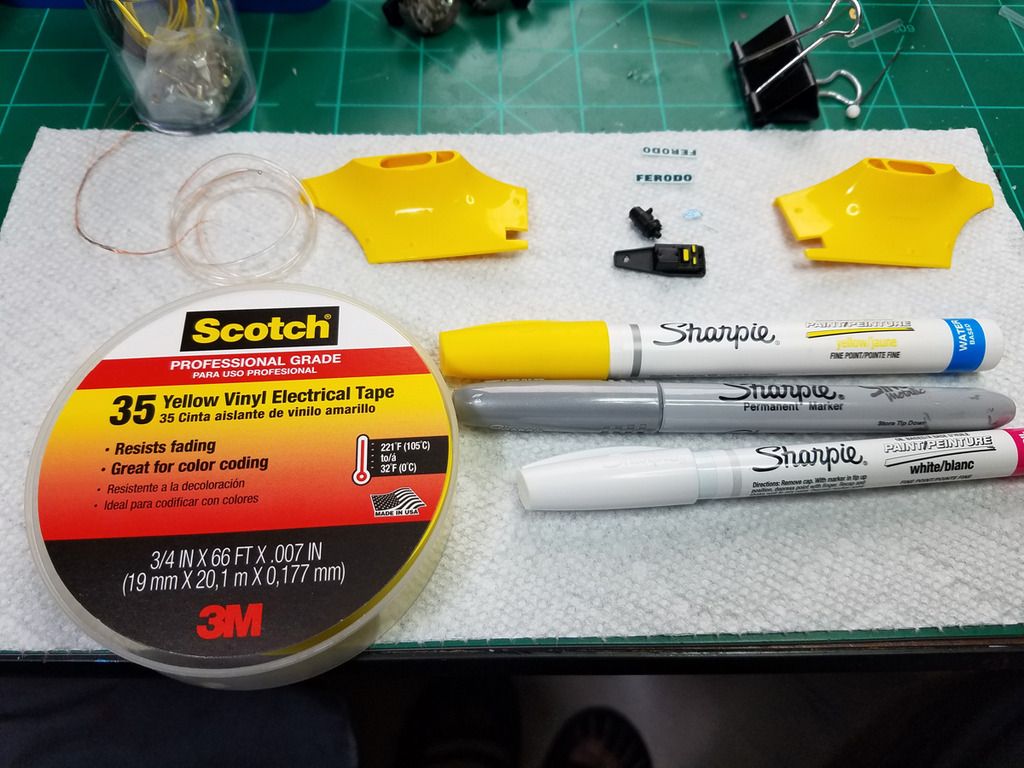
I really like this tape. It's smooth, flat and responds well to cutting in thin strips and sticking to itself without coming undone. I tried the MFH "clamping bands" and while they look promising, I have no clue how to make them wrap stuff without breaking.....oh well. Tape it is...
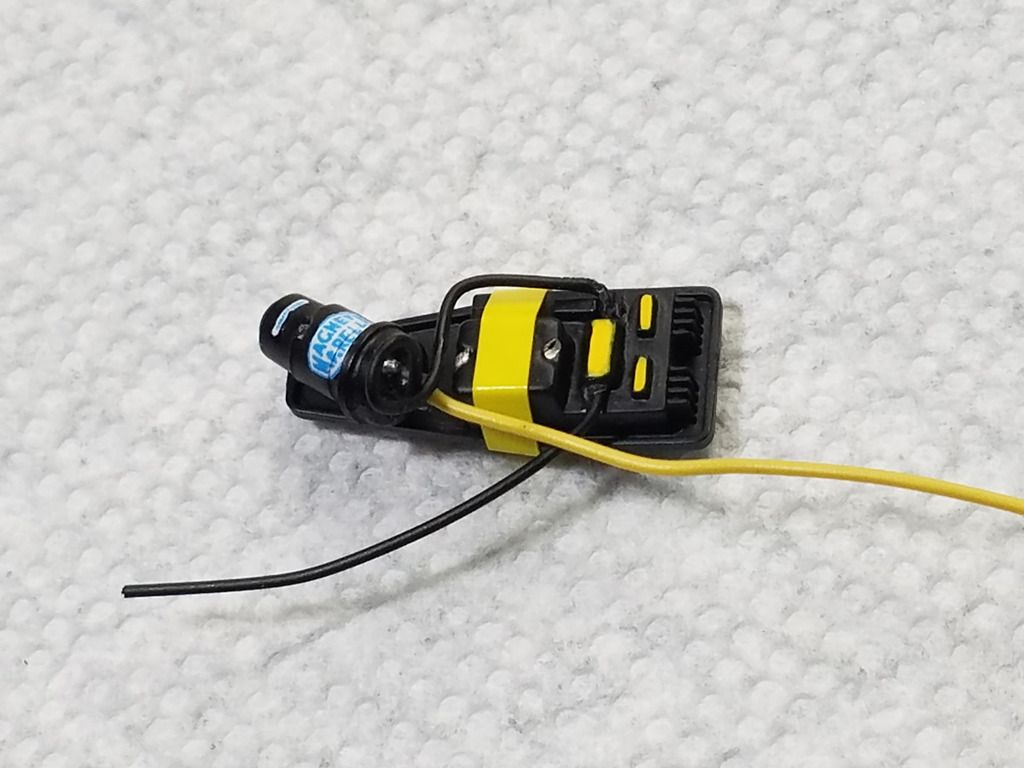
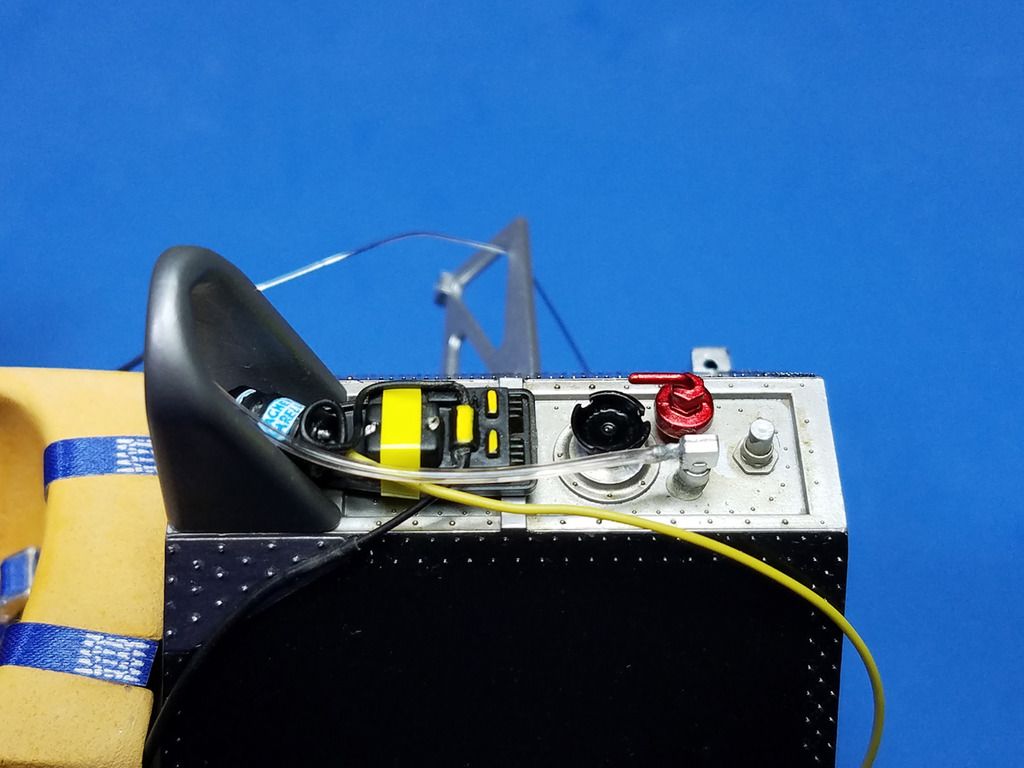
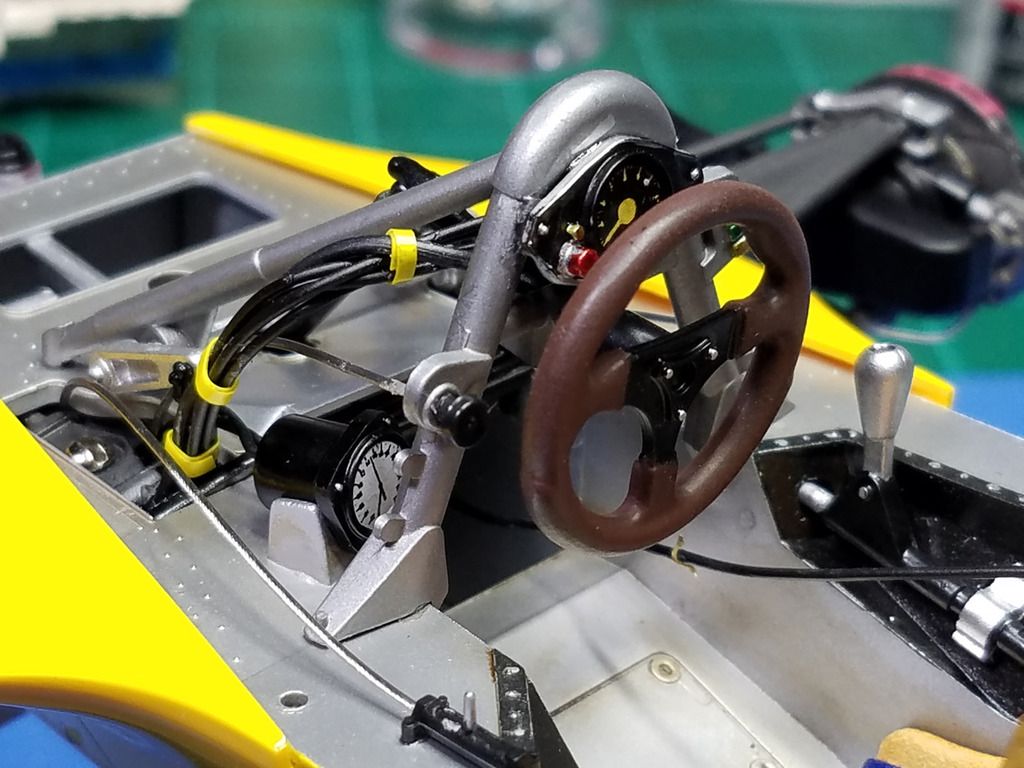
I kept things simple on the ignition coil with some added bits of wire, a Magnetti Marelli decal from a Virage sheet and some yellow tape/highlights.
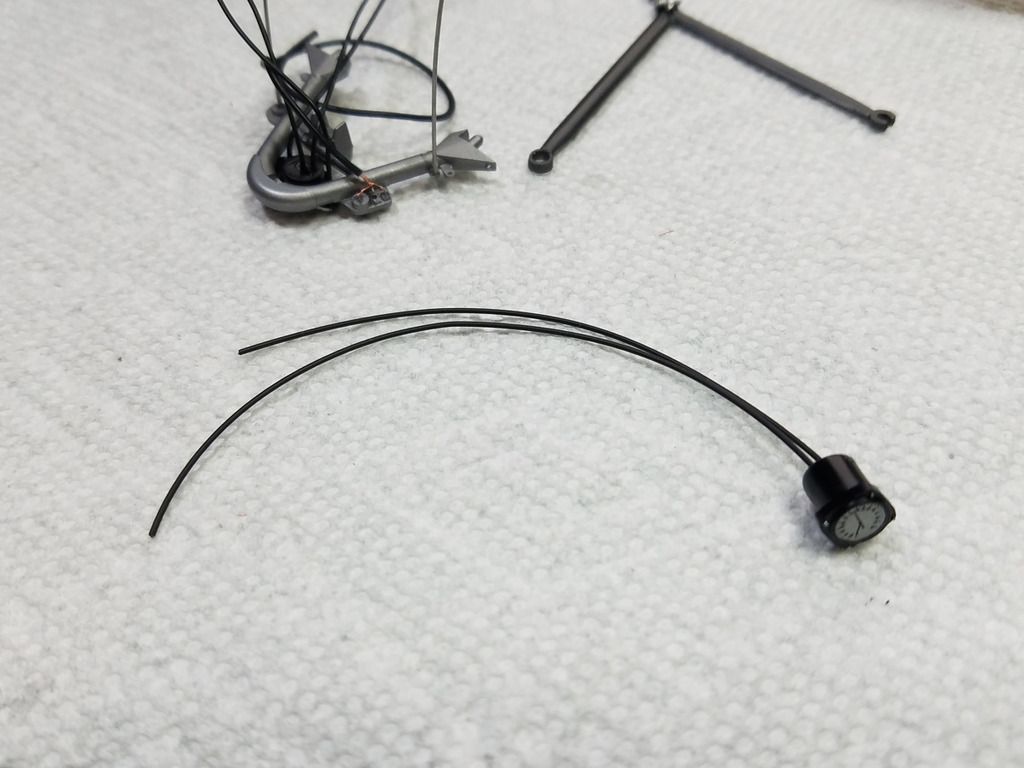
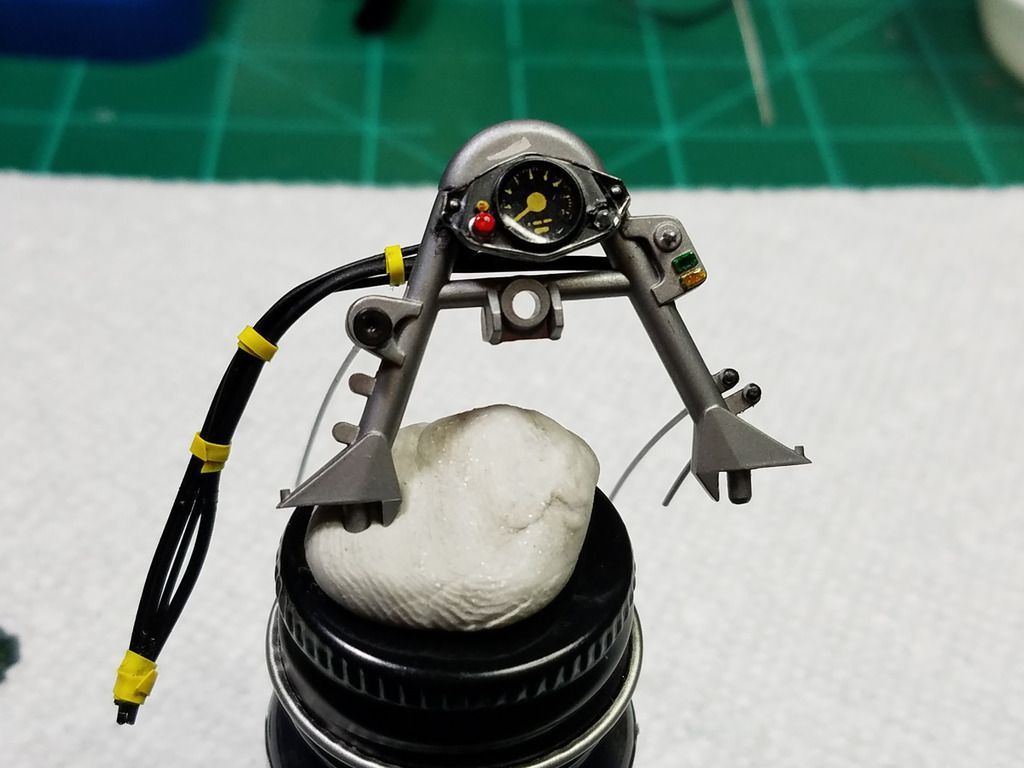
The turbo boost guage with a few added wires.
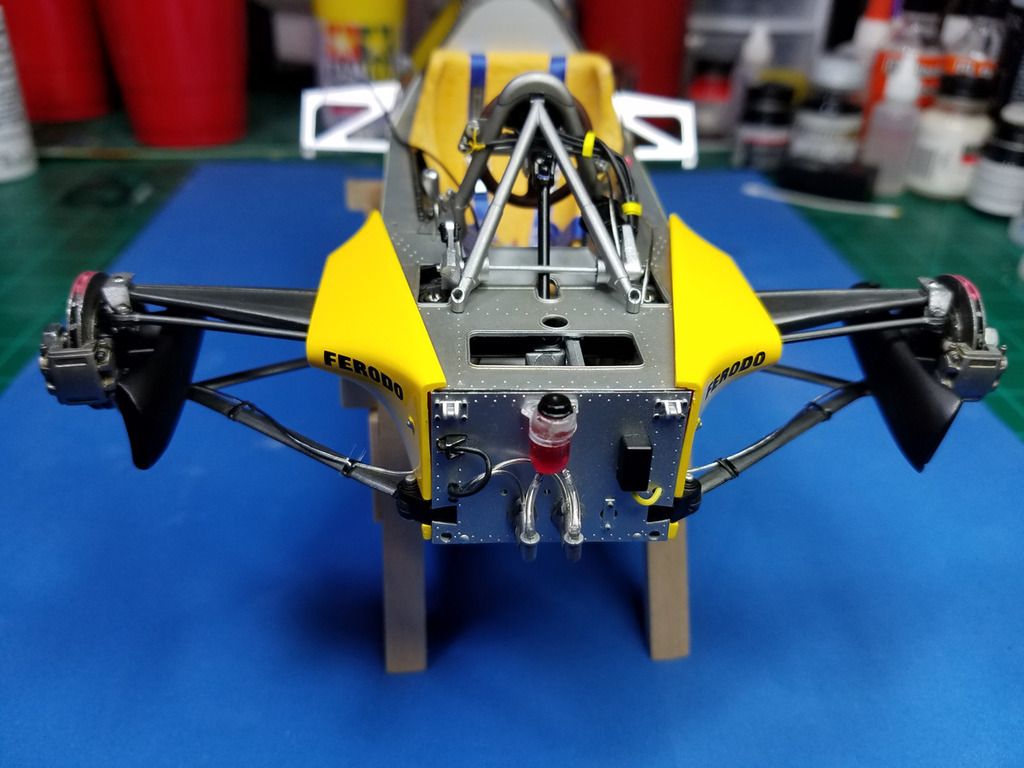
Ignition coil, fuel filler, EM shutoff of some sort and fuel vapor line installed....
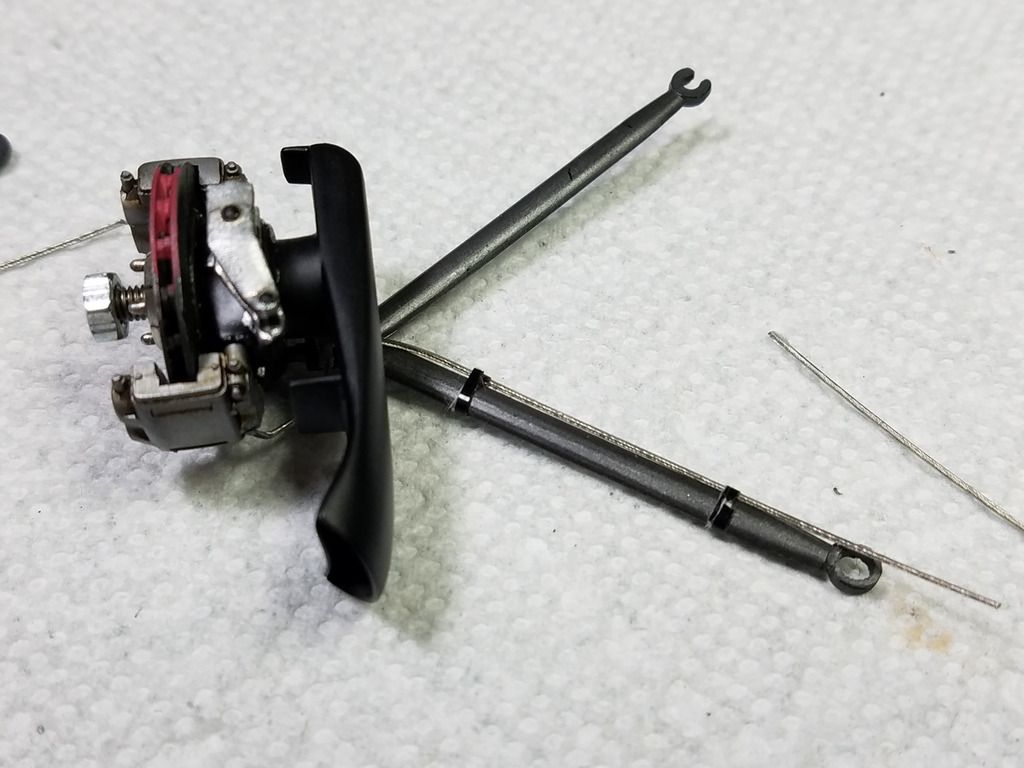
I found it easier to screw the brake assembly to the lower wishbones and plumb the brakes with resin "T" fittings I made from a few Hobby Design "L"'s. I ran a line to each brake caliper (I will photo another time). I used small strips of black tape and beading wire for brake lines. I really like the beading wire as brake lines, but it is tricky tough stuff to cut and bend in tight places.
I glued the ends of the black tape wrap so they don't come undone.
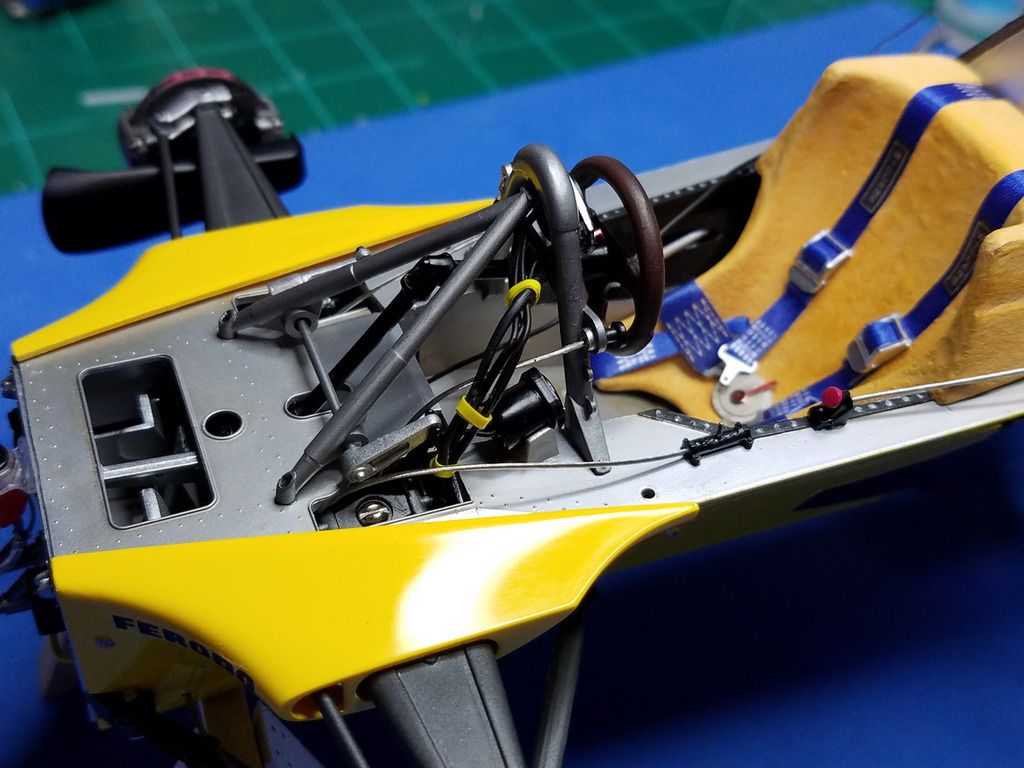
All my reference photos tell me there is a bunch of wires bundled and sent down into the monocoque on the left side, so I approximated that and painted some small copper wire for dash lights. I used the braided wire again for other stuff coming off the dash knobs in places....
Here is the front of the dash/roll hoop ready to go in the car with the steering wheel.....I scratched the top of the hoop and not sure if I want to repair it or leave that "patina", been looking at this too long.
I drilled .7mm holes for the .6mm brake lines, screwed the suspension in per the instructions and snapped the rest in place, lots of tense moments not trying to break anything or smear glue on the yellow painted and polished pieces that HAVE to go on before you can move ahead.....just a few decals left on the calipers.
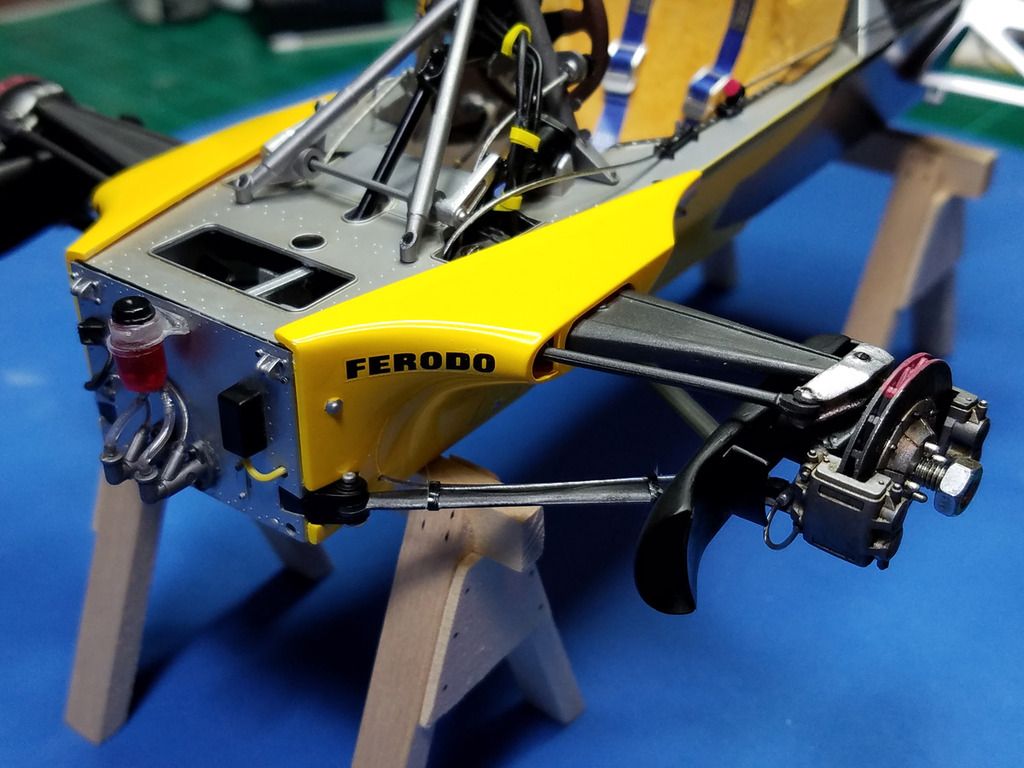
Cockpit pieces in place. The Turbo boost guage is basically unreadable behind the roll hoop unlike my photos....oh well. I'm satisfied so far. I test fit the cowling and everything seems to fit okay under it.....YEI.
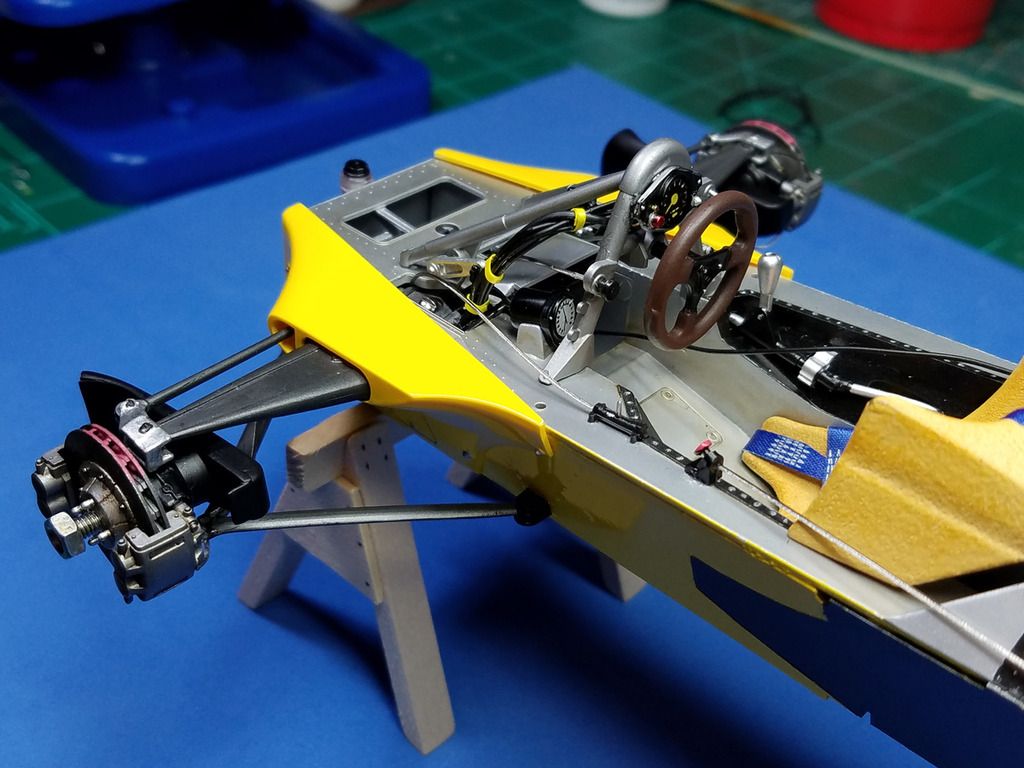
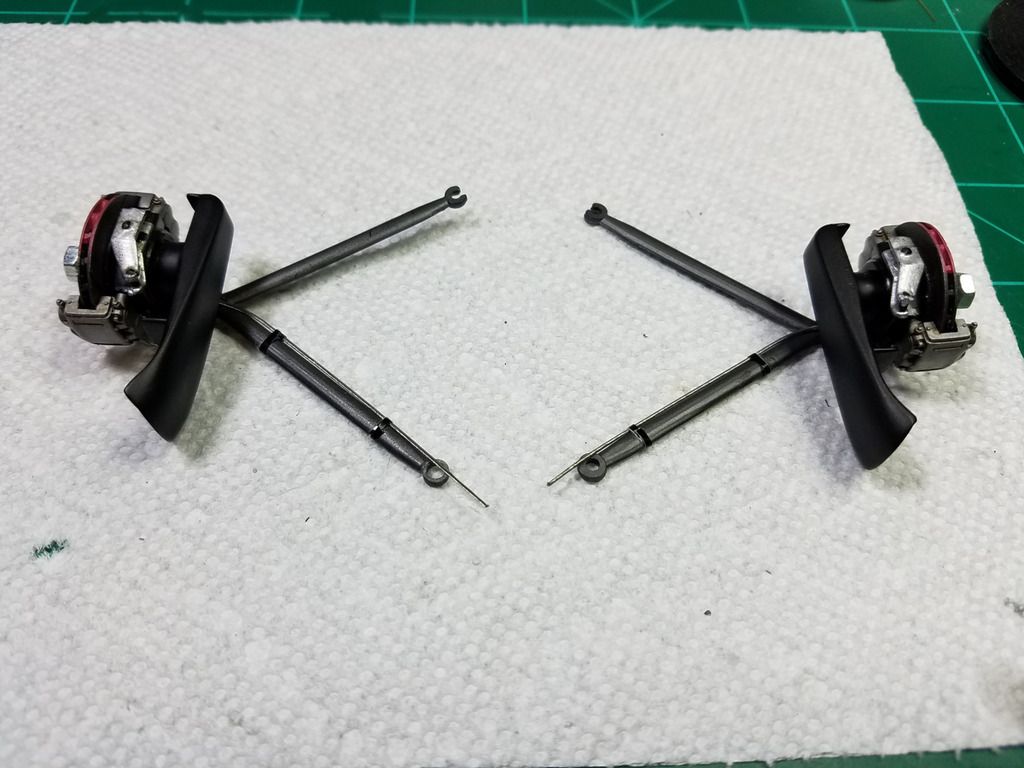
I think I will paint black the exposed screws on the shocks that look out of place and out of scale....
Tamiya engineered everything pretty tight up front and can't figure for the life of me how they expected the steering to work and be posable after all the screws, painting and gluing, but it all lines up pretty straight out of the box....
Top side view showing the front end alignment looks pretty straight for a 33 year old model......
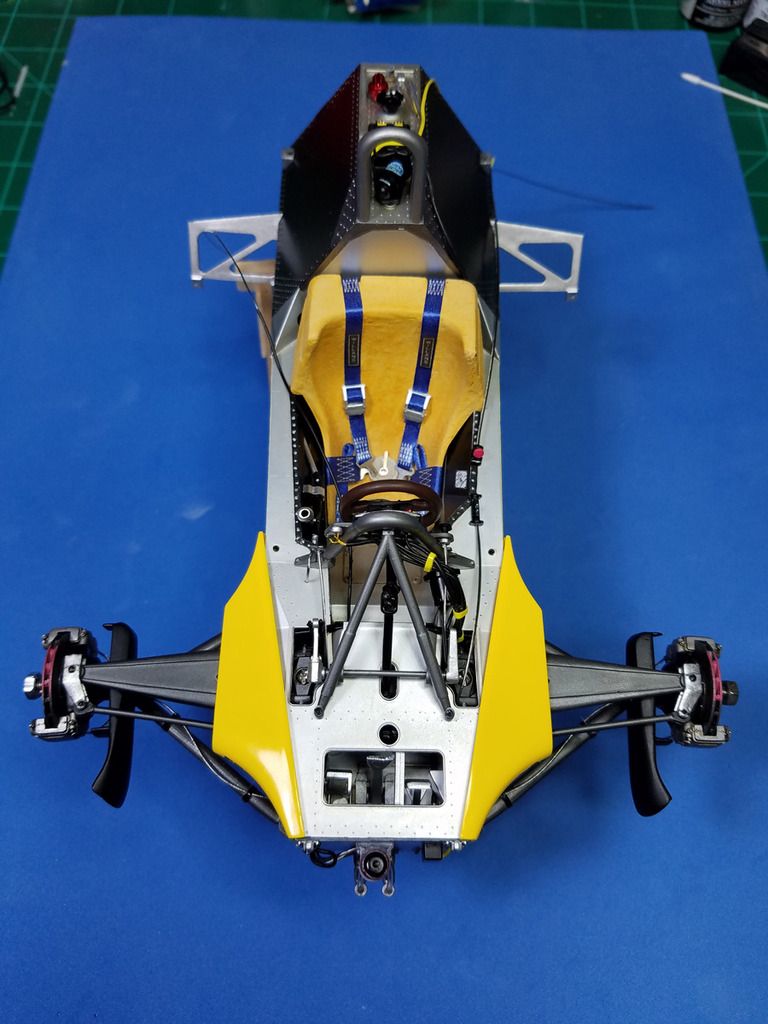
Thanks for looking! On to the engine and turbos!

Some of the items I am using for this session are yellow 3M electrical tape as wire management with some color pop and some Sharpie paint pens for quick detail of raised detail on the electrical boxes, knobs and bolts I don't want to use PE
on.....

I really like this tape. It's smooth, flat and responds well to cutting in thin strips and sticking to itself without coming undone. I tried the MFH "clamping bands" and while they look promising, I have no clue how to make them wrap stuff without breaking.....oh well. Tape it is...

I kept things simple on the ignition coil with some added bits of wire, a Magnetti Marelli decal from a Virage sheet and some yellow tape/highlights.

The turbo boost guage with a few added wires.

Ignition coil, fuel filler, EM shutoff of some sort and fuel vapor line installed....


I found it easier to screw the brake assembly to the lower wishbones and plumb the brakes with resin "T" fittings I made from a few Hobby Design "L"'s. I ran a line to each brake caliper (I will photo another time). I used small strips of black tape and beading wire for brake lines. I really like the beading wire as brake lines, but it is tricky tough stuff to cut and bend in tight places.

I glued the ends of the black tape wrap so they don't come undone.

All my reference photos tell me there is a bunch of wires bundled and sent down into the monocoque on the left side, so I approximated that and painted some small copper wire for dash lights. I used the braided wire again for other stuff coming off the dash knobs in places....

Here is the front of the dash/roll hoop ready to go in the car with the steering wheel.....I scratched the top of the hoop and not sure if I want to repair it or leave that "patina", been looking at this too long.

I drilled .7mm holes for the .6mm brake lines, screwed the suspension in per the instructions and snapped the rest in place, lots of tense moments not trying to break anything or smear glue on the yellow painted and polished pieces that HAVE to go on before you can move ahead.....just a few decals left on the calipers.

Cockpit pieces in place. The Turbo boost guage is basically unreadable behind the roll hoop unlike my photos....oh well. I'm satisfied so far. I test fit the cowling and everything seems to fit okay under it.....YEI.


I think I will paint black the exposed screws on the shocks that look out of place and out of scale....

Tamiya engineered everything pretty tight up front and can't figure for the life of me how they expected the steering to work and be posable after all the screws, painting and gluing, but it all lines up pretty straight out of the box....

Top side view showing the front end alignment looks pretty straight for a 33 year old model......

Thanks for looking! On to the engine and turbos!
"To finish first you must first finish" -Rick Mears
-
 RE60B
RE60B
- FOTA Vice Chairman

- Posts: 1801
- Joined: Thu Jan 24, 2013 1:35 pm
- Your Name: Cédric
- Favorite F1 Team or Driver: RENAULT
- Location: ANTIBES
- Status: Offline

Re: Renault RE20 1_12 Shelf of Doom WIP
Great great job 

Re: Renault RE20 1_12 Shelf of Doom WIP
What an amazing work so far!
Can`t wait to see the completed one
Can`t wait to see the completed one
Take a stand!
-
 daveyman
- FOTA Chairman
- Posts: 4540
- Joined: Sun Jun 24, 2007 11:39 am
- Favorite F1 Team or Driver: Riccardo Patrese
- Location: Hull, England.
- Status: Offline

Re: Renault RE20 1_12 Shelf of Doom WIP
Looking really good. Good idea about the yellow tape.