Tamiya Leyton House
-
 mobiusone
- Best of the Rest

- Posts: 598
- Joined: Sat Sep 12, 2015 4:11 pm
- Location: Texas
- Status: Offline
Re: Tamiya Leyton House
As per the inquiry by Chris and hquednau, I have used the PS sprays before on plastic kits. The key is to prime it first with one of Tamiya's white/gray primer. The glossy colors do come out very thick compared to TS colors, but cover well. Anyway, back to the build! Not to hijack the thread  Looking forward to the updates now that I have this rare kit in my stash
And so you touch this limit, something happens and you suddenly can go a little bit further. With your mind power, your determination, your instinct, and the experience as well, you can fly very high.
- Ayrton Senna
- Ayrton Senna
-
 Eagle50
- FOTA Chairman

- Posts: 4038
- Joined: Sun Apr 03, 2011 12:05 pm
- Location: Tokyo Japan
- Status: Offline
Re: Tamiya Leyton House
Hmm... Interesting insight, Mobi. PS can sprays (for clear polycarbonate) work over Tamiya's grey & white primers? I'll have to try that on a test spoon, to see the effect for myself. That could give us more can spray options.
Can't wait for the update of this cool build!
Cheers, Chris
Can't wait for the update of this cool build!
Cheers, Chris
-
 bossy122
Topic author - Constructors Champion

- Posts: 1380
- Joined: Thu May 01, 2008 11:04 am
- Location: HOT California, USA
- Status: Offline
Re: Tamiya Leyton House Update 5
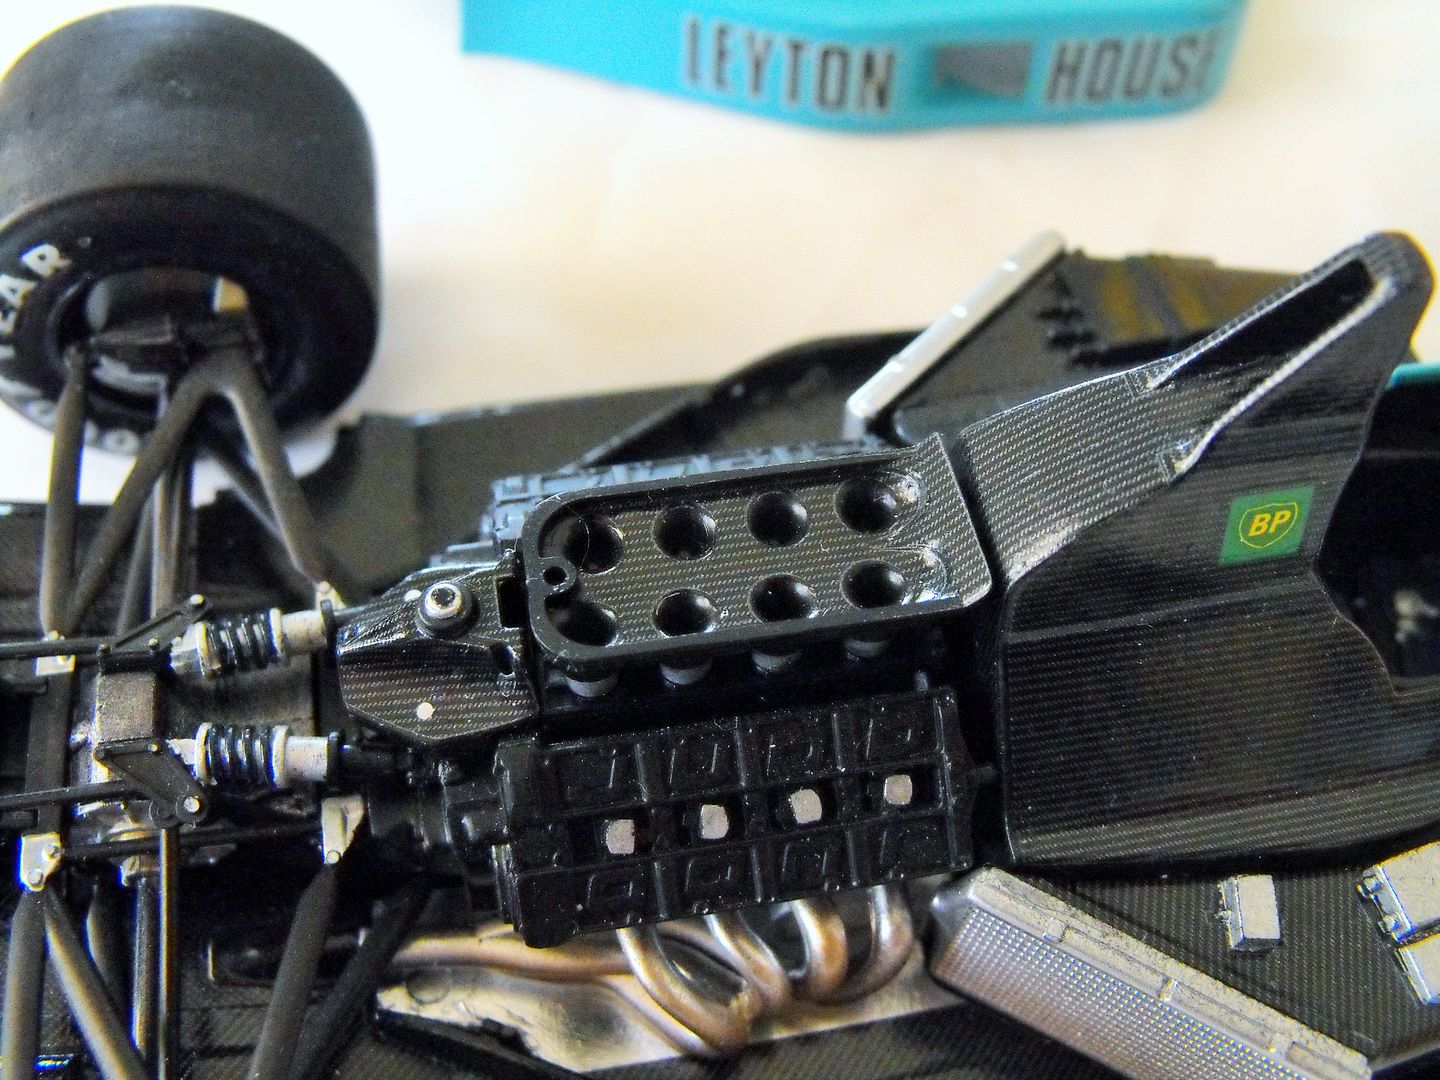
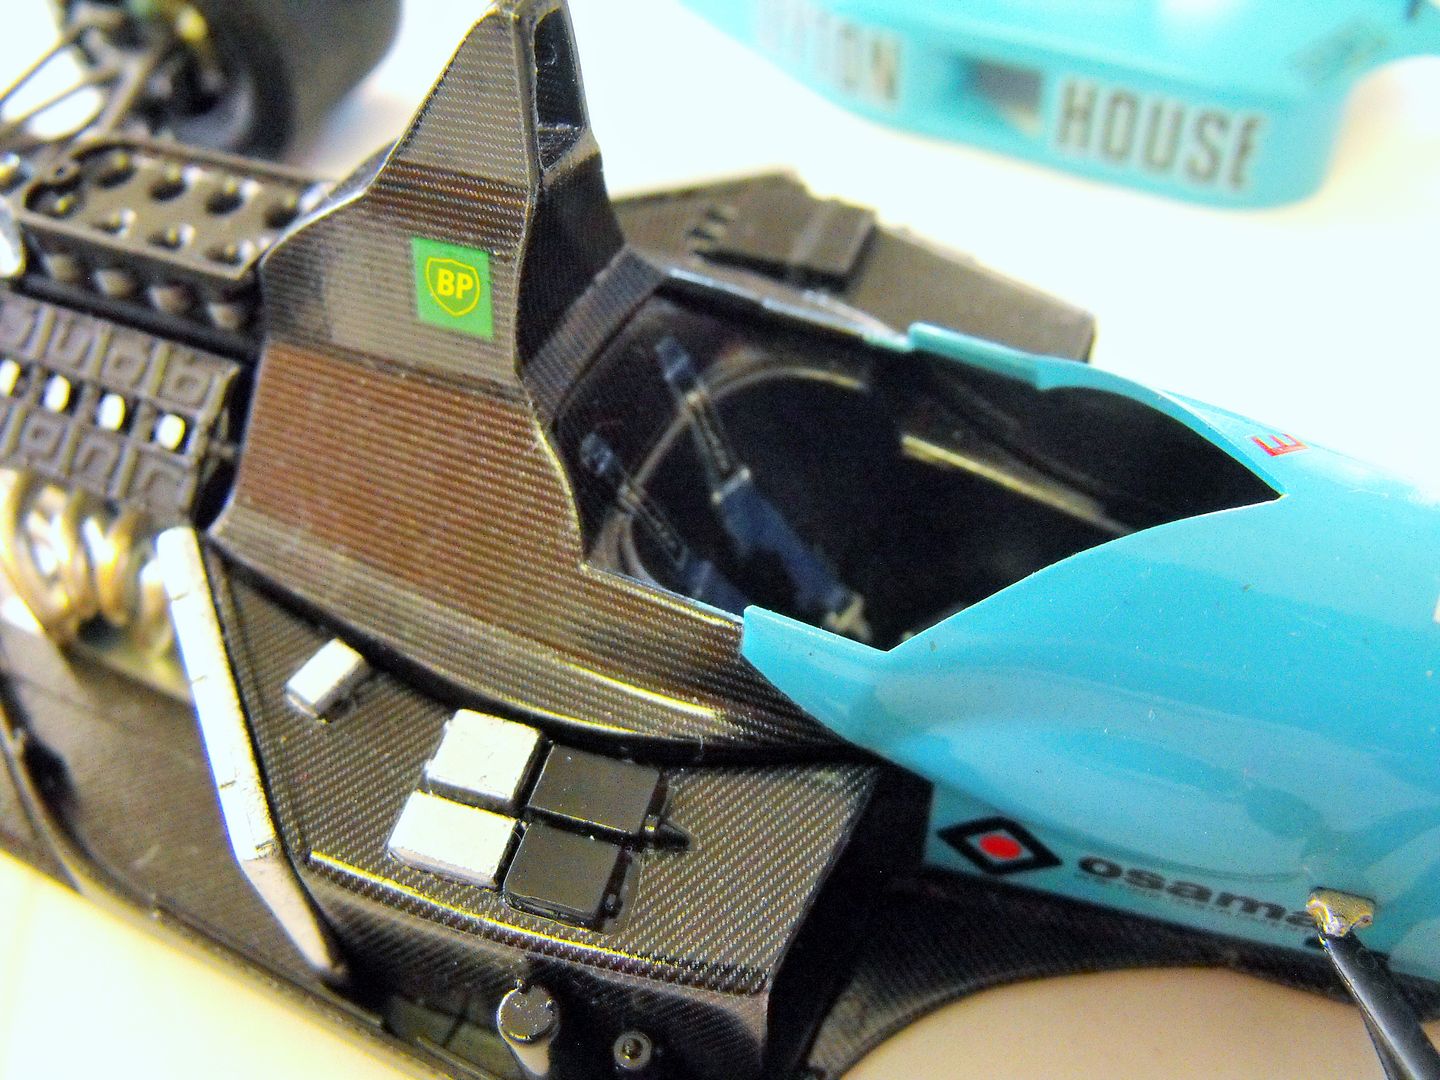
Ooh...not much to update on. A funny thing about carbon fibering stuff: it gets to be a TAD boring after a while. So I took a little break and in that time, thanks to ModelTime and his revelation about Spaz Stix chrome, I traded my carbon obsession for shiny obsession! I also dipped into my drawer of doom and picked up my S27 JS19 for the first time in well over a year and did some work to it and broke out my 1 12 Tamiya 312T4 and did some work on that one too. Break up that carbon monotony. I did, however, finally get back to the Leyton House yesterday and was quickly reminded about the other funny thing with carbon decals: BUBBLES! My god! One would think you'd simply be able to push them to the edge of the decal and burp them out.....NOOOOOOO. My thing has always been to poke little holes and try to get them out with Micro Sol and a Qtip....which sort of works, but then as soon as you hit that decal with any heat, say deflected from another area you're working on, MORE bubbles! Aggravating, to say the least. Push on regardless...
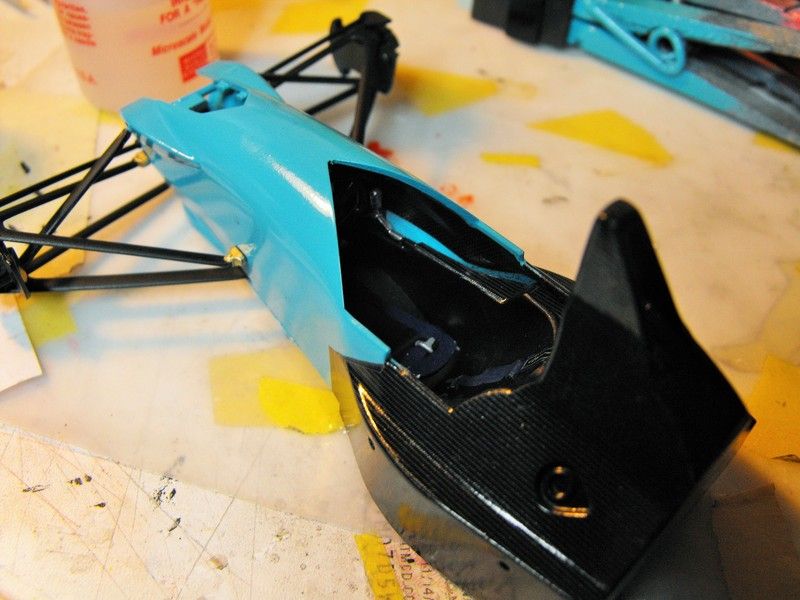
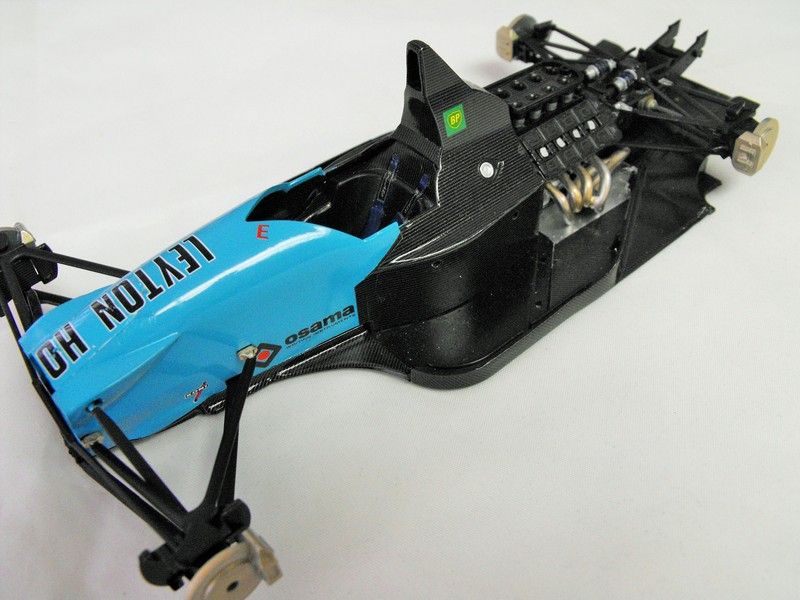
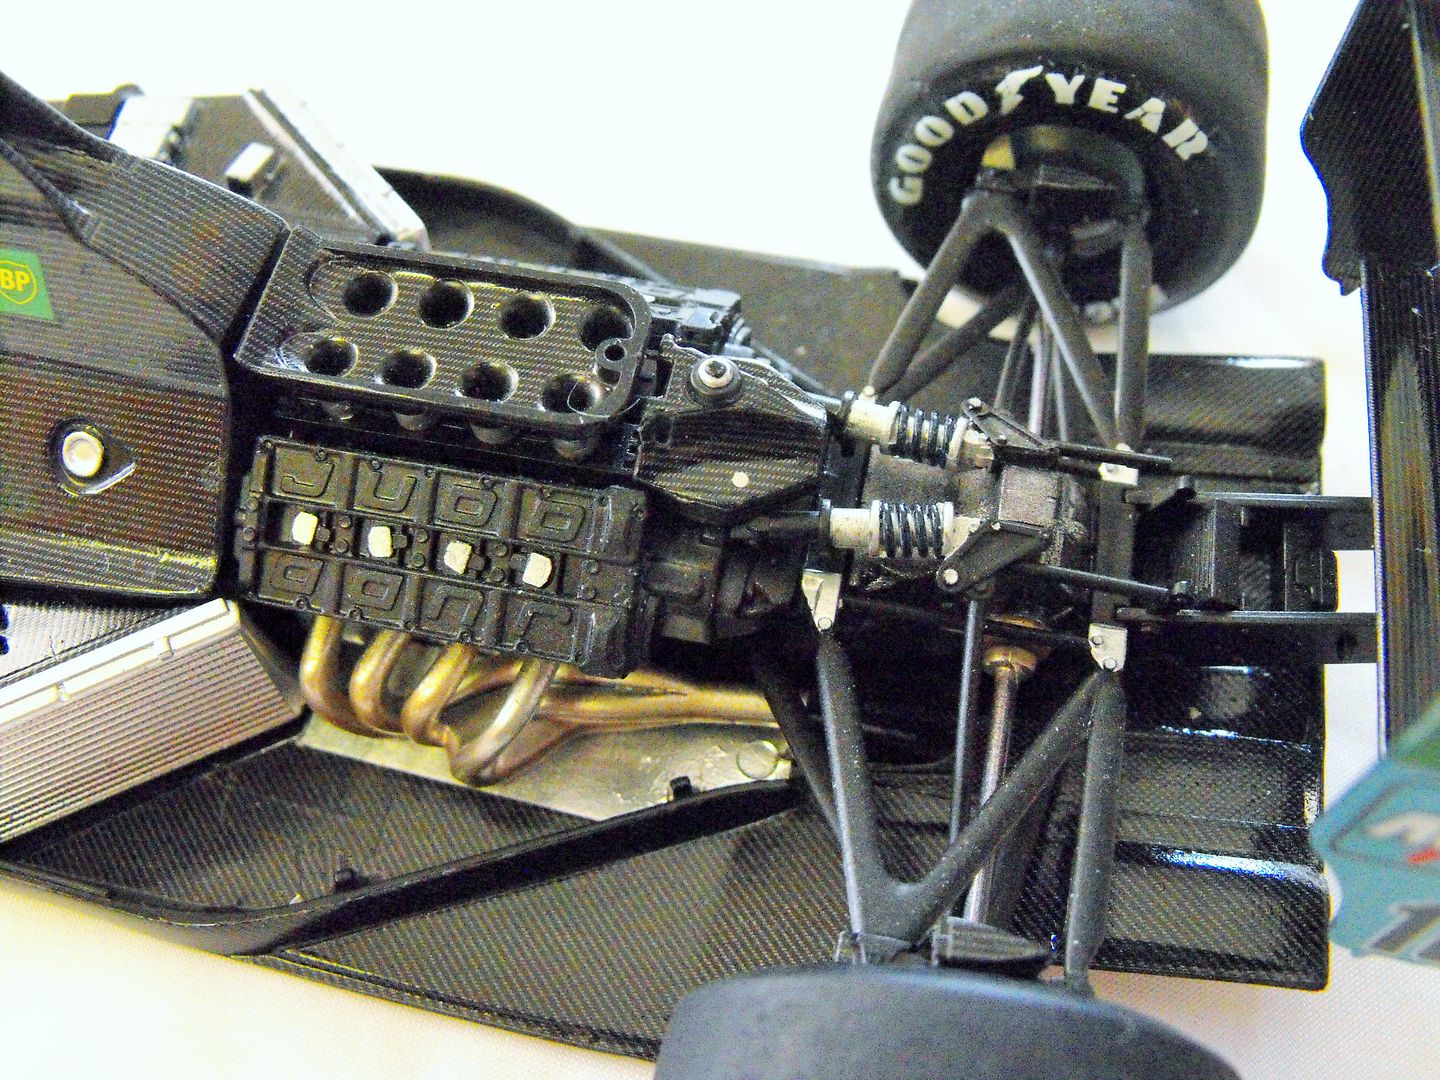
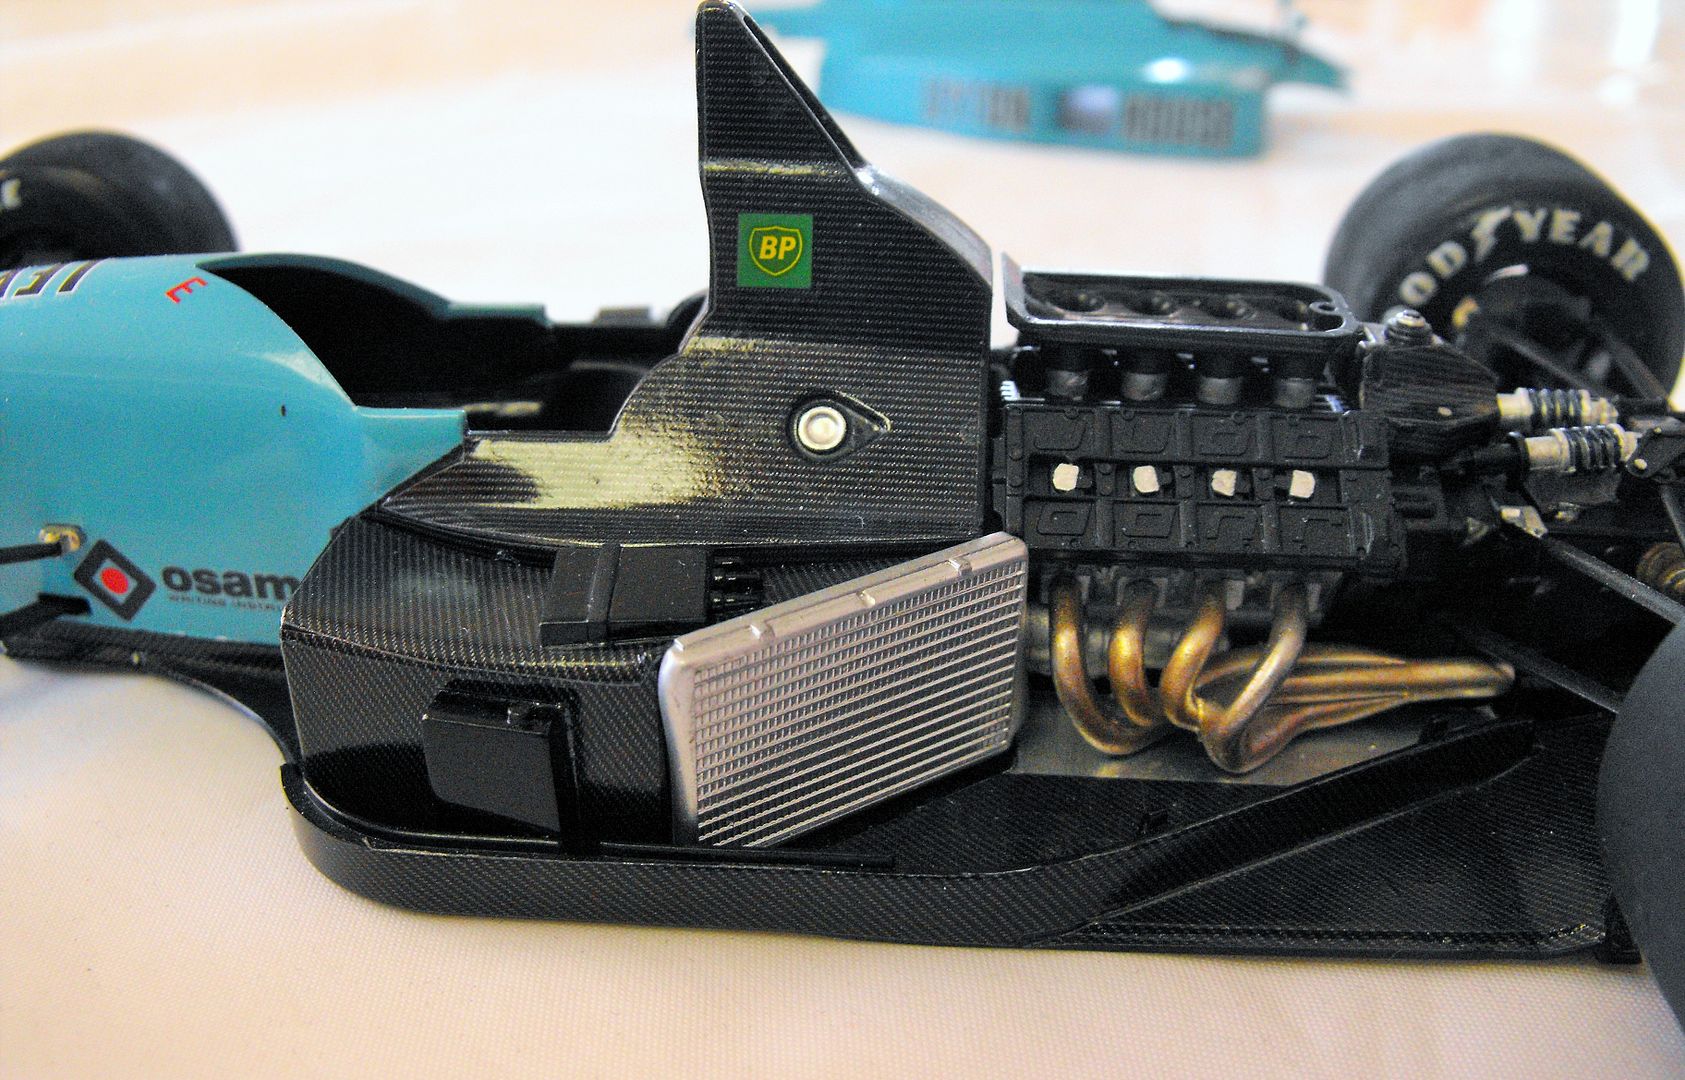
One thing to note: The carbons for the inside of the tub aren't wide enough, as you can see. I had to go back and add some extra to cover up the exposed area.
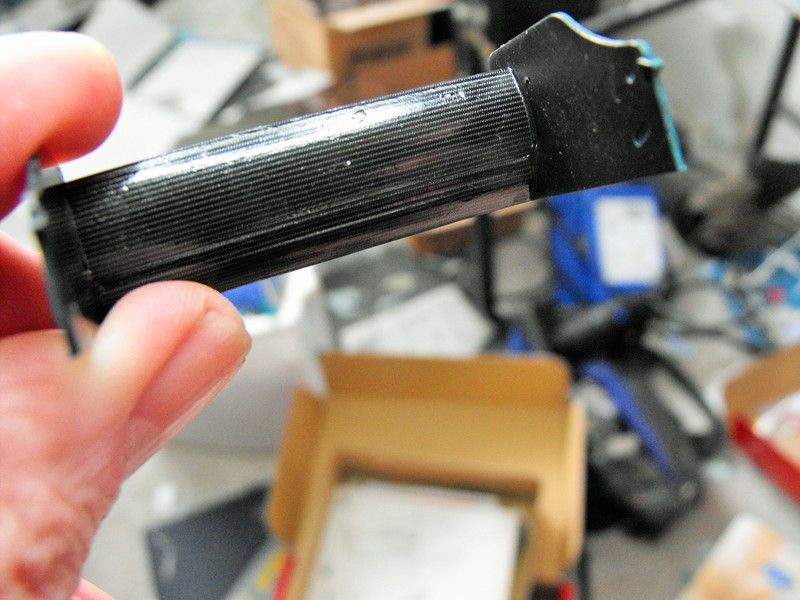
Cursed bubbles!!!!
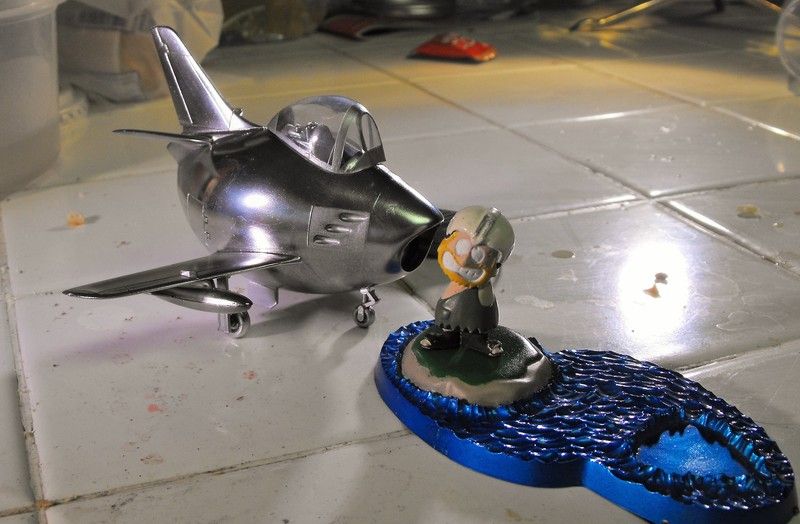
Shiiiiiny! I have had this little egg kit sitting around since probably last century! When I got my Spazzy stuff, I HAD to try it as a bare metal look on an airplane....and this was the only one I had! Waddya think? Pass for bare metal?
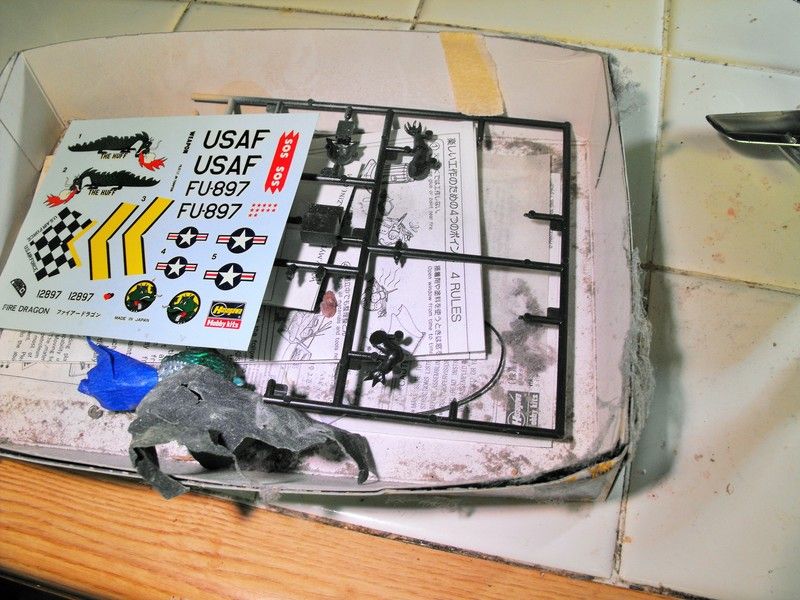
The box isn't crawling with dust bunnies, it's got dust monsters! It's been sitting for a while.
Side project #2....
Side project #3.... all while I collect bits and pieces to make an attempt at the BIG MP4/6. So much to do...

One thing to note: The carbons for the inside of the tub aren't wide enough, as you can see. I had to go back and add some extra to cover up the exposed area.

Cursed bubbles!!!!

Shiiiiiny! I have had this little egg kit sitting around since probably last century! When I got my Spazzy stuff, I HAD to try it as a bare metal look on an airplane....and this was the only one I had!

The box isn't crawling with dust bunnies, it's got dust monsters! It's been sitting for a while.

Side project #2....

Side project #3.... all while I collect bits and pieces to make an attempt at the BIG MP4/6. So much to do...

-
 allnie
- FOTA Chairman
- Posts: 3585
- Joined: Wed Jul 27, 2005 5:01 am
- Favorite F1 Team or Driver: Tyrrell. Lotus. McLaren.
- Location: Copenhagen, Denmark
- Status: Offline

Re: Tamiya Leyton House
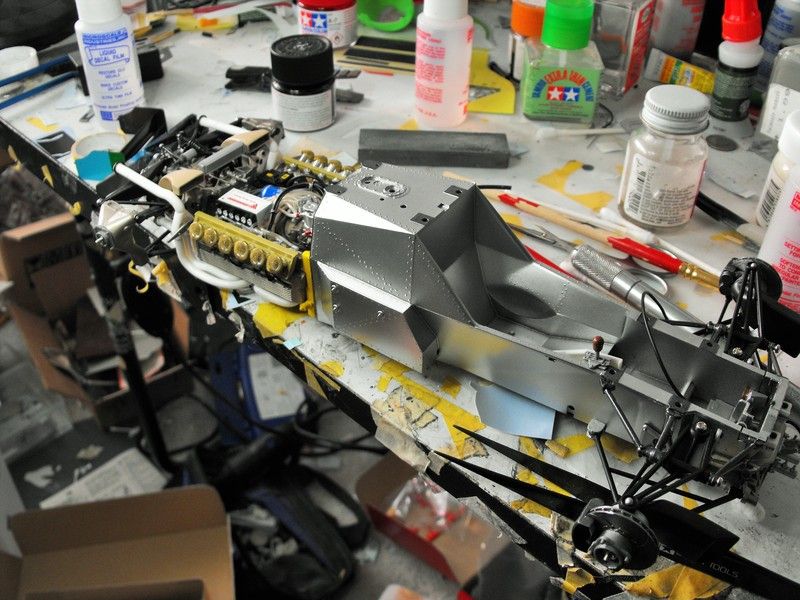
The 1/12 Tamiya 312T4 is still a superb kit after all those years. Chief designer was Mr. Ebbro himself.
Br
Allan
Allan
-
Eagle50
- FOTA Chairman
- Posts: 4038
- Joined: Sun Apr 03, 2011 12:05 pm
- Location: Tokyo Japan
- Status: Offline
Re: Tamiya Leyton House
Yes, well pointed out, Allan. Ebbro CEO Mr Kiya has also said, in print, that he designed the 1/12 Ferrari 641/2 too, and wasn't going to give the design work to anyone else. (Shows you how old some of those kits are getting -- Mr. Kiya hasn't been at Tamiya for decades.)
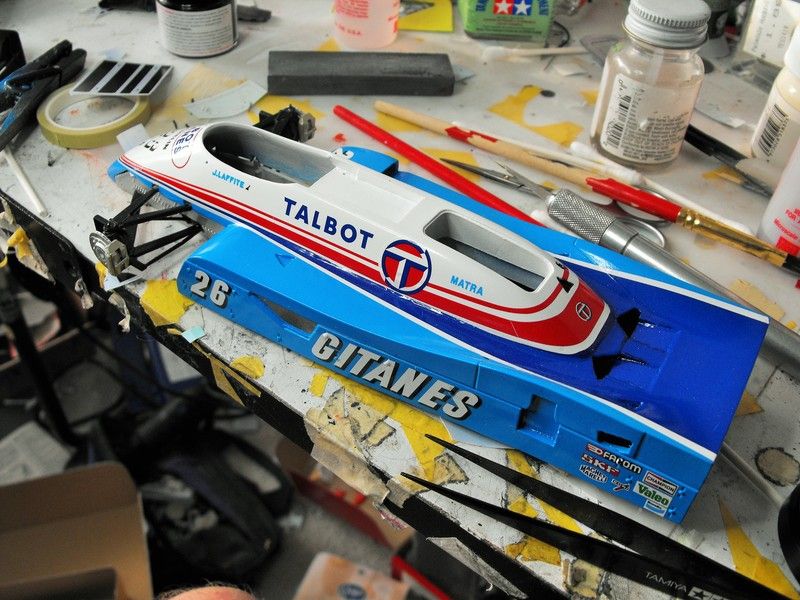
Great work on the Spaz Stix chromed egg plane, the Talbot, and the 312T4!
Cheers, Chris
Great work on the Spaz Stix chromed egg plane, the Talbot, and the 312T4!
Cheers, Chris
-
allnie
- FOTA Chairman
- Posts: 3585
- Joined: Wed Jul 27, 2005 5:01 am
- Favorite F1 Team or Driver: Tyrrell. Lotus. McLaren.
- Location: Copenhagen, Denmark
- Status: Offline
Re: Tamiya Leyton House
Regarding the 1/20 Leyton-House. I was told be an insider that the kit has never been re-released because the Leyton-House management was somehow ending up in prison - and Mister Tamiya does not want to re-issue this kit which is somehow related to a criminal company.
I was lucky to get my hands on a mint kit several years ago when it was not that hard to find.
And best news: I am VERY soon going to build the kit. I did build the kit just when it was released. It could be funny to see how much I have improved since 1991.
I was lucky to get my hands on a mint kit several years ago when it was not that hard to find.
And best news: I am VERY soon going to build the kit. I did build the kit just when it was released. It could be funny to see how much I have improved since 1991.
Br
Allan
Allan
-
 billgtp
- FOTA Chairman
- Posts: 2409
- Joined: Sat Jan 26, 2002 5:27 pm
- Favorite F1 Team or Driver: Chapmans Lotus, James Hunt
- Location: Anza ca.
- Status: Offline

Re: Tamiya Leyton House
The Leyton house is looking good.
-
bossy122
Topic author - Constructors Champion
- Posts: 1380
- Joined: Thu May 01, 2008 11:04 am
- Location: HOT California, USA
- Status: Offline
Re: Tamiya Leyton House
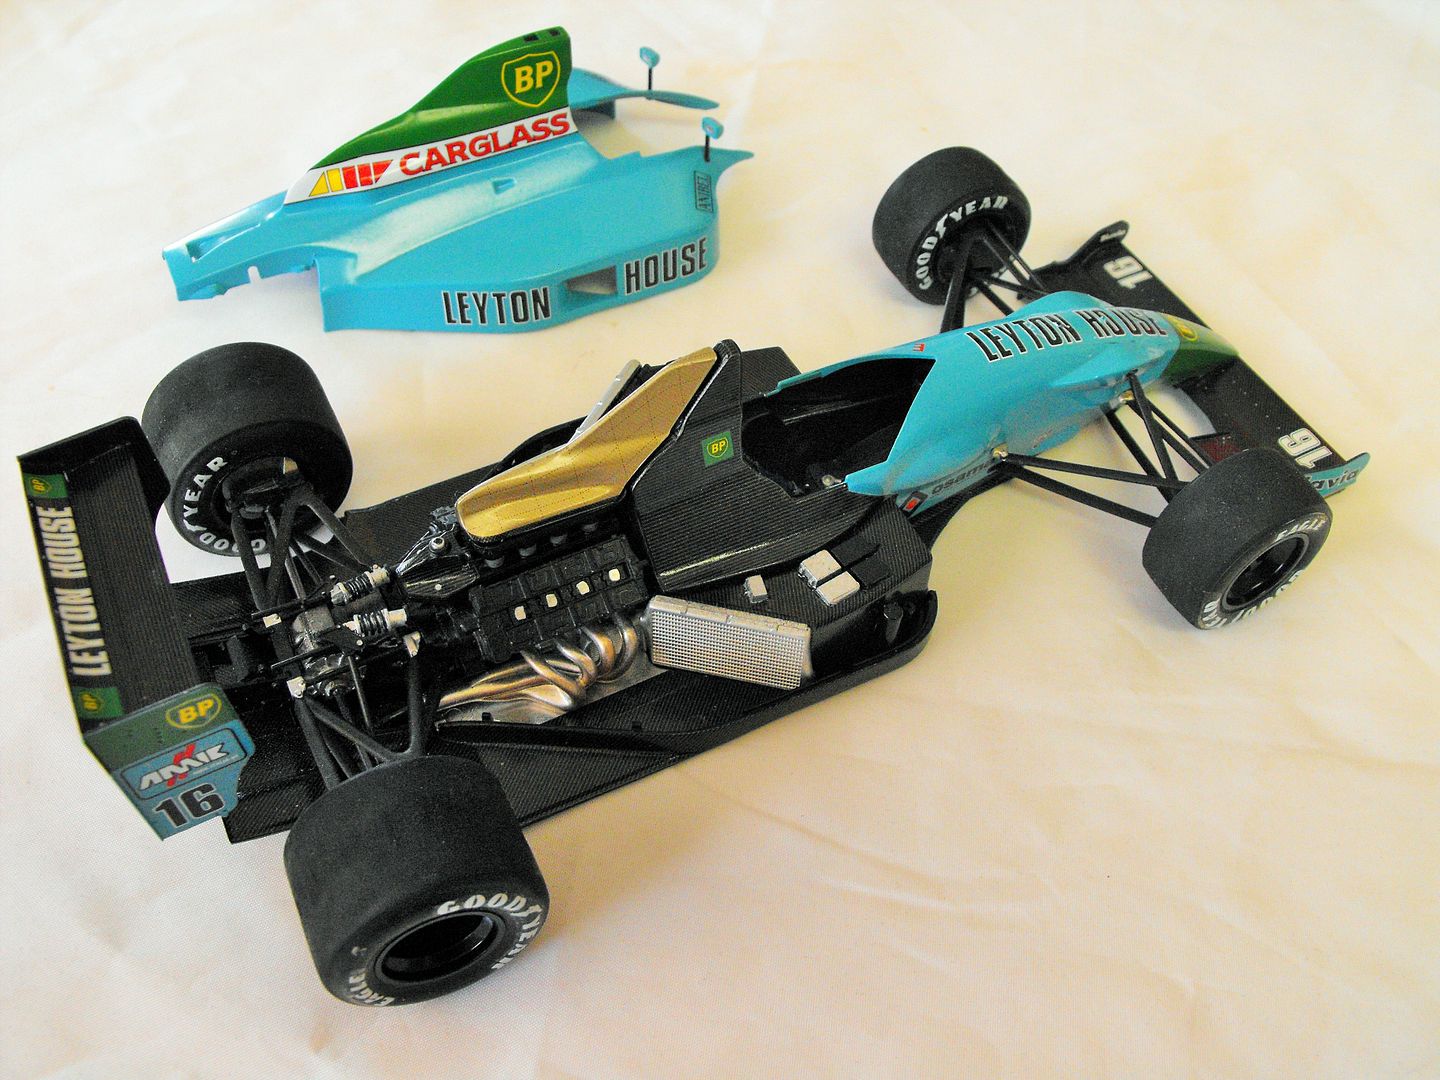
Almost 5 months have gone by since I updated this build. Because 5 months went by that I didn't touch this build. I finished the carbon fibre and all that was really needed to finish was the engine cover...
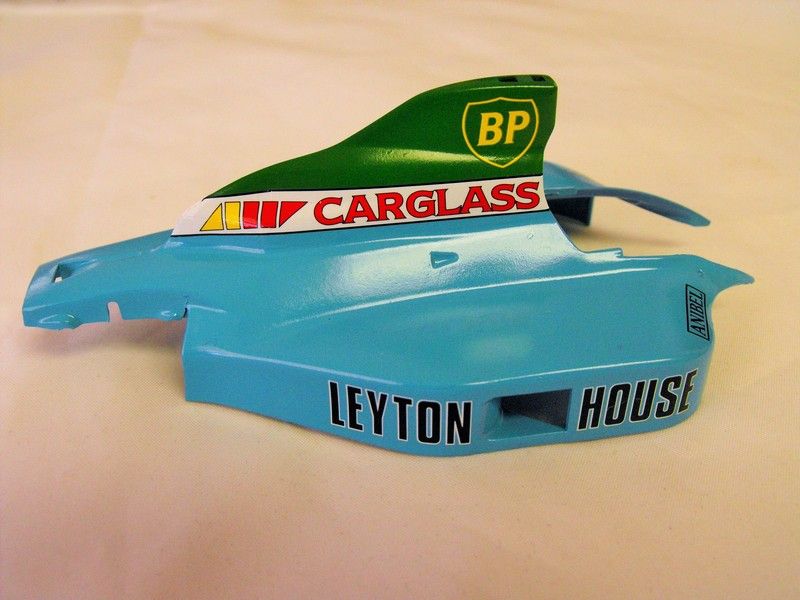
Ah, the engine cover, the achilles heel of this kit. I had it all painted, blue green and the white stripe. Turned out I made the white stripe a tad too wide. No problem, i'll just cut the stripe decal and "widen" it. LONG story short, that didn't work. I had it close enough but it bothered me, so I put it on hiatus.
I then focused on the T4 kits and in doing that found the Motsenbocks paint stripper that worked SO well on the Ferrari( painted with Testors paint ) that I opted to dunk the LH in and strip that and start all over as well. ....and I found out the HARD way that the Motsenbocks doesn't work on TS paints. What it DOES do is eat Tamiya epoxy putty like it wasn't even there and it dissolves THIN pieces of plastic passing for head rests into bubbles.....this was a set back.
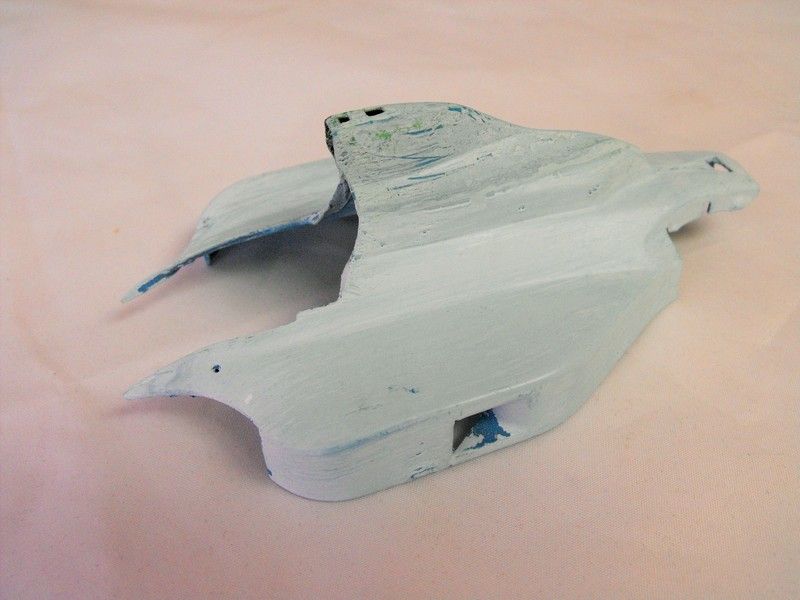
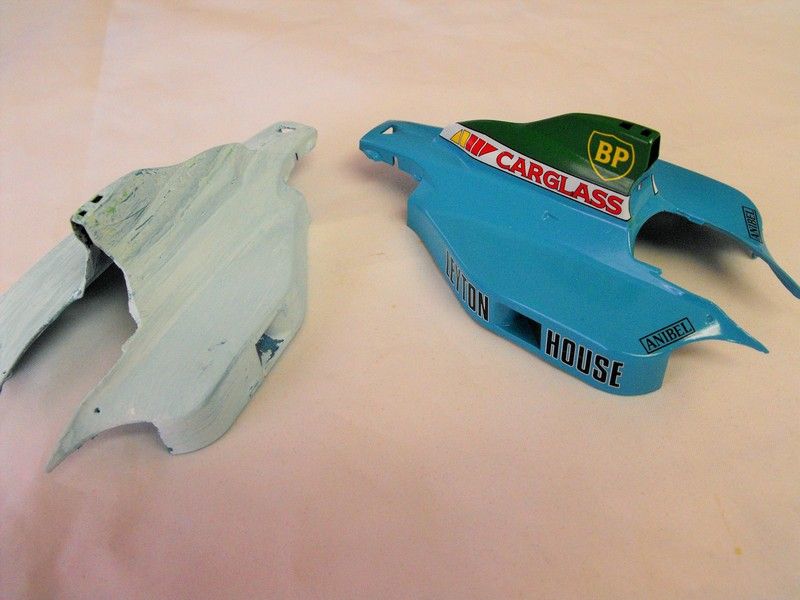
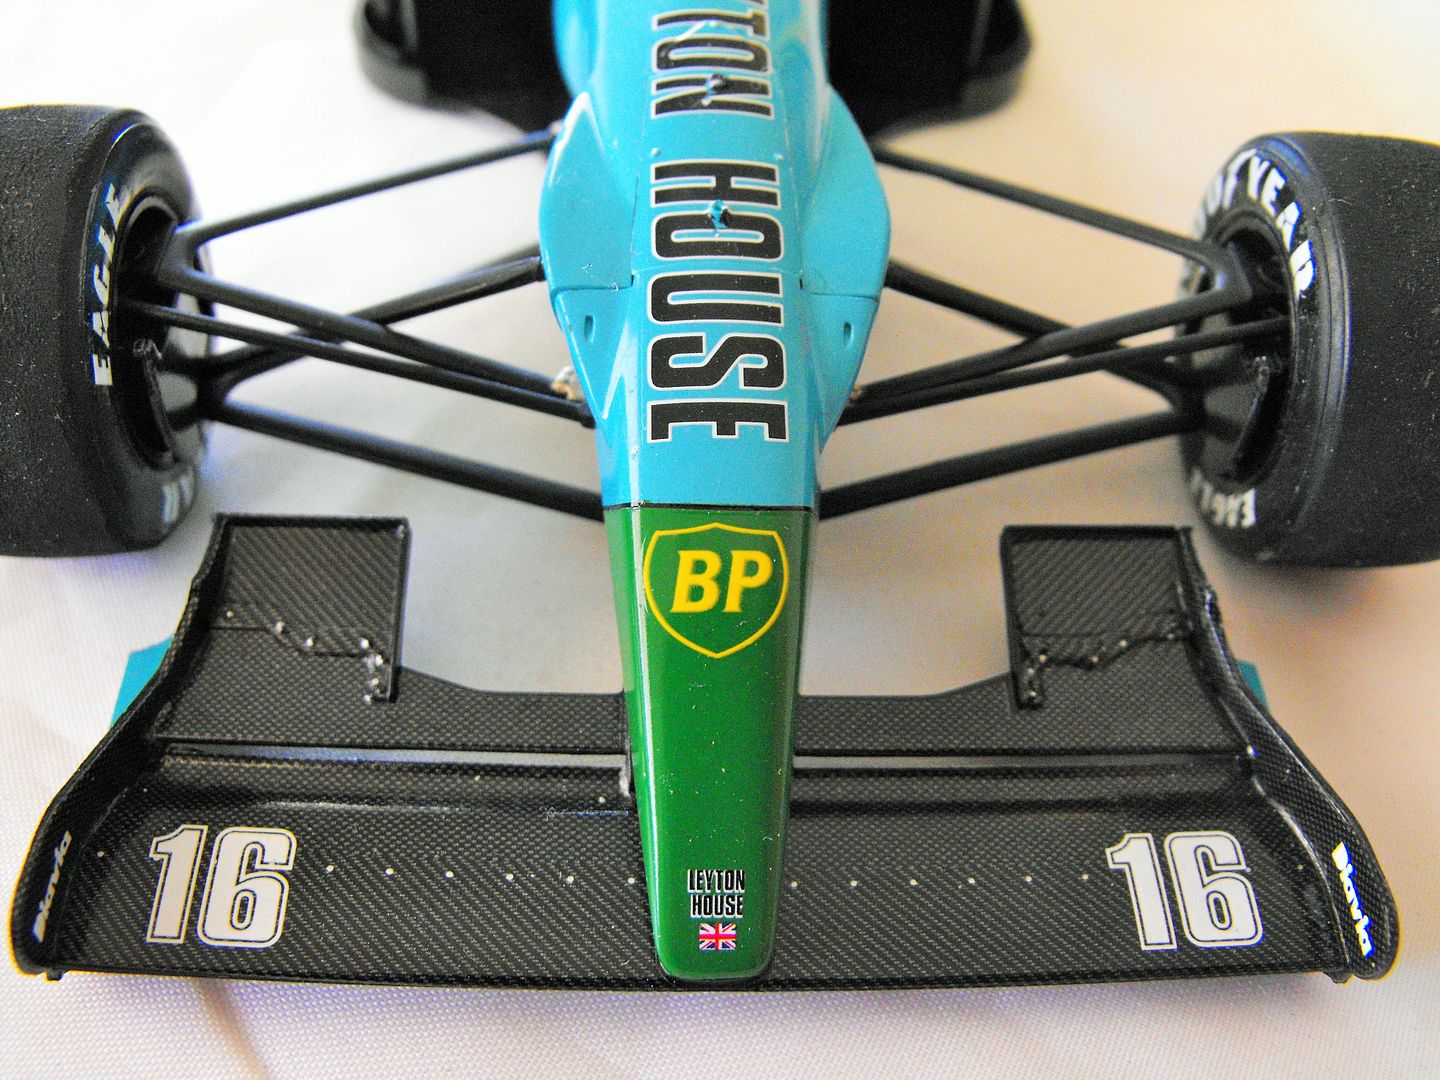
After cooling off for 4 some odd months at how much I hate that engine cover and that BS headrest, I poached the cover from the first LH. I stripped the decals off ( was never happy with that effort either), sanded it smooth, puttied those goddamn seams AGAIN along with one of the sidepods, painted the whole thing TS17 alu then painted it the Coral Blue and Mr Color 66 green, no white this time.
And with my 4th set of decals, I finally willed this annoying thing towards the finish line. BUT! But not before that seam popped again! At this point, done trying, tis gods will, apparently.
As it turned out, the cover wasn't the last thing i'd end up poaching off the first LH. I was on the fence about stealing the already finished tyres or doing the new ones. That decision was simplified when I saw how bad the tyre decals were. So now I need a set of 1 20 scale milk crates to put the first LH up as she looks like she was parked in a bad part of the course for a while
Getting closer.....
I was so disappointed the Motsenbocks didn't work on the TS stuff. Thought I had found the miracle cure for screw ups..... only on the Testors enamel.
Originally, I was so afraid the colors would bleed through the white decal is why I was adamant about painting it white. After seeing how well the T4 decals went on with no bleed through, I kinda figured the same would probably hold true for the Shunko decals. And I was right!
That white decal is still a pain in the ass all unto itself.
As I was adjusting my trusty Tamiya masking tape I heard that unmistakable "crack"......it was all I could do to not just drop the thing on the ground and stomp on it like a blue cockroach! Instead....took a deep breath...put it in the box....tried again the next day.
dry fit....so far, so good.
And the original Leyton Ho Use ( nice splice job, huh?)that needs to be up on blocks after having all its bits and pieces took. I couldn't get that right rear wheel off, had to take the tire off.
Ah, the engine cover, the achilles heel of this kit. I had it all painted, blue green and the white stripe. Turned out I made the white stripe a tad too wide. No problem, i'll just cut the stripe decal and "widen" it. LONG story short, that didn't work. I had it close enough but it bothered me, so I put it on hiatus.
I then focused on the T4 kits and in doing that found the Motsenbocks paint stripper that worked SO well on the Ferrari( painted with Testors paint ) that I opted to dunk the LH in and strip that and start all over as well. ....and I found out the HARD way that the Motsenbocks doesn't work on TS paints. What it DOES do is eat Tamiya epoxy putty like it wasn't even there and it dissolves THIN pieces of plastic passing for head rests into bubbles.....this was a set back.
After cooling off for 4 some odd months at how much I hate that engine cover and that BS headrest, I poached the cover from the first LH. I stripped the decals off ( was never happy with that effort either), sanded it smooth, puttied those goddamn seams AGAIN along with one of the sidepods, painted the whole thing TS17 alu then painted it the Coral Blue and Mr Color 66 green, no white this time.
And with my 4th set of decals, I finally willed this annoying thing towards the finish line. BUT! But not before that seam popped again! At this point, done trying, tis gods will, apparently.
As it turned out, the cover wasn't the last thing i'd end up poaching off the first LH. I was on the fence about stealing the already finished tyres or doing the new ones. That decision was simplified when I saw how bad the tyre decals were. So now I need a set of 1 20 scale milk crates to put the first LH up as she looks like she was parked in a bad part of the course for a while
Getting closer.....

I was so disappointed the Motsenbocks didn't work on the TS stuff. Thought I had found the miracle cure for screw ups..... only on the Testors enamel.

Originally, I was so afraid the colors would bleed through the white decal is why I was adamant about painting it white. After seeing how well the T4 decals went on with no bleed through, I kinda figured the same would probably hold true for the Shunko decals. And I was right!

That white decal is still a pain in the ass all unto itself.

As I was adjusting my trusty Tamiya masking tape I heard that unmistakable "crack"......it was all I could do to not just drop the thing on the ground and stomp on it like a blue cockroach! Instead....took a deep breath...put it in the box....tried again the next day.

dry fit....so far, so good.

And the original Leyton Ho Use ( nice splice job, huh?)that needs to be up on blocks after having all its bits and pieces took. I couldn't get that right rear wheel off, had to take the tire off.
-
bossy122
Topic author - Constructors Champion
- Posts: 1380
- Joined: Thu May 01, 2008 11:04 am
- Location: HOT California, USA
- Status: Offline
Re: Tamiya Leyton House
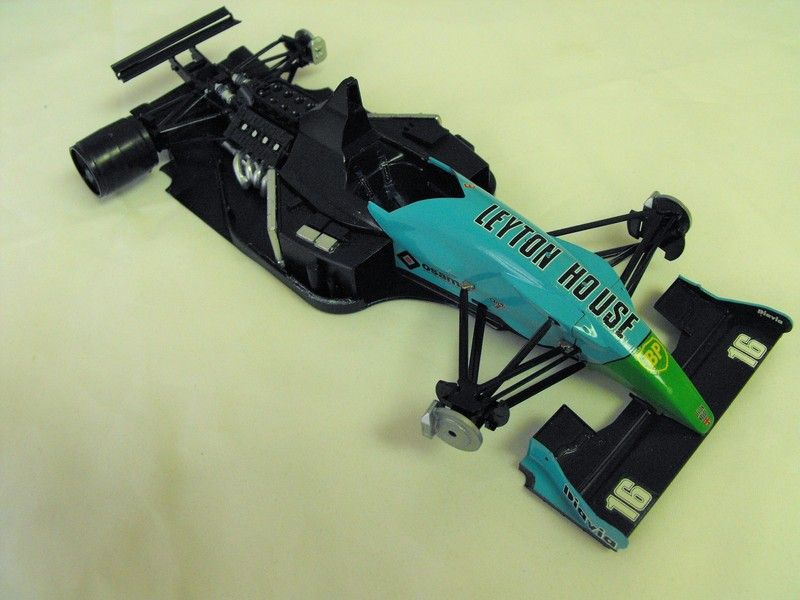
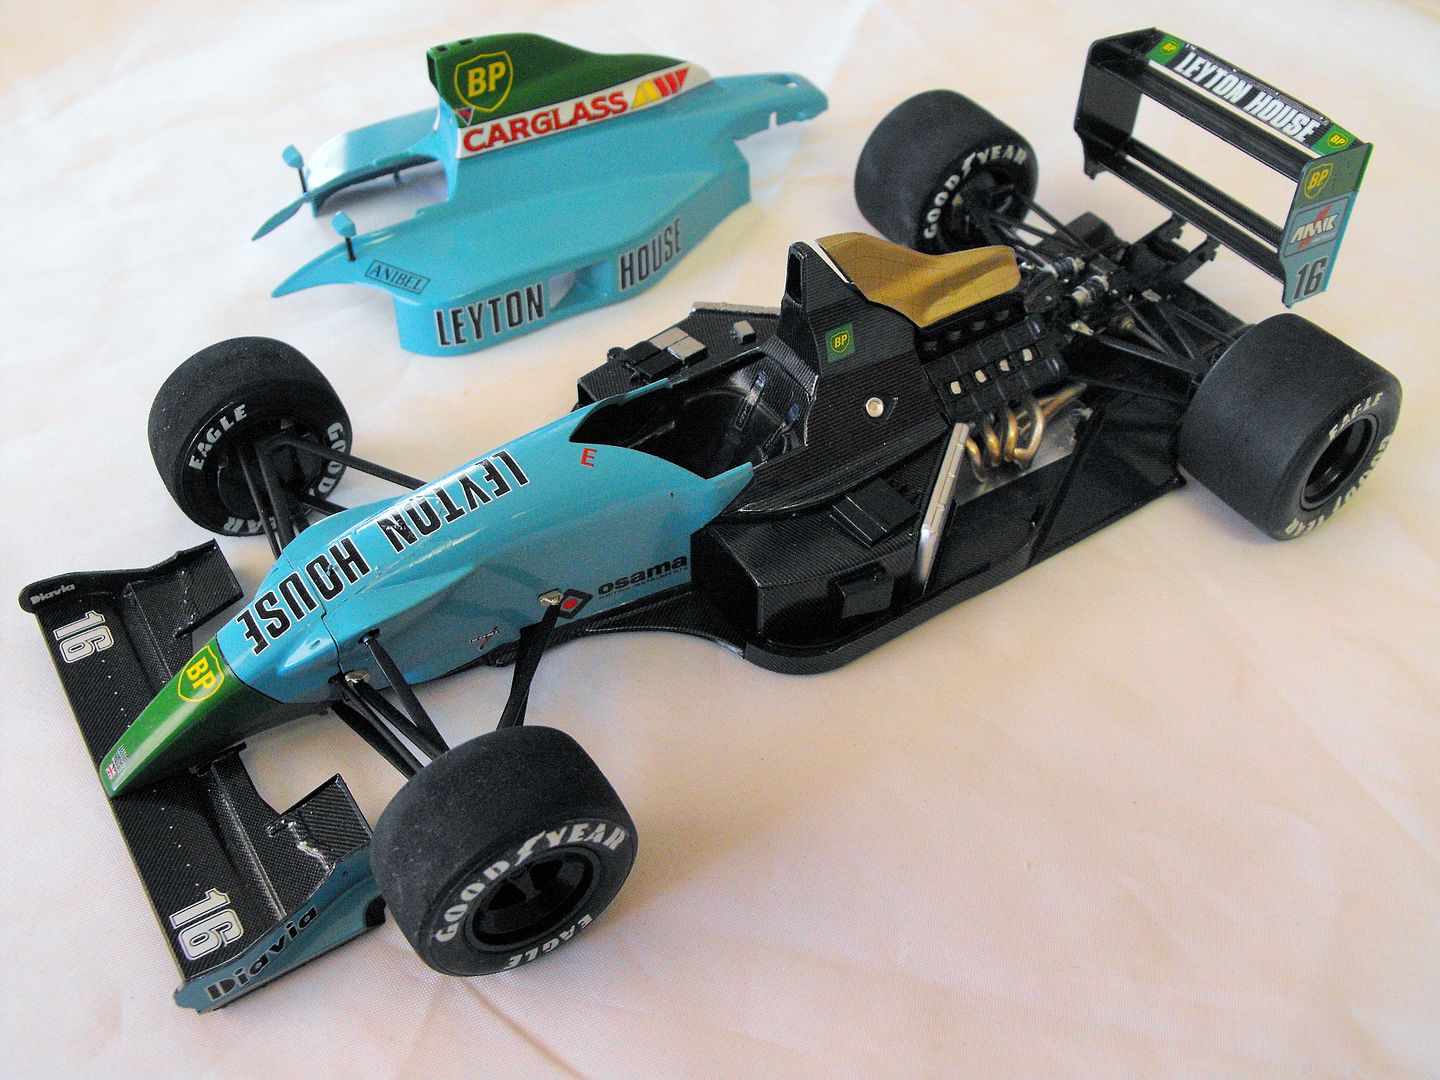
Hey, it's all done. I wish I could get a pic of it with the cover on but to get it over the radiators would require some stretching and well, pretty sure I know what would happen, so it ain't happening.
Same pain in the ass kit I remembered from the first build, mostly because of a single flawed part. And now it goes from the shelf of doom to the storage box of doom ( got no place to put it ).
Same pain in the ass kit I remembered from the first build, mostly because of a single flawed part. And now it goes from the shelf of doom to the storage box of doom ( got no place to put it ).


