M23 1973 Yardley WIP
-
- Major Constructor
- Posts: 1060
- Joined: Fri Mar 18, 2011 2:31 pm
- Location: New Hampshire - USA
- Status: Offline
Re: M23 1973 Yardley WIP
You are doing a excellent job. I also make my own a/n fitting when I need them
Please, keep the updates coming
Thanks for share your w.i.p.
Starr
Please, keep the updates coming
Thanks for share your w.i.p.
Starr
Classic Plastic Model Club - Lowell, MA
-
- FOTA Chairman
- Posts: 4540
- Joined: Sun Jun 24, 2007 11:39 am
- Favorite F1 Team or Driver: Riccardo Patrese
- Location: Hull, England.
- Status: Offline
Re: M23 1973 Yardley WIP
You mention trouble with the top of the monocoque, what issues have you had? Everything looks good to me, look forward to seeing this one finished.
-
- FOTA Chairman
- Posts: 2930
- Joined: Mon Mar 21, 2005 8:27 pm
- Your Name: Indycals
- Favorite F1 Team or Driver: Lotus
- Location: 6450'/1955m Colorado USA
- Contact:
- Status: Offline
Re: M23 1973 Yardley WIP
Looking good. I really like seeing Peter Revson getting some recognition.
Re: M23 1973 Yardley WIP
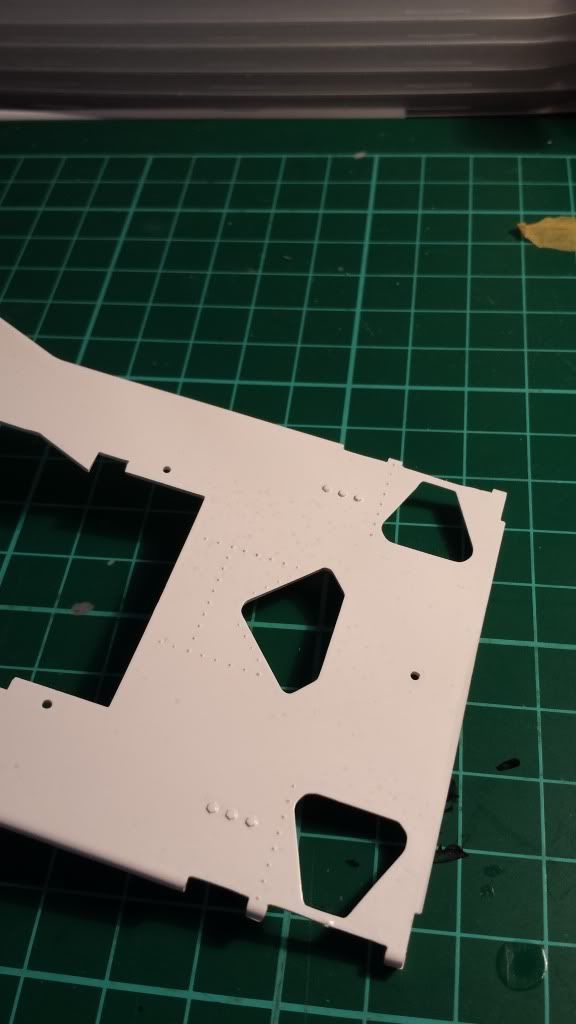
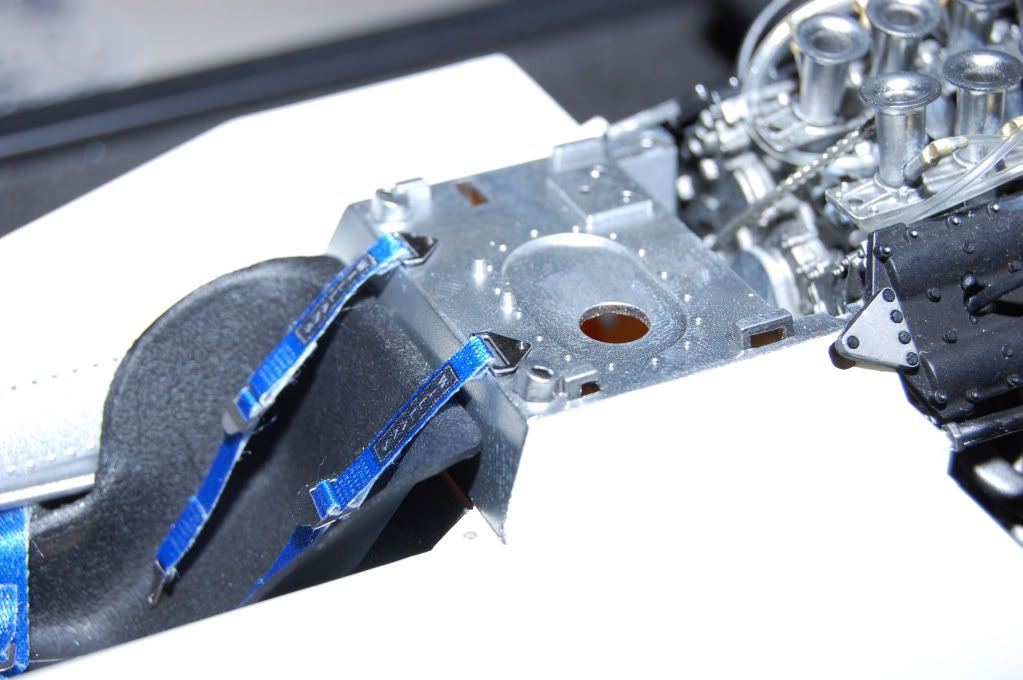
This is the current top piece it reacted when I painted the tamiya rattle cans over the primer there must of been some sort of contaminate on the primer, in the future I will use some sort of panel wipe.daveyman wrote:You mention trouble with the top of the monocoque, what issues have you had? Everything looks good to me, look forward to seeing this one finished.
-
- Team Owner
- Posts: 803
- Joined: Wed Dec 17, 2008 11:10 pm
- Favorite F1 Team or Driver: BRM, Lotus, Ferrari
- Location: Canada
- Contact:
- Status: Offline
Re: M23 1973 Yardley WIP
Adamg1987
Had some time to take a closer look. Very clean building. Should look great completed.
Cheers
Had some time to take a closer look. Very clean building. Should look great completed.
Cheers
Re: M23 1973 Yardley WIP
Just read thru your thread, any progress. Nice clean build sytle and look forward to more. This happens to be a fav of mine and I too started a Peter Revson build, but alas, never completed it.
Rick
Rick
I feel the need, the need for speed.........
Re: M23 1973 Yardley WIP
Hi Rick, yeah I have been following all your McLaren builds as I have the 76 Transkit I have commented on your threads a few times bugging you for progress
I have made some progress but unfortunately as I'm in the progress of moving out of my current home time has been sparse and I wont have a modelling area much longer.
Hopefully I will get this one buttoned up before that happens but I'm in no rush as I don't want to ruin it! I have yet to finish a model and this one is close!
The fourth and final top body part has been completed and attached, I'm not too happy with the seam but I started this way before I read about people making there kits seamless doh!
I have attached the engine and started work on the rest of the oil plumbing.
I will get some some updated pictures up this weekend hopefully and maybe a little more progress.
Adam
Re: M23 1973 Yardley WIP
Here are pics only a few months after I said I would upload some, progress has come to a halt I have no where to paint anymore so the few bits I need to finish will have to wait!
Pictures of the engine attached to body with the top half of body attached.
I have made a start on making up the rest of the a/n fittings as seen towards rear of car.
I can't find any reference pictures of how the seat belts attached but I wasn't happy with the tamiya way so I installed some buckles and rivets to look more realistic I understand this may not be accurate but the whole car isn't a 100% replica so I'm ok with that.
Re: M23 1973 Yardley WIP
Making some more progress, i have managed to route the wiring from the back of the instrument cluster to the rear of the car using top studio fasteners, i used a drop of c/a glue to attach the fasteners at various points down the cockpit.
Once dry i routed the wires through the fasteners and wrapped the tie pieced around the wires using some tweezers.
My next problem is trying to route my braided hoses from the fuel pump around the roll hoop as i appear to have little room :/ im taking it slow as i dont want to mess it up.
Once dry i routed the wires through the fasteners and wrapped the tie pieced around the wires using some tweezers.
My next problem is trying to route my braided hoses from the fuel pump around the roll hoop as i appear to have little room :/ im taking it slow as i dont want to mess it up.
-
- FOTA Chairman
- Posts: 3178
- Joined: Sat May 14, 2005 8:50 am
- Your Name: Chris Bartholomew
- Favorite F1 Team or Driver: Forza Ferrari!!!
- Location: Michigan, USA
- Status: Offline
Re: M23 1973 Yardley WIP
Just caught up with your build, and very impressed!! I really like your scratch-built A/N Fittings, they look great!
It's always a challenge to figure out where all the plumbing and wiring begins, ends and routes through it all, but it's kinda fun, eh? Looking forward to seeing some more progress on the Macca.
Cheers,
Chris
It's always a challenge to figure out where all the plumbing and wiring begins, ends and routes through it all, but it's kinda fun, eh? Looking forward to seeing some more progress on the Macca.
Cheers,
Chris
-
- Similar Topics
- Replies
- Views
- Last post
-
- 4 Replies
- 221 Views
-
Last post by marlborored