Speed Build: Hasegawa 1/20 312T2


Topic author
hirofkd
Backmarker
Backmarker
Posts: 338
Joined: Thu Feb 02, 2006 8:50 pm
Location: Austin, TX
Contact:
Status: Offline

Speed Build: Hasegawa 1/20 312T2

Post by hirofkd »

Looking at piles of boxes, I decided to join this speed build. I chose Hasegawa's 312T2 since it was expected to be less troublesome than Fujimi's recent F1 offerings.
Image

It's been two weeks, and the chassis is almost done.

<Day1: Feb 7>
I read the instruction and identified which parts were going to be painted in what colors.

<Day2: Feb 8>
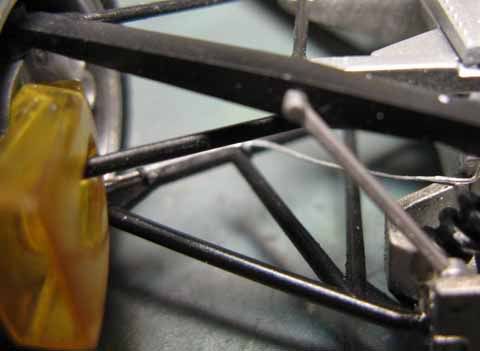
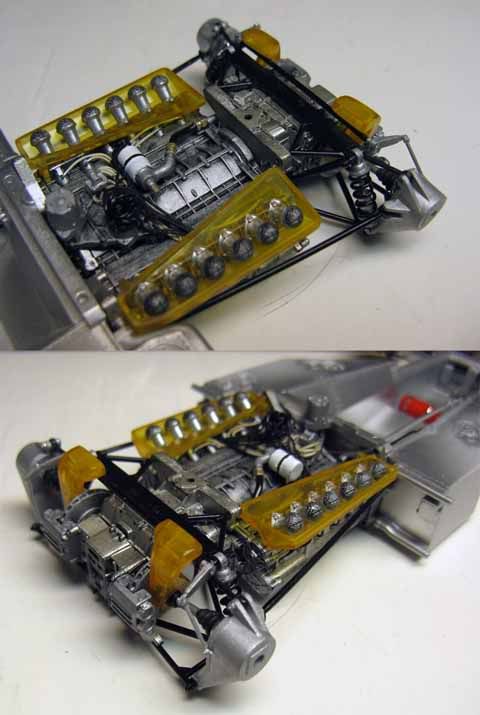
Since the engine parts were black, I skipped priming and just dry-brushed several different silver paints.
Image


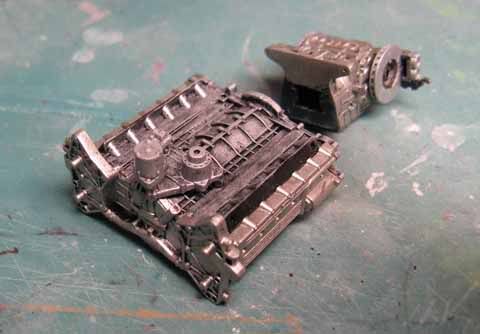
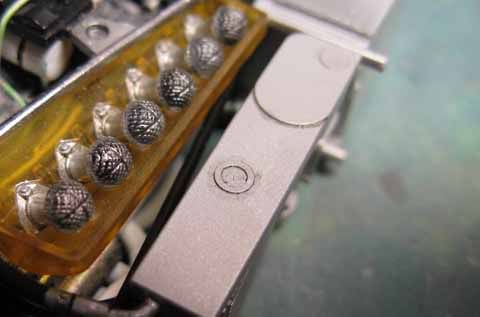
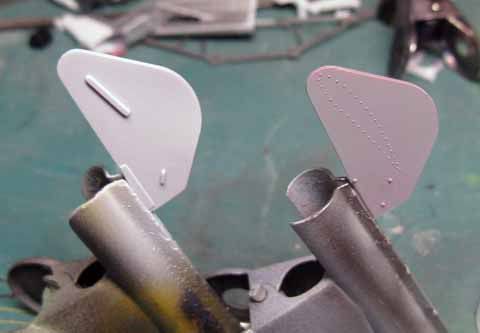
The intake mesh is molded in clear. The parts are meant to be translucent, but dry-brushed silver didn't look convincing enough, so I ended up painting the back side black in order to enhance the contrast.
Later, I realized the "X" part should have been silver, and I could have cut a thin strip of Bare Metal foil for them, but I decided not to.
Image

<Day3: Feb 9>
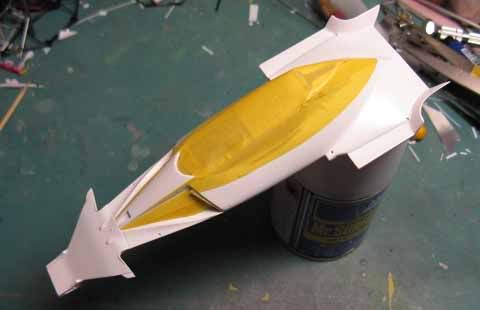
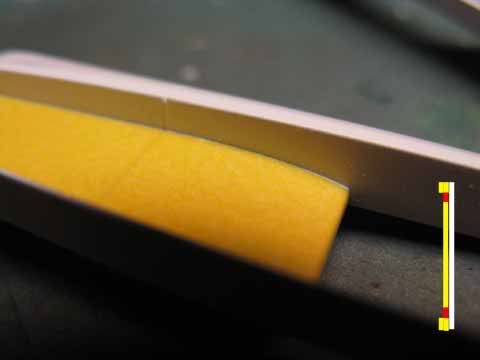
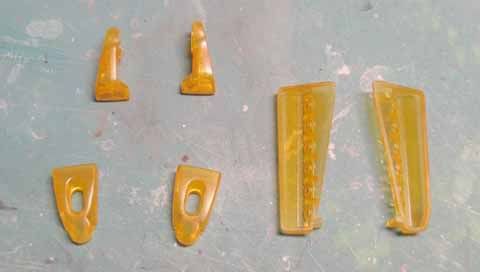
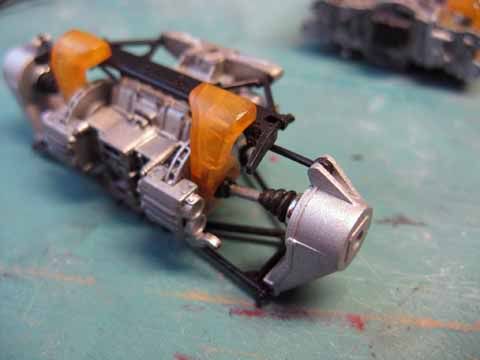
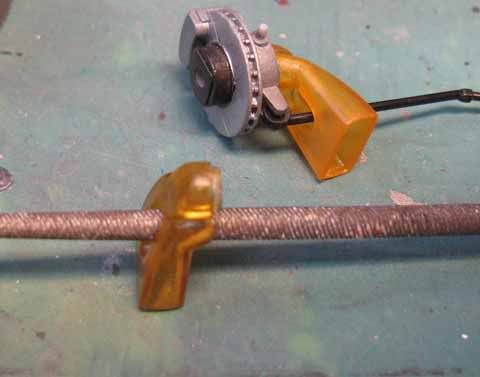
I painted the trays (what's those things called?) and brake ducts with a mix of clear yellow, clear orange, flat base additive and a tiny bit of white. It didn't turn out dull enough, and ended up fixing it later.
Image

<Day4: Feb 10>
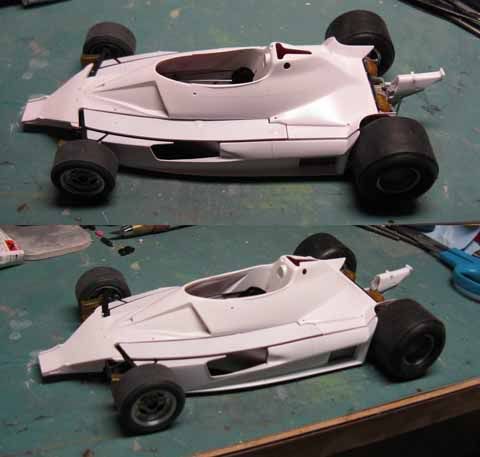
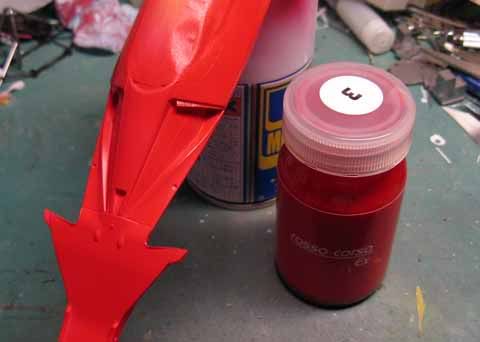
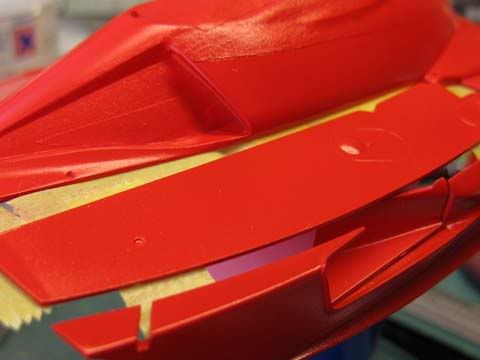
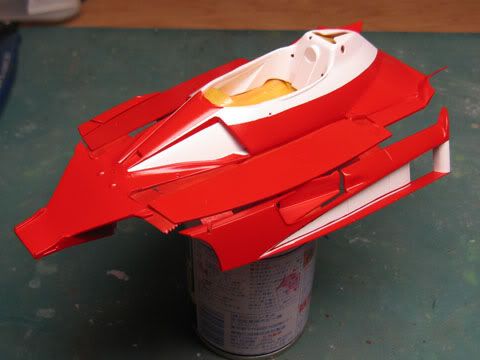
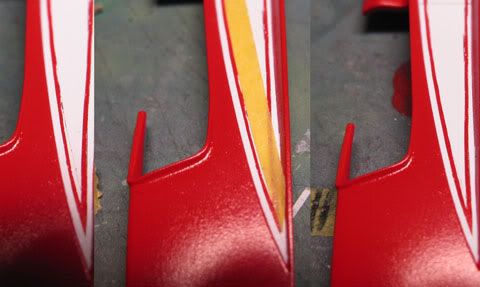
I probably should have started the body first as it involves several steps of preparation and painting. Anyhow, I used plastic welder to affix the white pieces to the body in order to minimize the use of putty.
Image

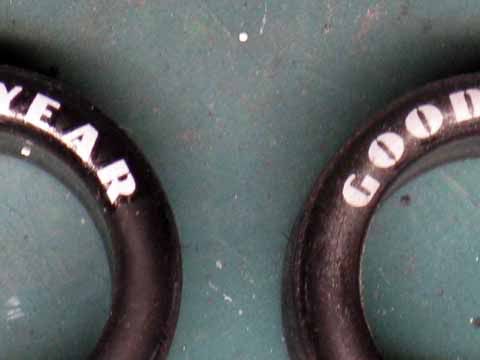
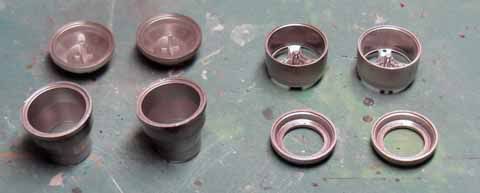
I also painted the wheels with Spazstix Mirror Chrome. Like any paints of this kind, the smoothness of the black base coat is critical. Since I didn't make any extra effort in sanding and polishing the base coat, the chrome didn't quite turn out as shiny as I had hoped.
Image

<Day5: Feb 11>
None
<Day6: Feb 12>
None

<Day7: Feb 13>
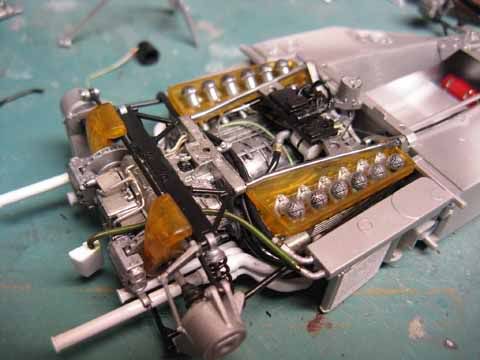
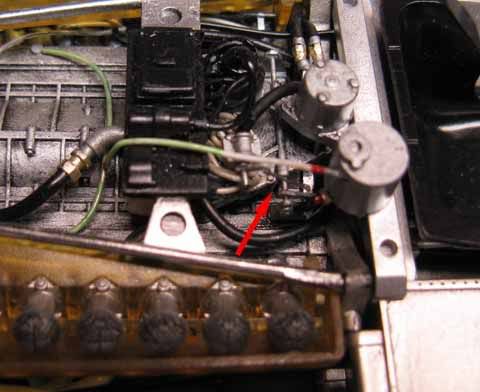
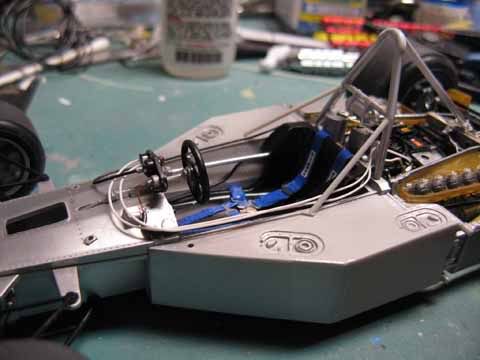
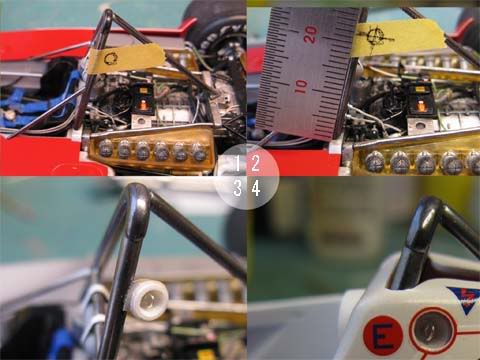
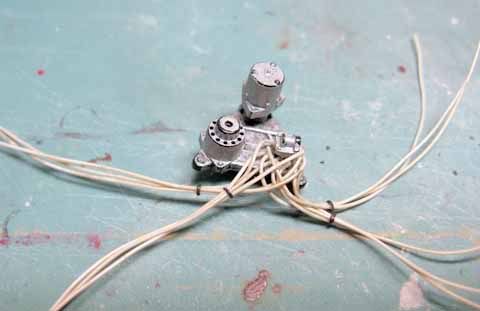
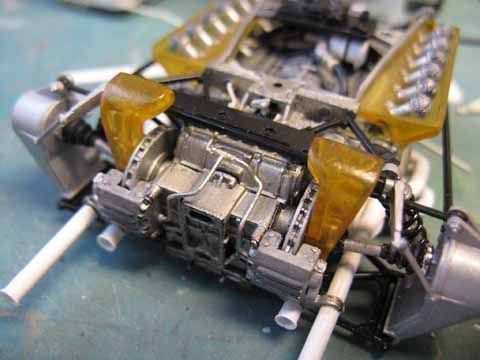
Although this is a speed build, I just couldn't leave the top of the engine looking so empty. So I drilled holes and adding fuel lines and spark plug wires.
Image

<Day8: Feb 14>
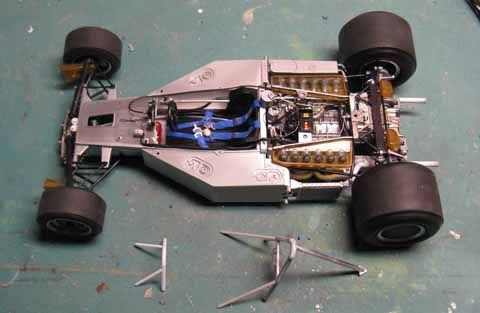
I began putting together sub assemblies.
Image

<Day9: Feb 15>
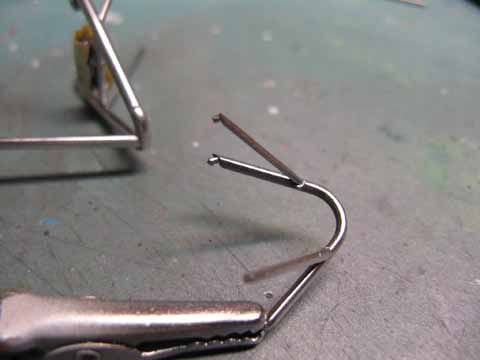
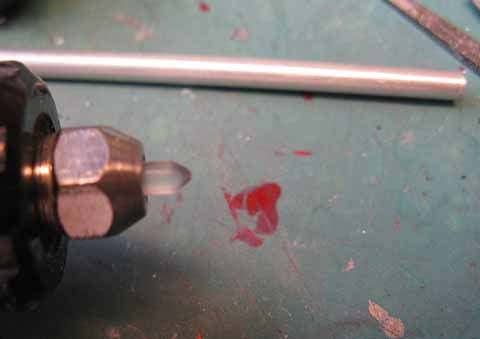
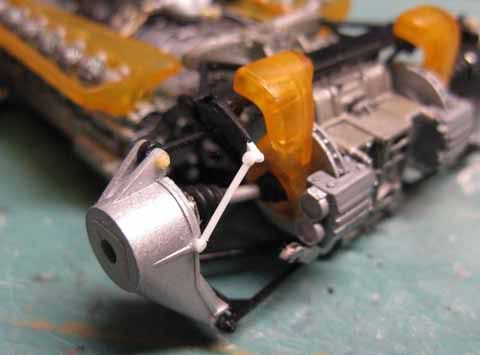
I noticed that there was a missing linkage, so I fabricated it with a styrene rod.
Image
Image

<Day10: Feb 16>
None

<Day11: Feb 17>
None

<Day12: Feb 18>
I started working on small parts.
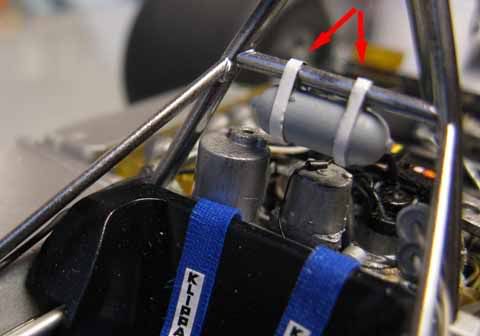
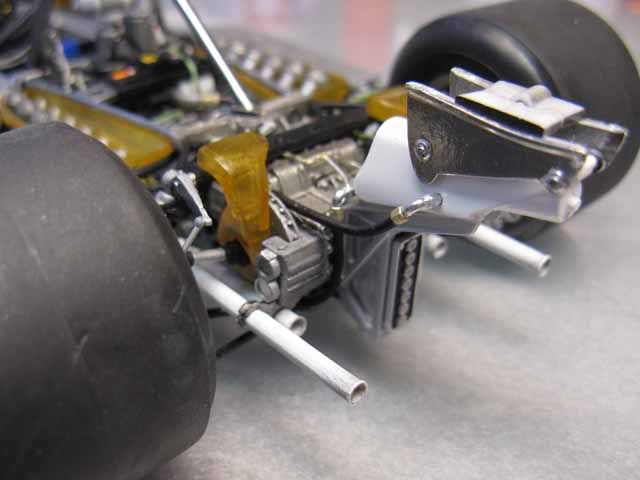
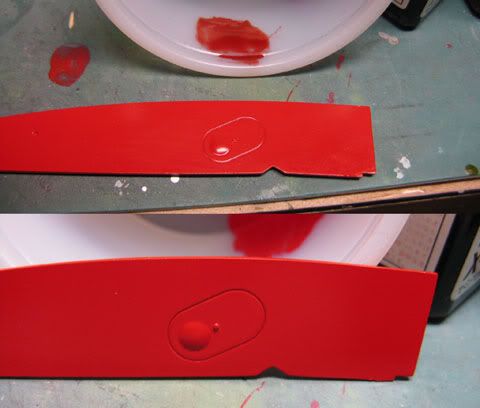
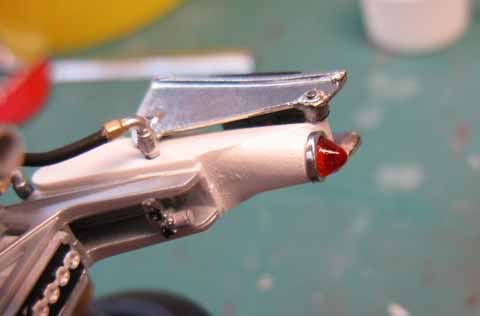
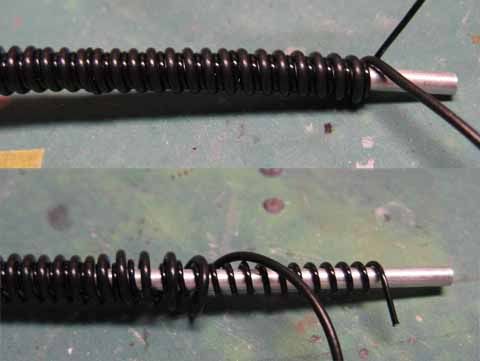
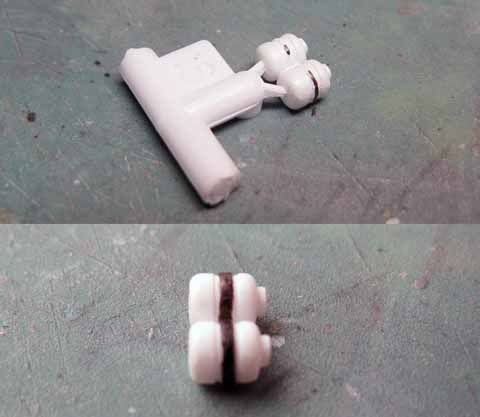
I filled the back side of the tank with styrene, and filed off the excess plastic. Once again, I couldn't help but to enhance the appearance of the rear shock absorbers since the parts are so noticeable (but I skipped on the front), so I fabricated the spring with a wire.
Image
Image
Image

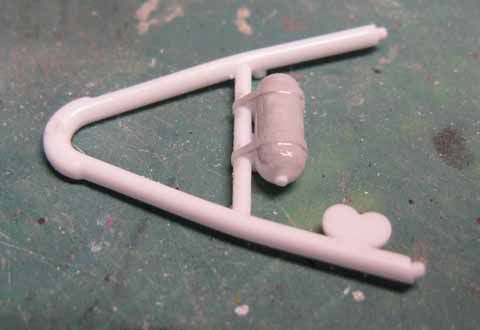
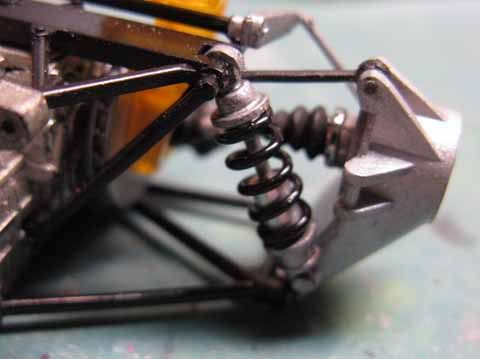
Here is the rear section of the model.
Image

<Day13: Feb 19>
None

<Day14: Feb 20>
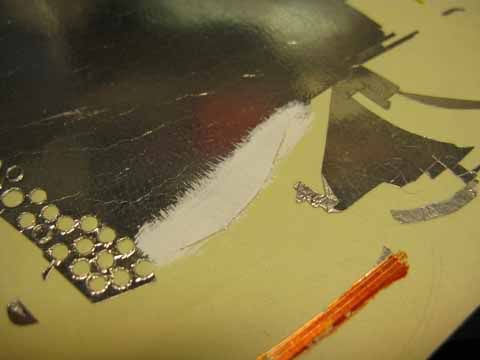
I noticed that the rim of the rear wheels had ejector marks, so I ended up smoothing them out. It only affected the very outer edge, so brush-painted Alclad chrome, which was adequate because the rest of the wheel wasn't shiny chrome either.
Image

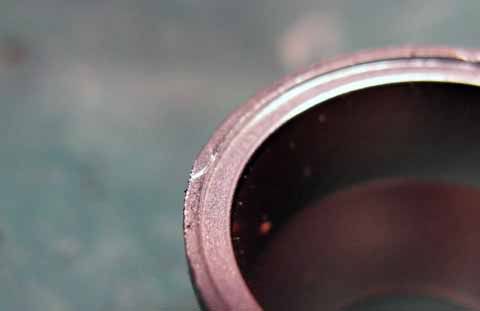
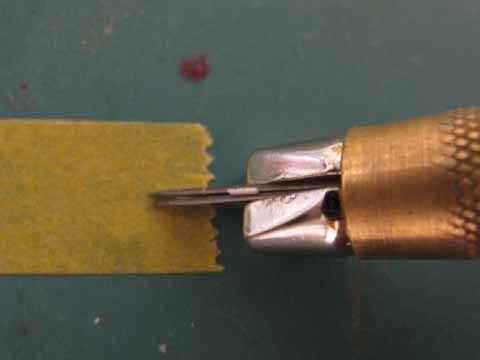
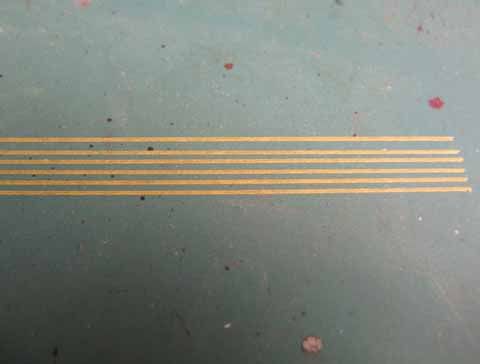
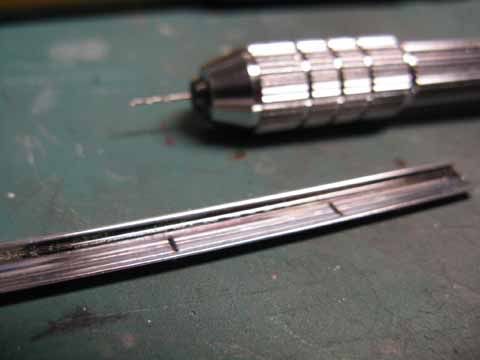
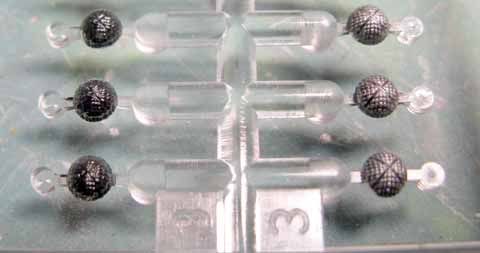
After began painting the black strip on these bottles, I thought, "Maybe I should use making tapes" until I realized I could paint a narrow strip of masking tape in black, and simply apply it around the bottle.
Image

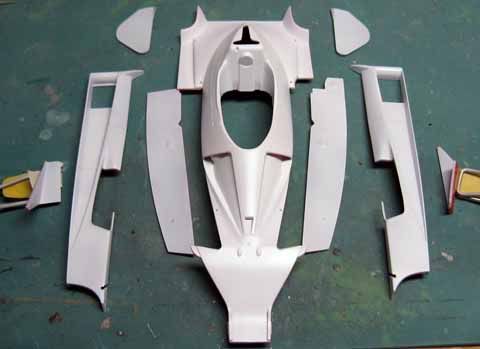
I also began priming the body parts with Mr. Surfacer 1200 followed by Finisher's Foundation White.
Image

<Day15: Feb 21>
I didn't like the look of the brake ducts, so I darkened it a bit by applying Tamiya X-19 Smoke. I also added brake fluid lines, even though I knew I shouldn't be spending too much time on details.
Image
Image

<Day16: Feb 22>
A few more layers of Foundation White was added. The finishing white will be GSI Creos GX Cool White.
Image
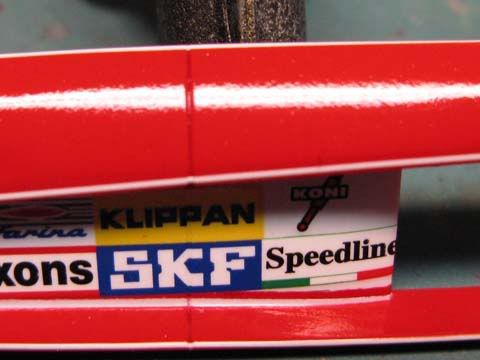
I didn't have very many T2 references, especially the '76 car, so I took some guesses based on what I could figure out from the T, '77 T2 and T3, as well as several 1/12 scale 312 kit instructions.
Image
Image
User avatar

lezdep
FOTA Chairman
FOTA Chairman
Posts: 3622
Joined: Tue Aug 23, 2005 2:42 am
Favorite F1 Team or Driver: Senna
Location: Toronto
Status: Offline
Canada

Re: Speed Build: Hasegawa 1/20 312T2

Post by lezdep »

Great start. Looking forward to completion of this model. I'm also glad you were lured into
speed build and finally posting your work here. Welcome back and I hope to see more of your
work. Good luck with this build.

43rdMichael
FOTA Chairman
FOTA Chairman
Posts: 2610
Joined: Thu May 12, 2005 9:43 pm
Location: Melbourne, Australia
Status: Offline

Re: Speed Build: Hasegawa 1/20 312T2

Post by 43rdMichael »

Awesome!

That's a very nice looking model - irrespective of the pace at which you're building it! Very impressive!
User avatar

daveyman
FOTA Chairman
FOTA Chairman
Posts: 4540
Joined: Sun Jun 24, 2007 11:39 am
Favorite F1 Team or Driver: Riccardo Patrese
Location: Hull, England.
Status: Offline
Great Britain

Re: Speed Build: Hasegawa 1/20 312T2

Post by daveyman »

Wow, if thats the standard you reach in a speed build then I'm very envious. Looking very good so far. A great engine and gearbox to detail, lots of character to them. Keep up the good work...

Topic author
hirofkd
Backmarker
Backmarker
Posts: 338
Joined: Thu Feb 02, 2006 8:50 pm
Location: Austin, TX
Contact:
Status: Offline

Re: Speed Build: Hasegawa 1/20 312T2

Post by hirofkd »

Here's another batch of updates. This speed build is becoming a regular build.
To make the matter worth, Fujimi's MP4/5 kit inspired me to buy Tamiya's MP4/4
and MP4/5B kits, (both of which I was commissioned to build before, so I don't
have my own). That makes the radio of finished to purchased models 0 to 2
(without counting the upcoming MP4/5.)
The whole idea of speed build is to turn this ratio around, but oh well...

<Day17: Feb 23>
None

<Day18: Feb 24>
I did a little bit of detailing like washing to the tank shown here.
Image

<Day19: Feb 25>
<Day20: Feb 26>
None

<Day21: Feb 27>
I spent a little adding the throttle linkage (totally unnecessary for a speed-built model, I know).
Image

<Day22: Feb 28>
I finished painting the wheels, including the tiny black bolt details.
(That was tedious...)
Image

<Day23: Mar 01>
I noticed that my progress slowed down considerably, and I realized that
it was because of clutter on the workbench. So I spend a little time
cleaning the desk.
Image

<Day24: Mar 02>
(No photo)
Hasegawa's tires feel softer and stickier than Tamiya's, so
removing the seam lines wasn't as easy as Tamiya's.

<Day25: Mar 03>
I took some pictures of a white 312T2 just for fun. I airbrushed
Finisher's Foundation White, followed by Creos's GX-1 Cool White.
Image

<Day26: Mar 04>
<Day27: Mar 05>
None

<Day28: Mar 06>
<Day29: Mar 07>
I built the gauges, and also made the seat belts. Then I dry-fitted the oil and fuel pressure gauge wiring.
Image
Image

<Day30: Mar 08>
<Day31: Mar 09>
<Day32: Mar 10>
None

<Day33: Mar 11>
I painted the role bars with Alclad Chrome.
Image

The rear section of the car was fairly detailed, but the front was out-of-the-box, so added the brake lines.
Image

I masked the white areas in preparation for the application of red.
Image

<Day34: Mar 12>
A while ago, I bought Gaianotes six-bottle prancing horse color set, which included 70's F1 color, so I decided to try it out.
The paint was fairly opaque, so it only required 3-4 light coats to hide the white base coat. The color looks orangish, but seems
fairly accurate when compared to some of the real car's photos taken under the sun.
Image

I started painting the bottle straps using a small brush, but quickly realized that it'd result in uneven width,
so instead, I painted a part of Modeler's Meta-Look white, cut out a thin strip, and applied it over the kit part.
Image
Image

<Day35: Mar 13>
The tire decals turned out glossy, so I mixed a tiny amount of Tamiya Acrylic Smoke and Flat Base with a lot of thinner,
and gently top-coated the decals. The left shows the logo without the flat smoke top-coat, and the right with the top-coat.
Image

I also add some of the remaining parts, like the wing support, battery, some kind of reservoir tank etc.
Image

<Day36: Mar 14>
I decided not to use the white decals on the side of the body, because I was afraid of bleeding.
Image

I attached two blades to the holder as shown, and put a spacer in-between in order to get the desired gap.
Then I cut out narrow masking tapes, and applied then at the top and bottom of the indented section on
the side panels. Using the masking tape as a guide, I used the double-blade knife to remove the part that
had to be painted red.
Image
Image

Later, I realized that I could have super-glued a thin plastic sheet directly to the large masking tape. That would
have worked much better than the soft masking tape.

I added a few more light coats of red. This time, I used more thinner and Mr. Regarder than the previous coats.
Image

I'm hoping to finish the model in the next batch of updates. I might use urethane clear to speed up the final stage of painting.

43rdMichael
FOTA Chairman
FOTA Chairman
Posts: 2610
Joined: Thu May 12, 2005 9:43 pm
Location: Melbourne, Australia
Status: Offline

Re: Speed Build: Hasegawa 1/20 312T2

Post by 43rdMichael »

Very nice!

jps
F3
F3
Posts: 19
Joined: Mon Feb 14, 2005 1:45 pm
Status: Offline

Re: Speed Build: Hasegawa 1/20 312T2

Post by jps »

Thank you for the build diary.
Great skills. Following with anticipation.
My T2 arrived at the door yesterday.
Among all the new 1/20 releases in recent times, this is my first purchase.
User avatar

vekkuli
FOTA Chairman
FOTA Chairman
Posts: 4438
Joined: Wed Dec 21, 2005 3:20 pm
Favorite F1 Team or Driver: Stake Sauber
Location: Oulu-Uleåborg Finland
Status: Offline
Finland

Re: Speed Build: Hasegawa 1/20 312T2

Post by vekkuli »

Cool Build :) .
User avatar

Shunter
FOTA Chairman
FOTA Chairman
Posts: 2886
Joined: Sat Sep 20, 2003 12:38 am
Favorite F1 Team or Driver: Alfa Romeo, McLaren, Williams
Location: Melbourne, Australia
Contact:
Status: Offline
Australia

Re: Speed Build: Hasegawa 1/20 312T2

Post by Shunter »

Excellent work so far and i do like your mix for the air ducts etc, great touch.

Topic author
hirofkd
Backmarker
Backmarker
Posts: 338
Joined: Thu Feb 02, 2006 8:50 pm
Location: Austin, TX
Contact:
Status: Offline

Re: Speed Build: Hasegawa 1/20 312T2

Post by hirofkd »

Things didn't turn out as I had planed, but the project is going steadily. Instead of using urethane clear,
I used Gaianote's EX Clear, which dries quickly, and gives a glossy finish that almost matches
urethane's (because Gaia's paint film is very strong).

<Day37: Mar 15>
<Day38: Mar 16>
<Day39: Mar 17>
<Day40: Mar 18>
I removed the masking tapes, and applied two layers of clear, so I could sand the clear layer without affecting
the base coat. This smoothing process helps the decals adhere better, and also prevents hazing.
Image

<Day41: Mar 19>
<Day42: Mar 20>
<Day43: Mar 21>
<Day44: Mar 22>
<Day45: Mar 23>
<Day46: Mar 24>

<Day47: Mar 25>
I didn't want to sharpen the panel lines after applying layers and layers of clear coat, so I darkened
the panel lines before clear coating. I mixed enamel red and black with a lot of thinner, and let it flow
along the grooves. It's hard to see in the photos, but it's fairly noticeable in person.
Image

<Day48: Mar 26>
A part of the painted red lines didn't turn out well, so I partially masked the part, and corrected the width.
The bottom line (right side in the pictures) isn't even either, but it was going to be covered by a decal,
so I didn't bother fixing that part.
Image

<Day49: Mar 27>
In the kit, the cut-off pin housing is supposed to be glued to the body, but that
doesn't look realistic, so I decided to place it to the roll-bar. I applied a masking tape to the roll bar,
and dry-fitted the body, so I could mark the location. Then, I measured the exact location and took notes.
After that, I made an extension with a plastic sheet, and glued the housing. The pin was made of thin
electrical wire.
Image

Somehow I misplaced the clear brake light part, so I had to make it from a clear sprue. I just attached
a short segment to my Dremel tool, and made a cone-shaped part. Then I made the ring by cutting
an aluminum pipe.
Image

Once the aluminum bracket was polished, it looked pretty realistic.
Image

The third element of the rear wing has has noticeable slits and bolts, but they are omitted in the kit,
so I made those slits by drilling several holes, and removed the unnecessary portion with a sharp knife.
Image

<Day50: Mar 28>
<Day51: Mar 29>
<Day52: Mar 30>
<Day53: Mar 31>
<Day54: Apr 1>
<Day55: Apr 2>
<Day56: Apr 3>
Clear-coating and drying.

<Day57: Apr 4>
After applying six very thin coats of EX Clear, the surface began to look glossy.
Image
Locked