Porsche 935 K3 Coca Cola – 1/24 Nunu
-
parklaneworks
- Backmarker

- Posts: 343
- Joined: Fri Jul 23, 2010 8:23 am
- Favorite F1 Team or Driver: Ferrari, Lotus, Brabham
- Location: Rotterdam, Netherlands
- Status: Offline

Re: Porsche 935 K3 Coca Cola – 1/24 Nunu
Looks very good! All the detail is amazing!
-
 JesusM
Topic author - Backmarker
- Posts: 341
- Joined: Thu Oct 28, 2010 4:24 am
- Favorite F1 Team or Driver: Ferrari, Tyrrell
- Location: Madrid - Spain
- Contact:
- Status: Offline

Re: Porsche 935 K3 Coca Cola – 1/24 Nunu
Ya se ve la luz al final del tunel!! Este proyecto tiene ya sus dias contados para que llegue a su fin. Y eso no quiere decir que no haya procesos que hacer y mostrar, puesto que el trabajo final requiere mucha paciencia y calma, porque pueden arruinar todo el trabajo previo.
There is light at the end of the tunnel! This project has its days counted down to the end. And that does not mean that there are no processes to be done and shown, since the final work requires a lot of patience and calm, because they can ruin all the previous work.
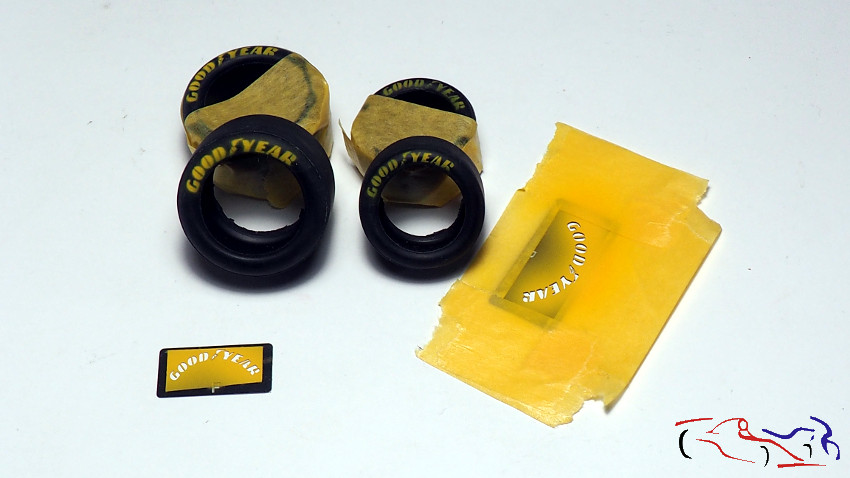
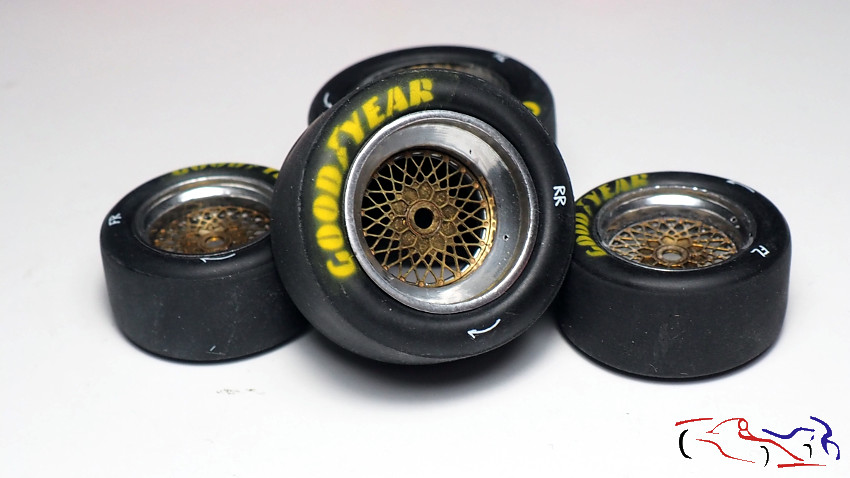
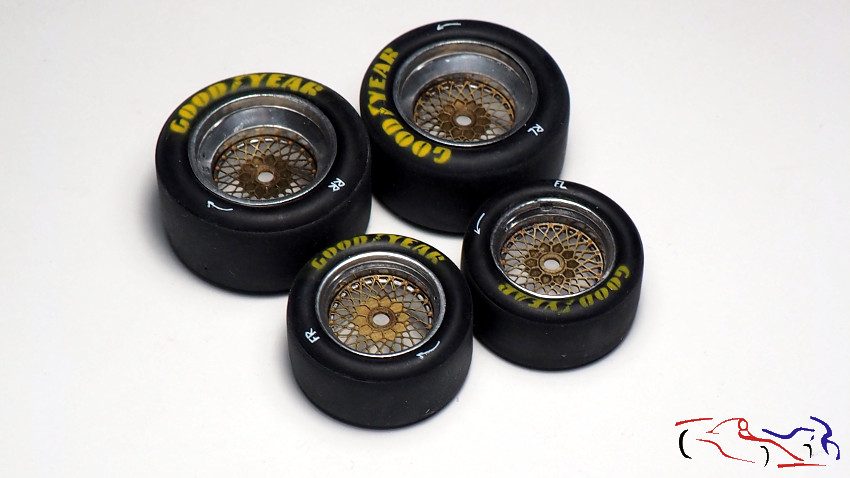
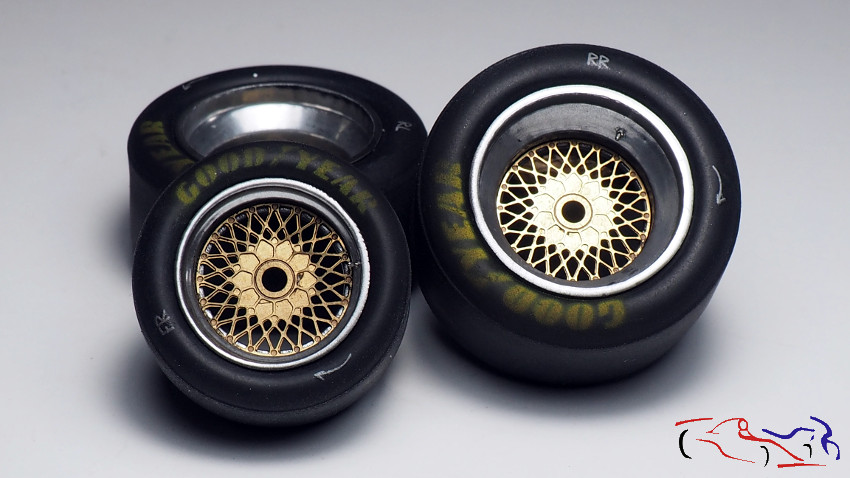
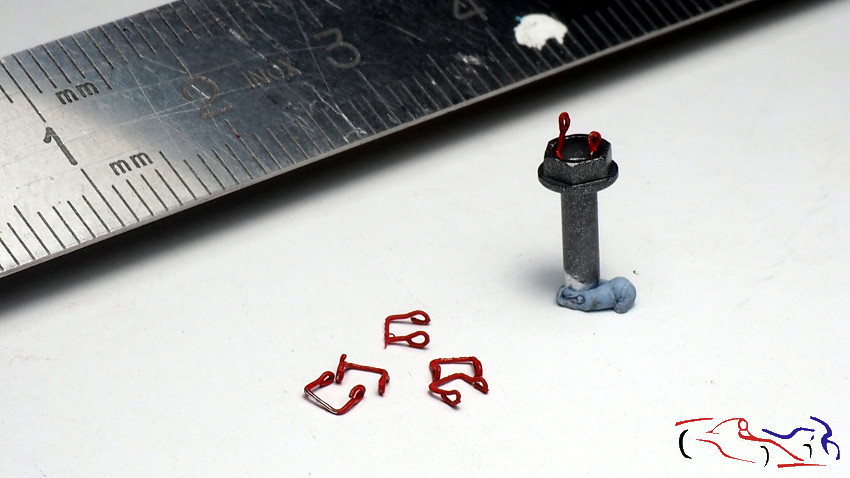
El primero de esos procesos son las ruedas. Comenzaremos protegiendolas para pintar el logo de los neumáticos con amarillo acrílico de Tamiya, y para ello uso un fotograbado del Ferrari 312T de Studio27. Una vez pintado, le añado las marcas de tiza (calcas de Decalcas) y le doy un sombreado final de XF1 de Tamiya, disuelto al 50%. Terminamos creando las fijaciones de las llantas, hechas con cable de 0,2mm y pintadas com rojo brillante de Tamiya LP.
The first of these processes is the wheels. We start by protecting them to paint the tyre logo with Tamiya acrylic yellow, and for this I use a photoetched Ferrari 312T from Studio27. Once painted, I add the chalk marks (from Decalcas decals) and give it a final shading of Tamiya XF1, dissolved at 50%. We finish by creating the rim mountings, made with 0,2mm wire and painted with Tamiya LP bright red.
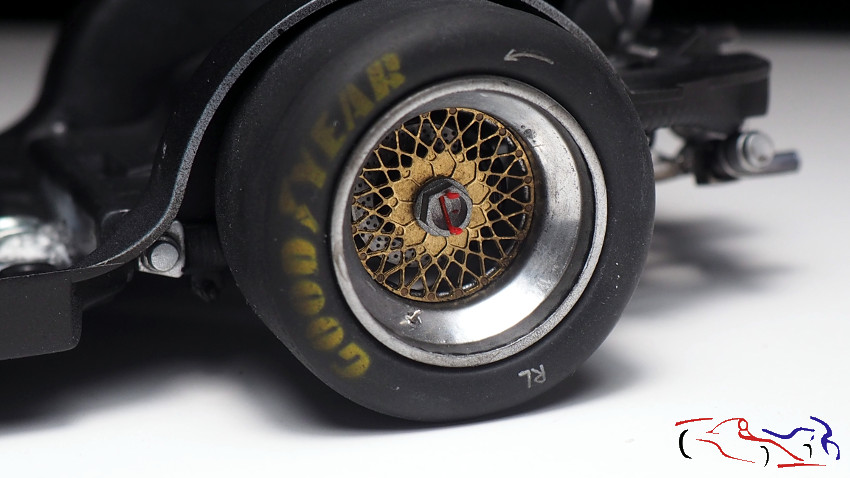
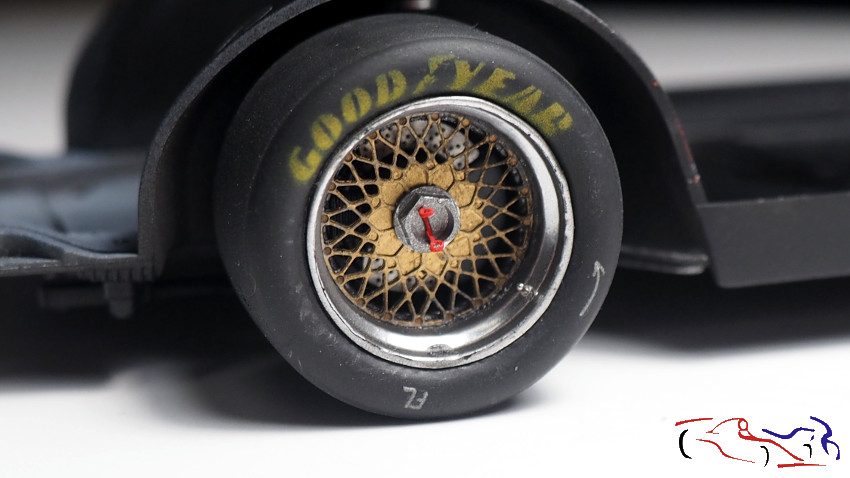
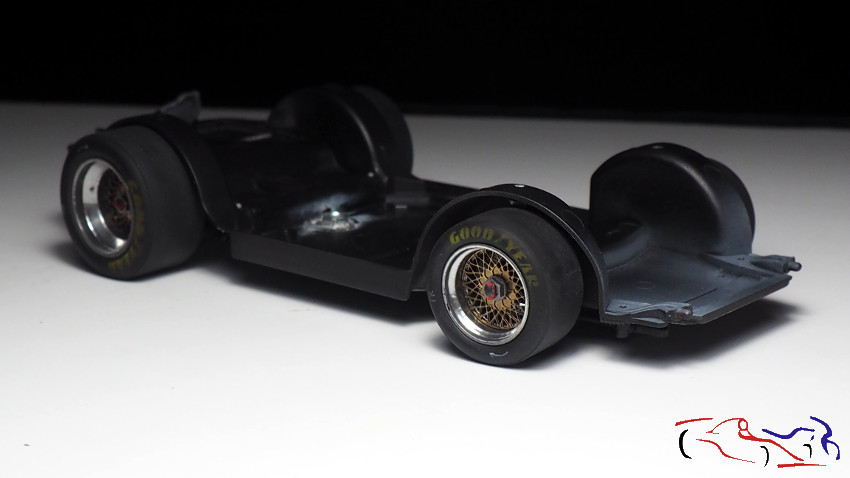
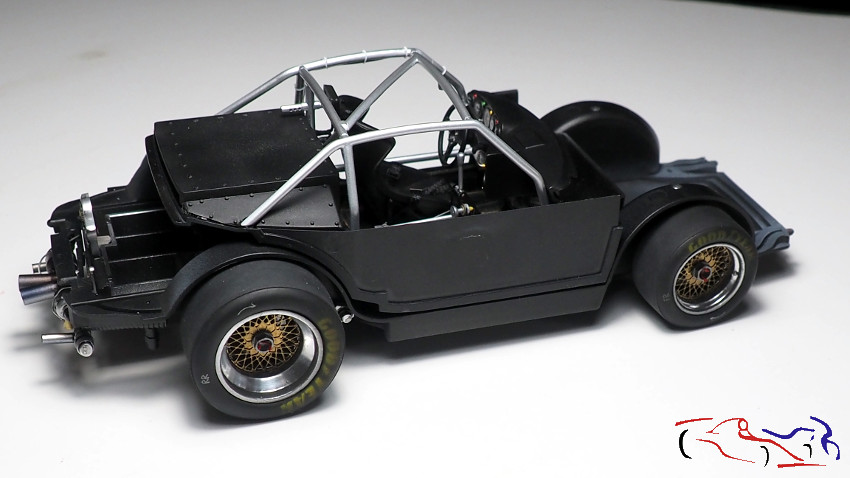
Y este es el resultado de las ruedas montadas en el chasis:
And this is the result of the wheels mounted on the chassis:.
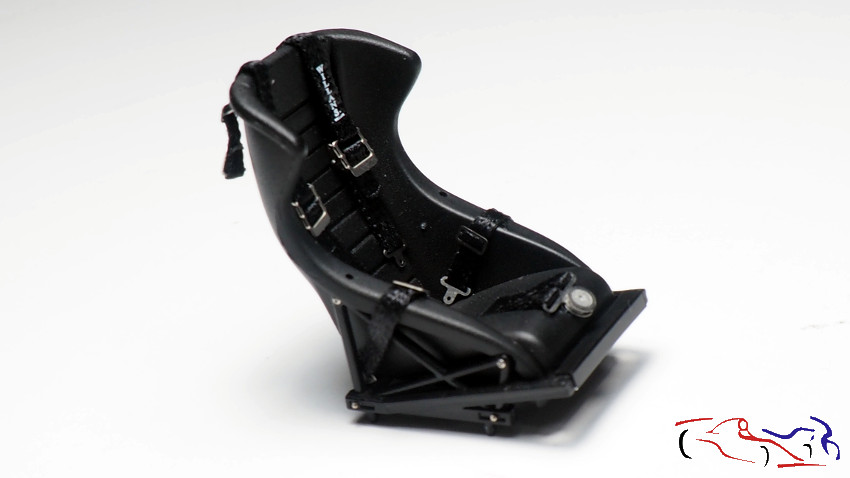
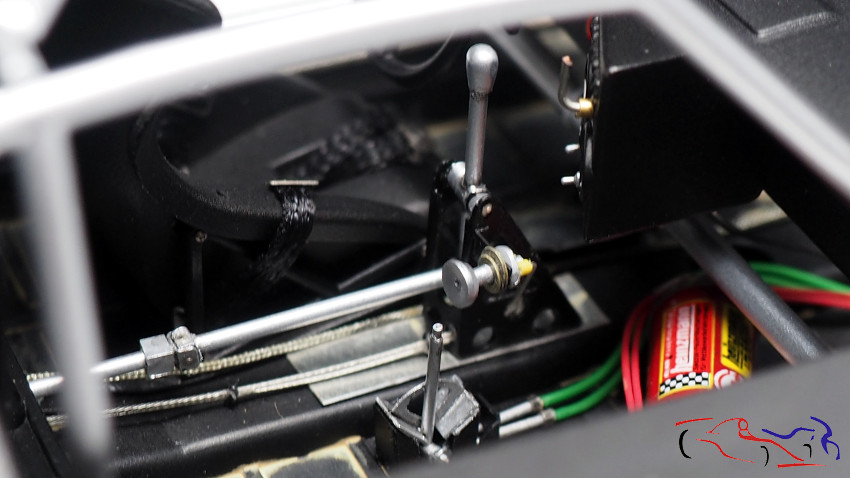
Al asiento que ya estaba pintado, le añado los cinturones que, al ser negros no destacan mucho, con sus hebillas de fotograbado. Tambié le he añadido unos tornillos y remaches al soporte del asiento:
To the seat, which was already painted, I added the belts which, being black, do not stand out very much, with their photoetched buckles. I also added some screws and rivets to the seat support:
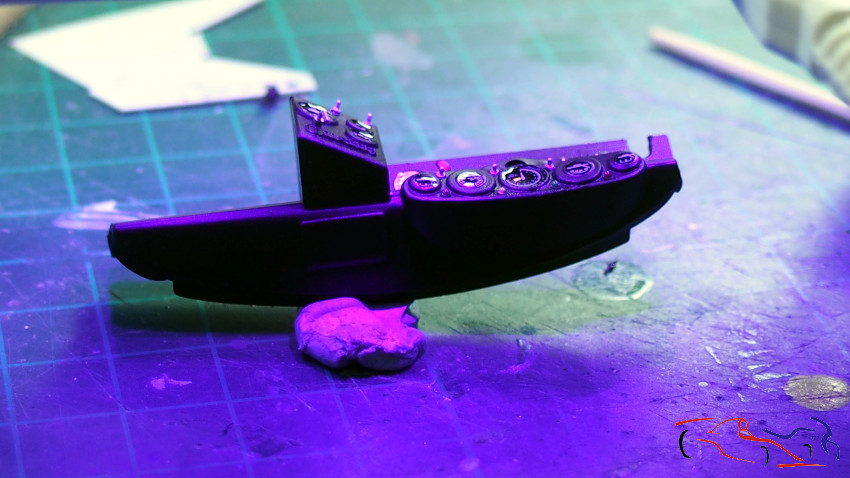
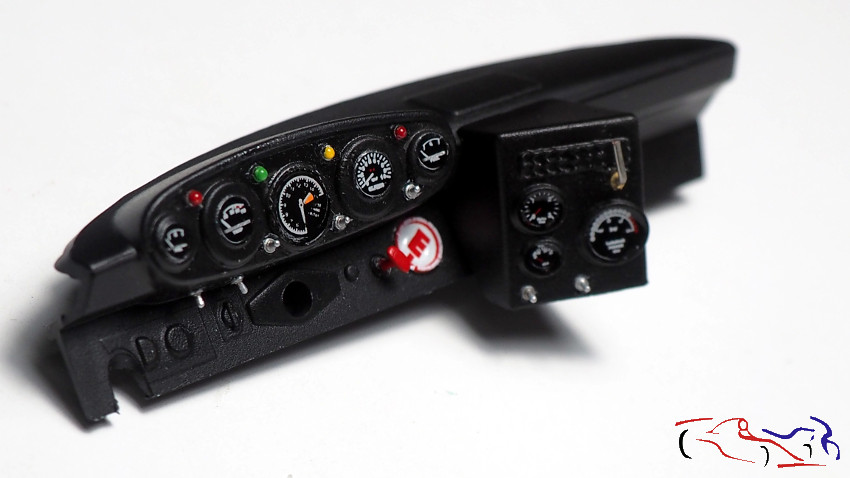
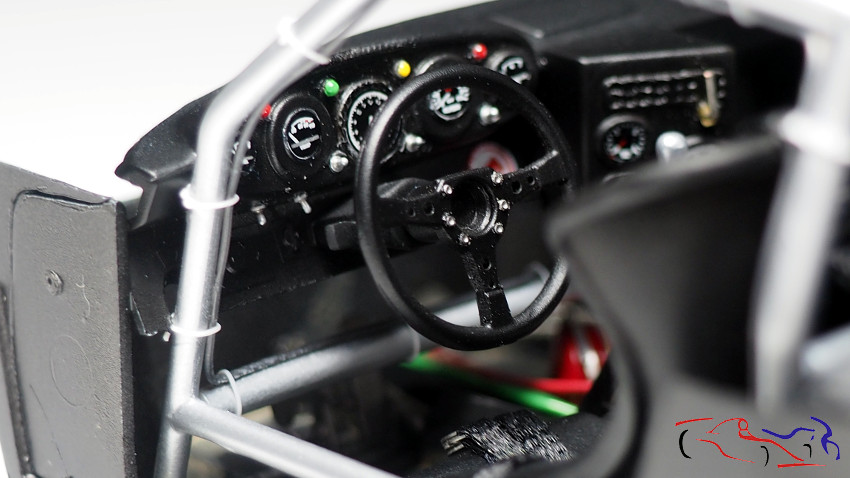
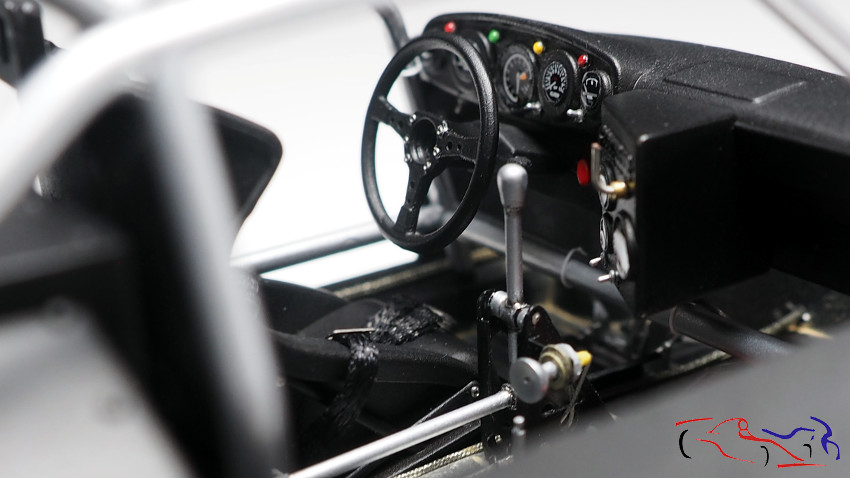
Para el salpicadero, una vez puestos las calcas de los relojes, y los interrptores y luces (de Decalcas), con un palillo le pongo una gota de resina UV, y lo expongo a dicha luz. EL resultado se ve en la segunda foto:
For the dashboard, once the decals of the clocks and the switches and lights (from Decalcas) are in place, I put a drop of UV resin on it with a toothpick and expose it to the UV light. The result can be seen in the second photo:
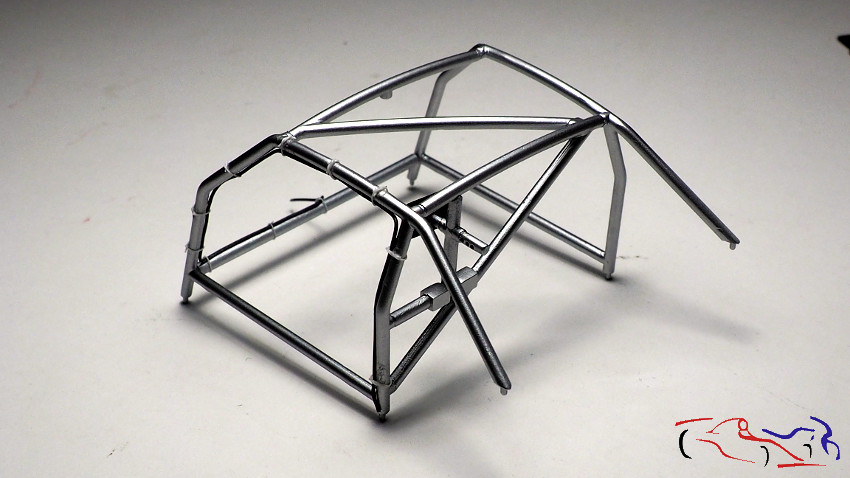
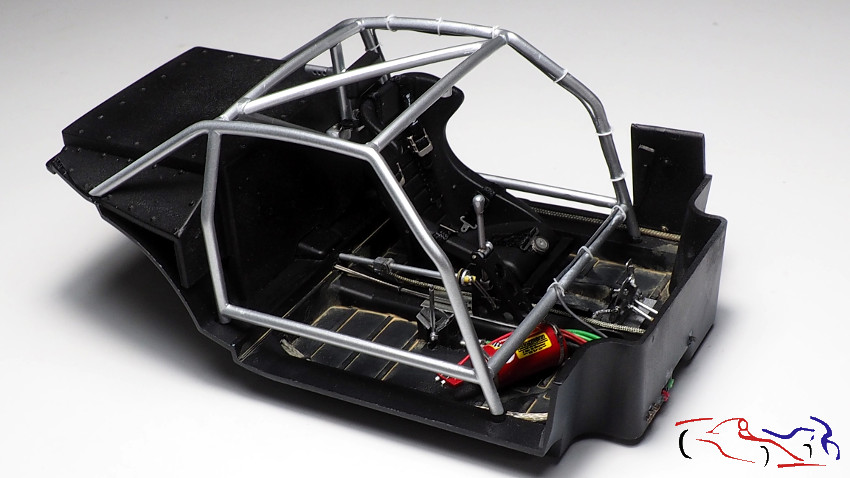
Y como paso previo al ensamblaje del cockpit, le añado un tubo a la jaula, con sus fijaciones blancas realizadas con plástico estirado!!
And as a previous step to the assembly of the cockpit, I add a tube to the cage, with its white fixings made of stretched plastic!
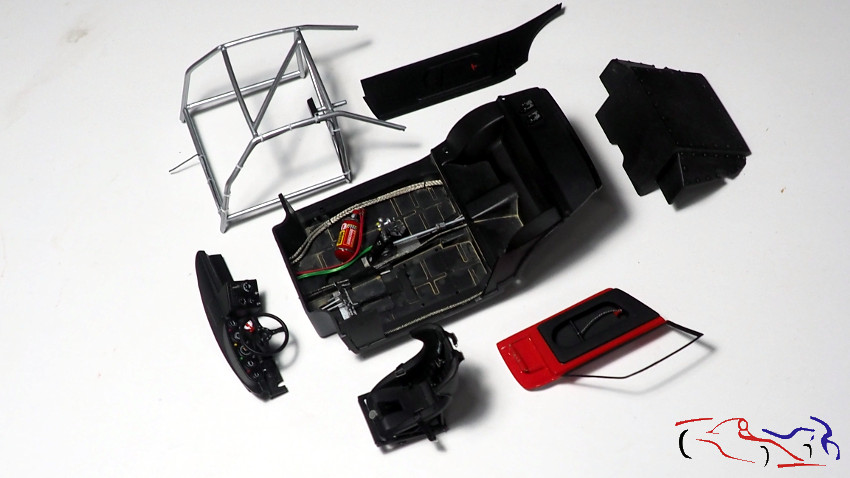
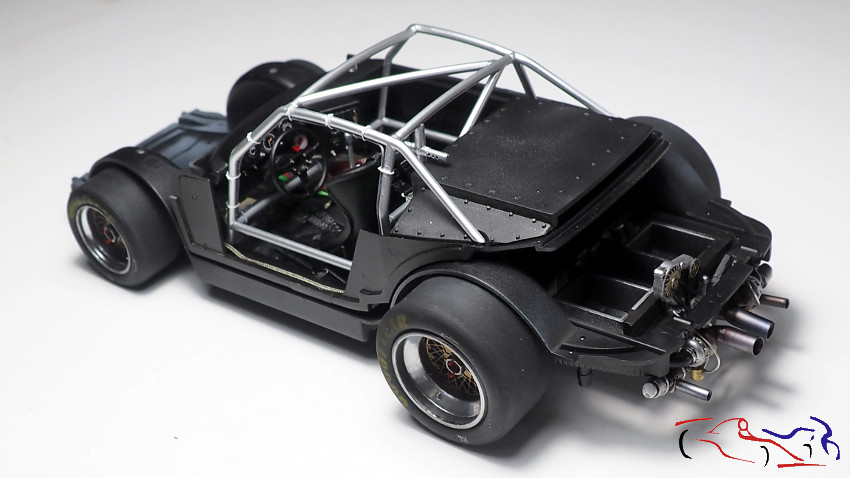
Y aqui vemos el cockpit todo terminado, estando las primeras fotos sin el salpicadero.
And here we see the cockpit all finished, being the first pictures without the dashboard.

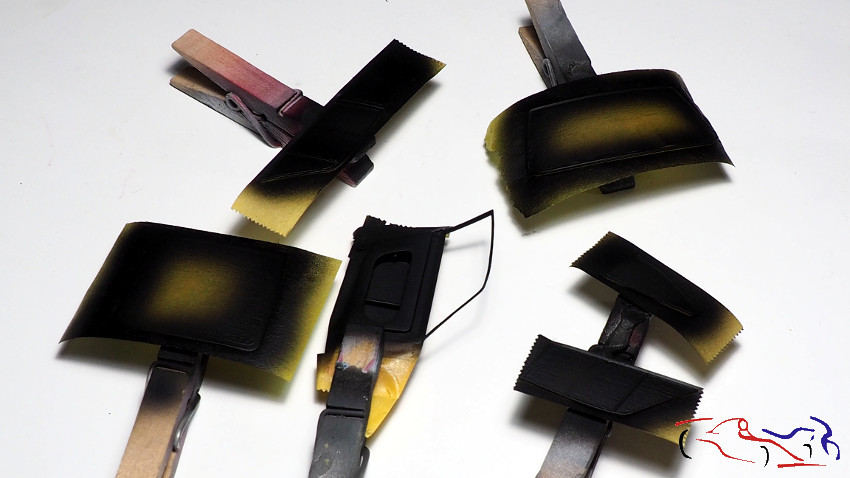
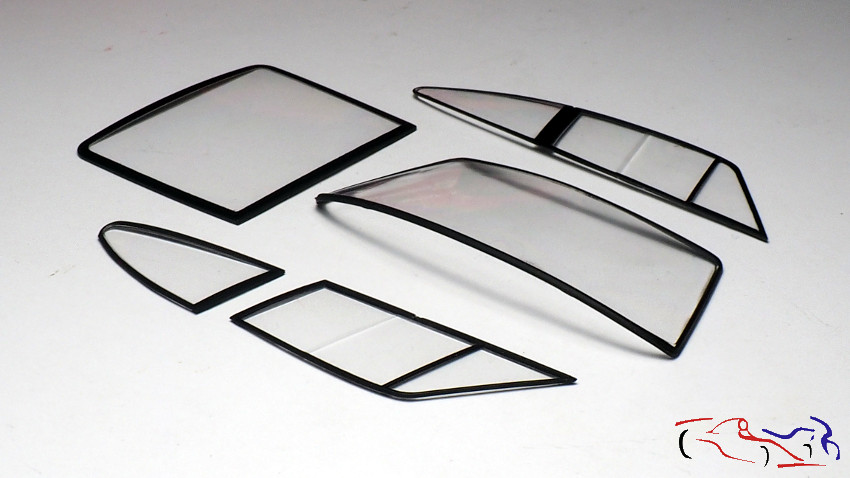
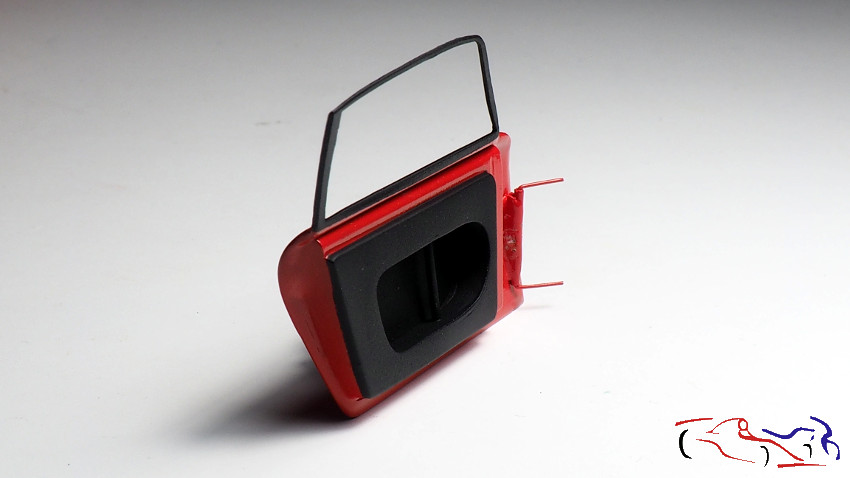
Más cosas: pintamos de negro satinado de Tamiya LP los cristales que previamente había enmascarado con el producto de Decalcas, que se ajusta muy bien a las formas, como bien se ve en la foto de los cristales. Tambié pintamos los marcos de la carrocería puesto que se pueden ver una vez puesto los cristales, terminando con el interior de la puerta izquierda, que como sabéis, se podrá abrir y cerrar:
More things: we painted in Tamiya LP satin black the windows that I had previously masked with the Decalcas product, which fits very well to the shapes, as you can see in the photo of the windows. We also painted the body frames as they can be seen once the windows are in place, finishing with the inside of the left door, which as you know, can be opened and closed:
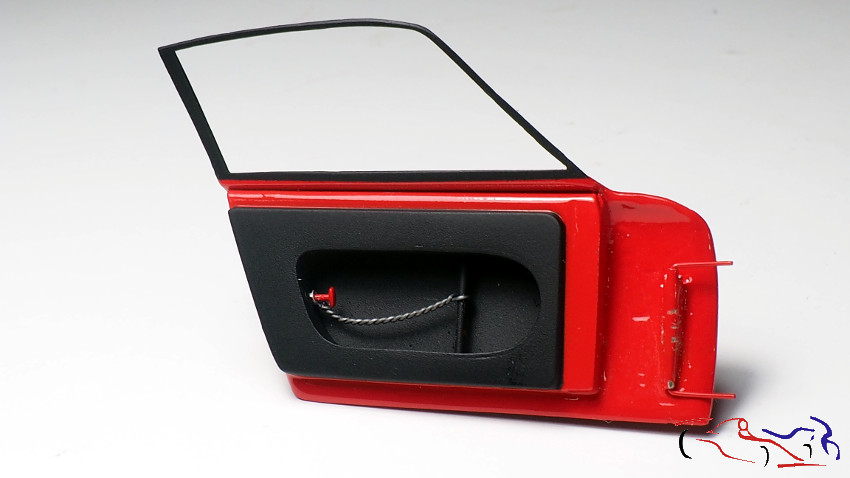
Y continuando con la puerta del piloto, le he añadido el mecanismo que tiene para abrila desde el interior (un poco anticuado pero eficiente!):
And continuing with the pilot’s door, I have added the mechanism it has to open it from the inside (a bit old-fashioned but efficient!):
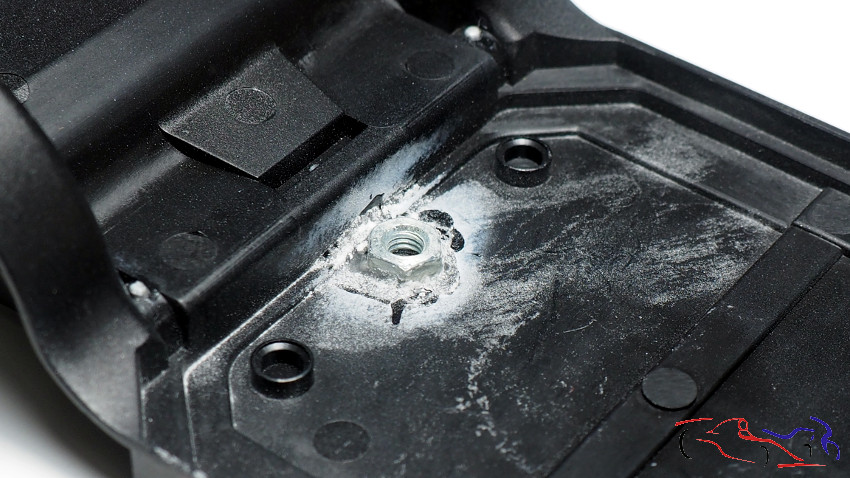
Y antes de colocar la cuna del cockpit, realizo un agujero en el chasis y le pego una tuerca firmemente, que servirá para fijar el kit a la peana. Decir que la peana servirá para muchos coches.
And before placing the cradle of the cockpit, I make a hole in the chassis and glue a nut firmly, which will serve to fix the kit to the base. The base will be used for many cars.
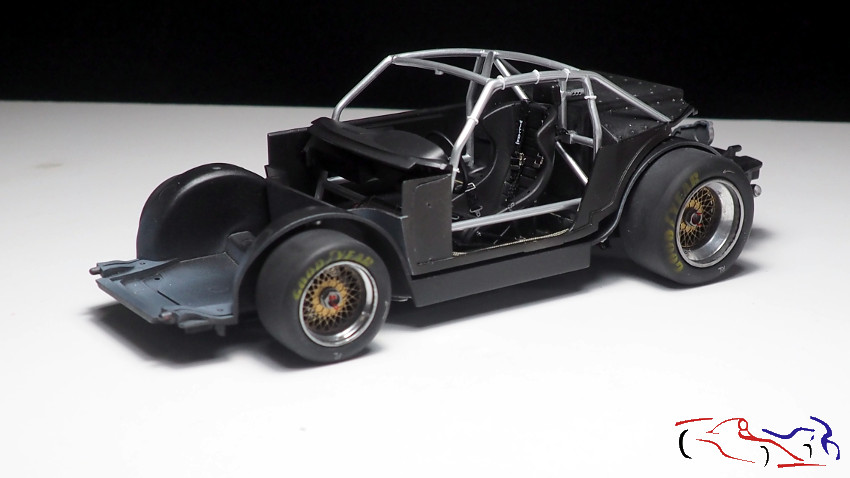
Y ahora si, pehamos el cockpit y las ruedas al chasis:
And now, yes, let’s attach the cockpit and the wheels to the chassis:
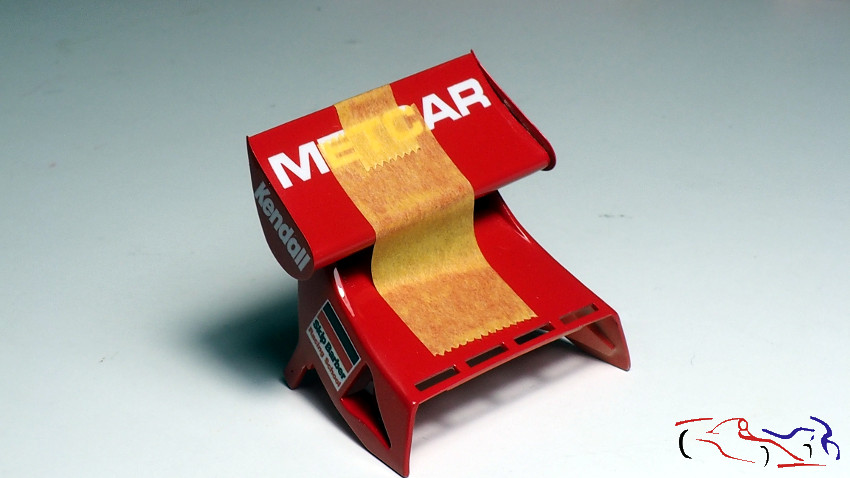
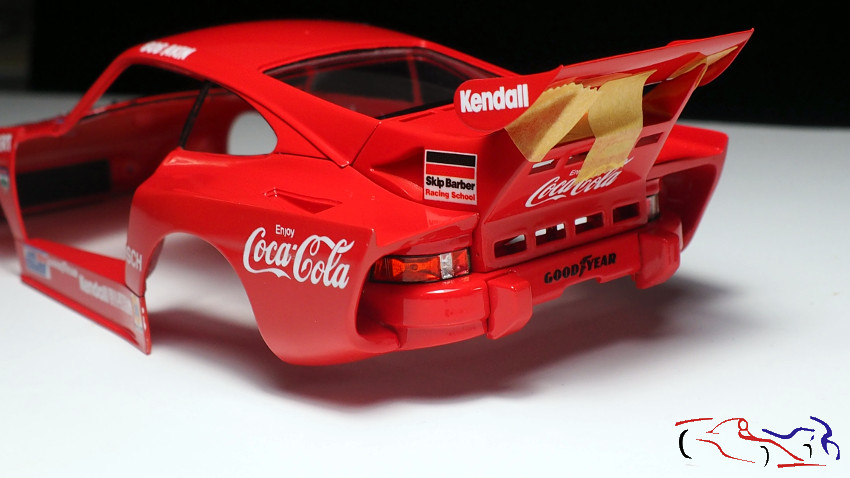
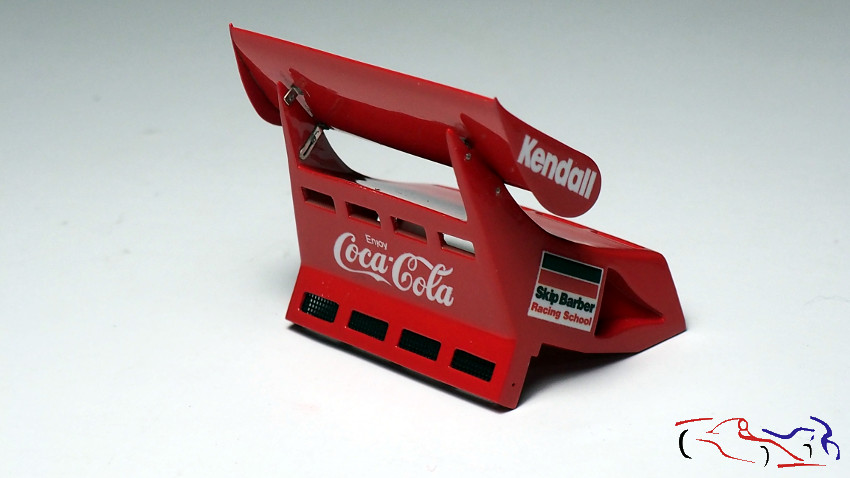
Pasamos a la carrocería, y en concreto al alerón. Como le eliminé las marcas para fijarlo, tuve que utilizar cinta de enmascarar para situalo en su posición correcta, y pegarlo con epoxy de dos componentes, para que me diera tiempo a modificar su posición si fuera necesario. Y al dia siguiente, una vez seco, la añadí los fotograbados y las tuercas, pegados con Ultra Glue de MIG. También se ve la rejilla negra de fotograbado de las aberturas bajo el logo de Cocacola, así como las luces traseras que llevan la parte interior cromada del kit, y los cristales pintados con rotuladores.
We moved on to the bodywork, and specifically to the spoiler. As I removed the marks to fix it, I had to use masking tape to place it in its correct position, and glue it with two-component epoxy, to give me time to modify its position if necessary. And the next day, once dry, I added the photoetched parts and the nuts, glued with Ultra Glue from MIG. You can also see the black photoetched grille of the openings under the Cocacola logo, as well as the rear lights with the chrome inner part of the kit, and the windows painted with felt-tip pens.
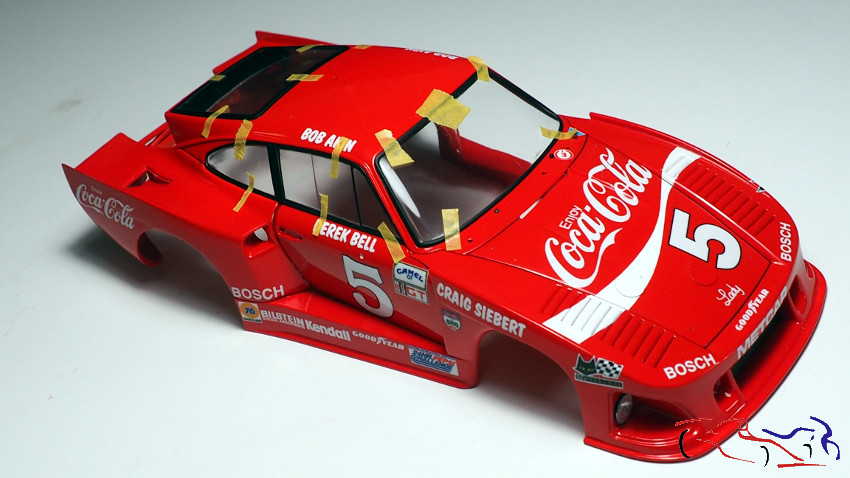
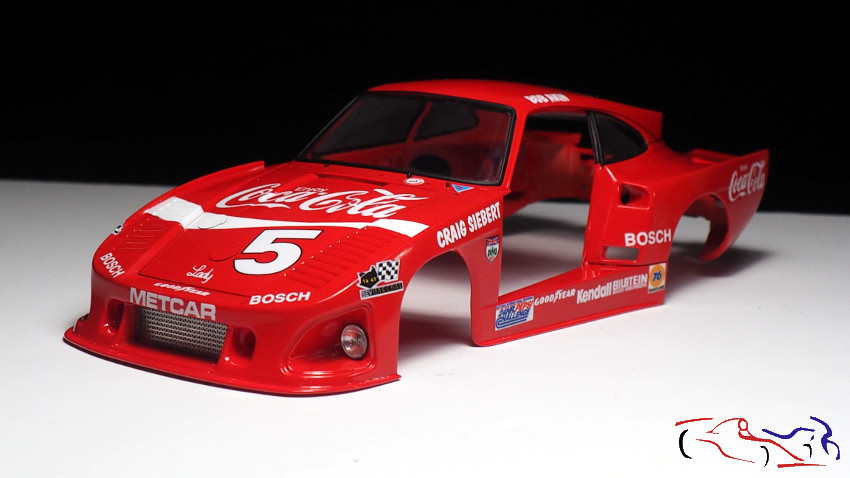
Pegamos los cristales con Ultra Glue de MIG, y los sujetamos con cinta de enmascarar. Podemos observar que las luces delanteras ya están colocadas a falta del cristal, que no llevará el marco de negro.
We glue the windows with MIG Ultra Glue, and fasten them with masking tape. We can see that the front lights are already in place except for the glass, which will not have the black frame.
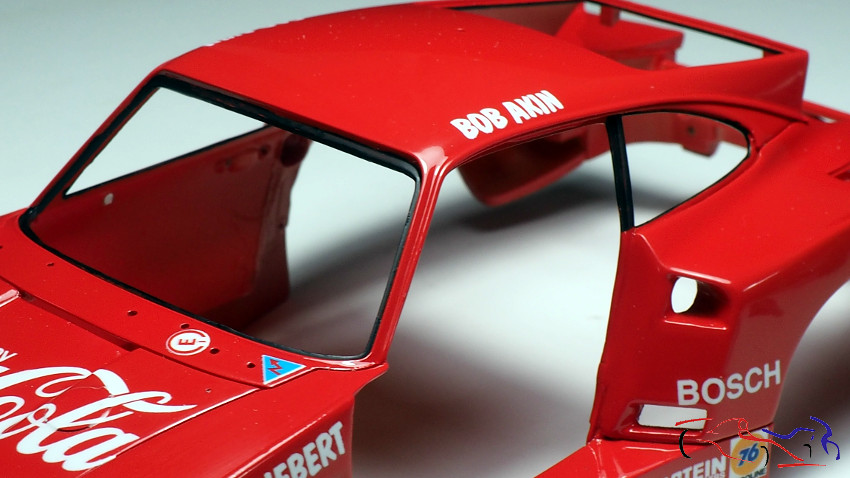
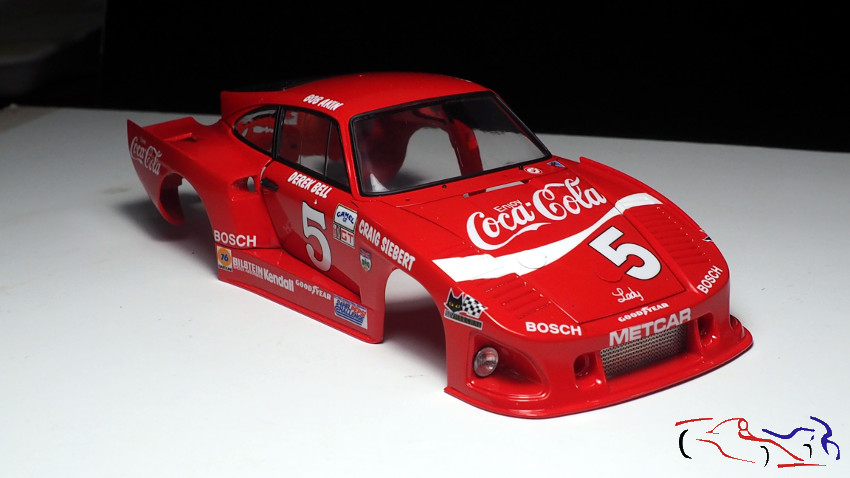
Y para terminar, este es el resultado de la carrocería con los cristales ya colocados:
And finally, this is the result of the bodywork with the windows already in place:
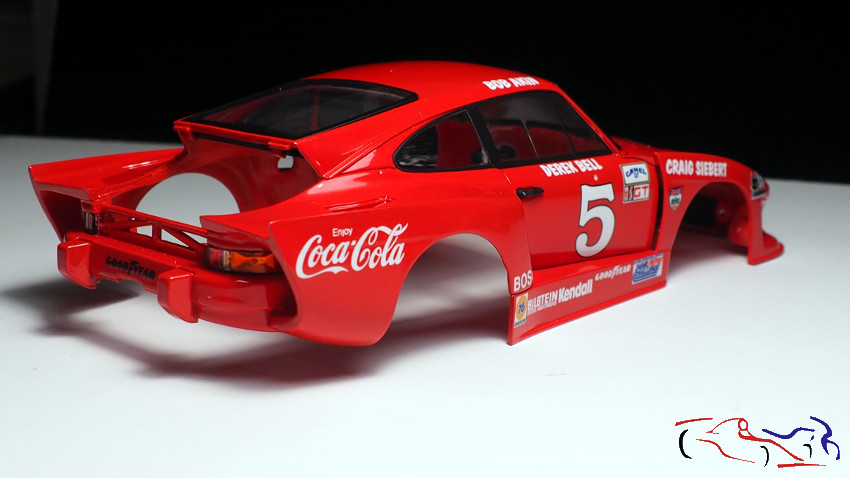
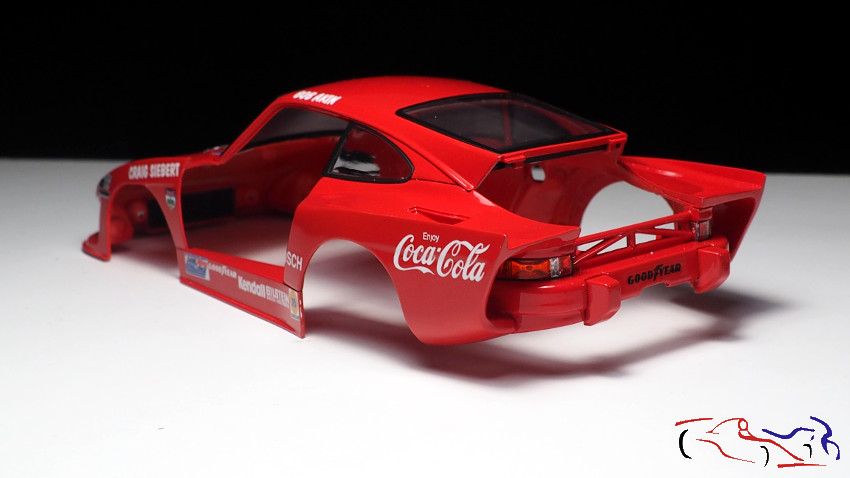
Y una última foto con la puerta del piloto colocada en su lugar.
And one last photo with the pilot door in place.

Ahora, solo queda poner la carrocería en su lugar, fijar la puerta (cuzando los dedos para que su movimiento sea correcto!) y los toques de la carrocería referentes a fotograbados y pequeñas piezas, por lo que en el próximo post, la daré por terminada. Gracias por ver y comentar!
Now, the only thing left to do is to put the body in place, fix the door (curving the fingers so that its movement is correct!) and the touches of the bodywork referring to photoetches and small parts, so in the next post, I will finish it. Thanks for watching and commenting!
There is light at the end of the tunnel! This project has its days counted down to the end. And that does not mean that there are no processes to be done and shown, since the final work requires a lot of patience and calm, because they can ruin all the previous work.
El primero de esos procesos son las ruedas. Comenzaremos protegiendolas para pintar el logo de los neumáticos con amarillo acrílico de Tamiya, y para ello uso un fotograbado del Ferrari 312T de Studio27. Una vez pintado, le añado las marcas de tiza (calcas de Decalcas) y le doy un sombreado final de XF1 de Tamiya, disuelto al 50%. Terminamos creando las fijaciones de las llantas, hechas con cable de 0,2mm y pintadas com rojo brillante de Tamiya LP.
The first of these processes is the wheels. We start by protecting them to paint the tyre logo with Tamiya acrylic yellow, and for this I use a photoetched Ferrari 312T from Studio27. Once painted, I add the chalk marks (from Decalcas decals) and give it a final shading of Tamiya XF1, dissolved at 50%. We finish by creating the rim mountings, made with 0,2mm wire and painted with Tamiya LP bright red.
Y este es el resultado de las ruedas montadas en el chasis:
And this is the result of the wheels mounted on the chassis:.
Al asiento que ya estaba pintado, le añado los cinturones que, al ser negros no destacan mucho, con sus hebillas de fotograbado. Tambié le he añadido unos tornillos y remaches al soporte del asiento:
To the seat, which was already painted, I added the belts which, being black, do not stand out very much, with their photoetched buckles. I also added some screws and rivets to the seat support:
Para el salpicadero, una vez puestos las calcas de los relojes, y los interrptores y luces (de Decalcas), con un palillo le pongo una gota de resina UV, y lo expongo a dicha luz. EL resultado se ve en la segunda foto:
For the dashboard, once the decals of the clocks and the switches and lights (from Decalcas) are in place, I put a drop of UV resin on it with a toothpick and expose it to the UV light. The result can be seen in the second photo:
Y como paso previo al ensamblaje del cockpit, le añado un tubo a la jaula, con sus fijaciones blancas realizadas con plástico estirado!!
And as a previous step to the assembly of the cockpit, I add a tube to the cage, with its white fixings made of stretched plastic!
Y aqui vemos el cockpit todo terminado, estando las primeras fotos sin el salpicadero.
And here we see the cockpit all finished, being the first pictures without the dashboard.
Más cosas: pintamos de negro satinado de Tamiya LP los cristales que previamente había enmascarado con el producto de Decalcas, que se ajusta muy bien a las formas, como bien se ve en la foto de los cristales. Tambié pintamos los marcos de la carrocería puesto que se pueden ver una vez puesto los cristales, terminando con el interior de la puerta izquierda, que como sabéis, se podrá abrir y cerrar:
More things: we painted in Tamiya LP satin black the windows that I had previously masked with the Decalcas product, which fits very well to the shapes, as you can see in the photo of the windows. We also painted the body frames as they can be seen once the windows are in place, finishing with the inside of the left door, which as you know, can be opened and closed:
Y continuando con la puerta del piloto, le he añadido el mecanismo que tiene para abrila desde el interior (un poco anticuado pero eficiente!):
And continuing with the pilot’s door, I have added the mechanism it has to open it from the inside (a bit old-fashioned but efficient!):
Y antes de colocar la cuna del cockpit, realizo un agujero en el chasis y le pego una tuerca firmemente, que servirá para fijar el kit a la peana. Decir que la peana servirá para muchos coches.
And before placing the cradle of the cockpit, I make a hole in the chassis and glue a nut firmly, which will serve to fix the kit to the base. The base will be used for many cars.
Y ahora si, pehamos el cockpit y las ruedas al chasis:
And now, yes, let’s attach the cockpit and the wheels to the chassis:
Pasamos a la carrocería, y en concreto al alerón. Como le eliminé las marcas para fijarlo, tuve que utilizar cinta de enmascarar para situalo en su posición correcta, y pegarlo con epoxy de dos componentes, para que me diera tiempo a modificar su posición si fuera necesario. Y al dia siguiente, una vez seco, la añadí los fotograbados y las tuercas, pegados con Ultra Glue de MIG. También se ve la rejilla negra de fotograbado de las aberturas bajo el logo de Cocacola, así como las luces traseras que llevan la parte interior cromada del kit, y los cristales pintados con rotuladores.
We moved on to the bodywork, and specifically to the spoiler. As I removed the marks to fix it, I had to use masking tape to place it in its correct position, and glue it with two-component epoxy, to give me time to modify its position if necessary. And the next day, once dry, I added the photoetched parts and the nuts, glued with Ultra Glue from MIG. You can also see the black photoetched grille of the openings under the Cocacola logo, as well as the rear lights with the chrome inner part of the kit, and the windows painted with felt-tip pens.
Pegamos los cristales con Ultra Glue de MIG, y los sujetamos con cinta de enmascarar. Podemos observar que las luces delanteras ya están colocadas a falta del cristal, que no llevará el marco de negro.
We glue the windows with MIG Ultra Glue, and fasten them with masking tape. We can see that the front lights are already in place except for the glass, which will not have the black frame.
Y para terminar, este es el resultado de la carrocería con los cristales ya colocados:
And finally, this is the result of the bodywork with the windows already in place:
Y una última foto con la puerta del piloto colocada en su lugar.
And one last photo with the pilot door in place.
Ahora, solo queda poner la carrocería en su lugar, fijar la puerta (cuzando los dedos para que su movimiento sea correcto!) y los toques de la carrocería referentes a fotograbados y pequeñas piezas, por lo que en el próximo post, la daré por terminada. Gracias por ver y comentar!
Now, the only thing left to do is to put the body in place, fix the door (curving the fingers so that its movement is correct!) and the touches of the bodywork referring to photoetches and small parts, so in the next post, I will finish it. Thanks for watching and commenting!
-
 Shunter
- FOTA Chairman

- Posts: 2887
- Joined: Sat Sep 20, 2003 12:38 am
- Favorite F1 Team or Driver: Alfa Romeo, McLaren, Williams
- Location: Melbourne, Australia
- Contact:
- Status: Offline

Re: Porsche 935 K3 Coca Cola – 1/24 Nunu
Looking fantastic…

Re: Porsche 935 K3 Coca Cola – 1/24 Nunu
Great work as usuall Jesus, what an eyecatcher! 
Take a stand!
-
parklaneworks
- Backmarker
- Posts: 343
- Joined: Fri Jul 23, 2010 8:23 am
- Favorite F1 Team or Driver: Ferrari, Lotus, Brabham
- Location: Rotterdam, Netherlands
- Status: Offline
Re: Porsche 935 K3 Coca Cola – 1/24 Nunu
Just awesome  !
!
-
JesusM
Topic author - Backmarker
- Posts: 341
- Joined: Thu Oct 28, 2010 4:24 am
- Favorite F1 Team or Driver: Ferrari, Tyrrell
- Location: Madrid - Spain
- Contact:
- Status: Offline
Re: Porsche 935 K3 Coca Cola – 1/24 Nunu
Thanks for your words!!!
-
 indycals
- FOTA Chairman
- Posts: 2930
- Joined: Mon Mar 21, 2005 8:27 pm
- Your Name: Indycals
- Favorite F1 Team or Driver: Lotus
- Location: 6450'/1955m Colorado USA
- Contact:
- Status: Offline

Re: Porsche 935 K3 Coca Cola – 1/24 Nunu
To say this is stunning would be putting it mildly. There are no words. Fantastic build.
-
- Similar Topics
- Replies
- Views
- Last post
-
- 4 Replies
- 220 Views
-
Last post by marlborored