MFH 1/12 Ferrari 315S/335S
-
 Preludevenom
- Top Designer

- Posts: 717
- Joined: Tue Jul 15, 2014 11:14 am
- Status: Offline
Re: MFH 1/12 Ferrari 315S/335S
FANTASTIC !!! GORGEOUS !!!! more please 


-
gavrob
- World Champion
- Posts: 624
- Joined: Thu Jan 09, 2003 3:17 am
- Your Name: Gavin Roberts
- Favorite F1 Team or Driver: Lewis Hamilton
- Location: Norfolk, UK
- Status: Offline

Re: MFH 1/12 Ferrari 315S/335S
Beautiful work.
-
 blakebirk
Topic author - Backmarker

- Posts: 318
- Joined: Wed Jan 12, 2011 3:29 pm
- Your Name: Dan
- Favorite F1 Team or Driver: Ferrari fan
- Location: Seattle Wa.
- Status: Offline

Re: MFH 1/12 Ferrari 315S/335S
Just a small update. I've had some time to work on this the last couple of weeks but these take a lot of time (or I work slowly) probably a combo of the two.
Finished the suspension and the brakes.
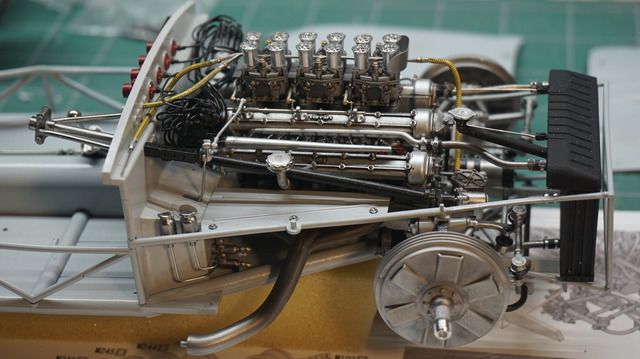
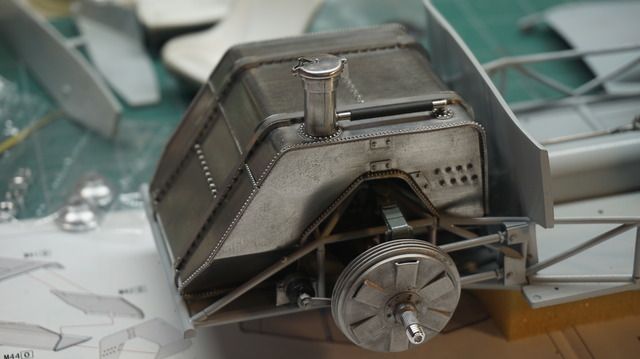
A lot of time was spent polishing the fuel tank. Its quite difficult to polish it out evenly with all the rivets, it may be better to remove the cast in rivets, polish the tank then add some aftermarket rivets. That's not how I did it. it turned out pretty good, the photo doesn't show it too accurately, it isn't a mirror finish, looks something like brushed aluminum with some age. Should look good against the red bodywork.
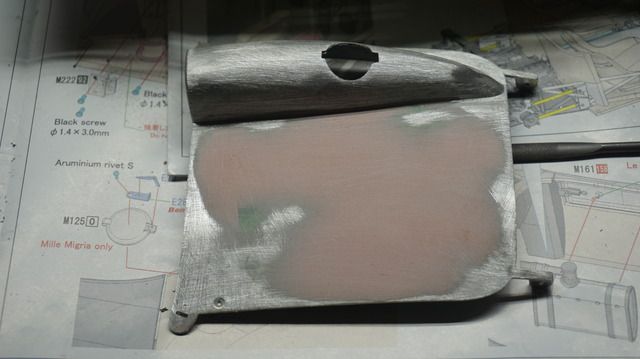
Moving on to the body work; the resin body is as close to perfect as I've seen, some light sanding and primer and it looks great. the hood and deck lid were a bit rough having been bent up a bit in the box. they seem to be a little oversized which is good so you can get it to fit well. the trunk lid is a little harder to form because the headrest stiffens it up. mine had a large depression in the middle that I couldn't get out so I broke out the bondo and filled it in.
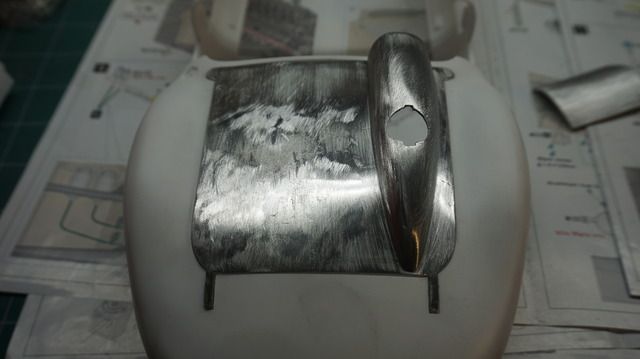
Just tonight I fitted the fuel tank and test fit the body with the trunk lid in position. The fuel filler cap is supposed to fit neatly through the head rest, the tolerances are pretty close so I wanted to check it closely before gluing in the tank or painting the body. Good thing I did.
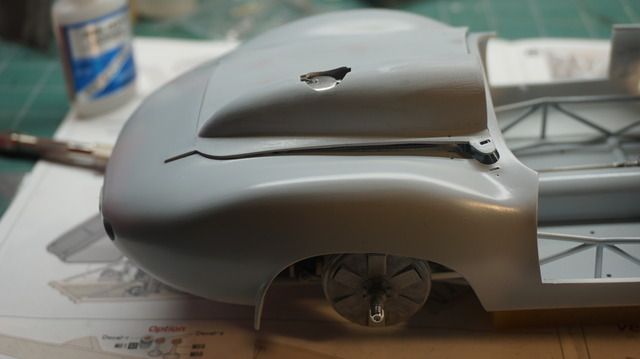
I think this is fixable by removing the fuel filler and reshaping the bottom of it so it leans forward more, we will see. test fit, test fit, test fit!
thanks for reading.
Finished the suspension and the brakes.

A lot of time was spent polishing the fuel tank. Its quite difficult to polish it out evenly with all the rivets, it may be better to remove the cast in rivets, polish the tank then add some aftermarket rivets. That's not how I did it. it turned out pretty good, the photo doesn't show it too accurately, it isn't a mirror finish, looks something like brushed aluminum with some age. Should look good against the red bodywork.

Moving on to the body work; the resin body is as close to perfect as I've seen, some light sanding and primer and it looks great. the hood and deck lid were a bit rough having been bent up a bit in the box. they seem to be a little oversized which is good so you can get it to fit well. the trunk lid is a little harder to form because the headrest stiffens it up. mine had a large depression in the middle that I couldn't get out so I broke out the bondo and filled it in.


Just tonight I fitted the fuel tank and test fit the body with the trunk lid in position. The fuel filler cap is supposed to fit neatly through the head rest, the tolerances are pretty close so I wanted to check it closely before gluing in the tank or painting the body. Good thing I did.

I think this is fixable by removing the fuel filler and reshaping the bottom of it so it leans forward more, we will see. test fit, test fit, test fit!
thanks for reading.
-
wargrider
- F2 Champion

- Posts: 93
- Joined: Tue Jan 27, 2015 3:22 am
- Your Name: Jean-Michel
- Favorite F1 Team or Driver: Ferrari
- Status: Offline

Re: MFH 1/12 Ferrari 315S/335S
Very nice progress!
-
 billgtp
- FOTA Chairman

- Posts: 2409
- Joined: Sat Jan 26, 2002 5:27 pm
- Favorite F1 Team or Driver: Chapmans Lotus, James Hunt
- Location: Anza ca.
- Status: Offline
Re: MFH 1/12 Ferrari 315S/335S
Looking good. I like the gas tank looks great
-
blakebirk
Topic author - Backmarker
- Posts: 318
- Joined: Wed Jan 12, 2011 3:29 pm
- Your Name: Dan
- Favorite F1 Team or Driver: Ferrari fan
- Location: Seattle Wa.
- Status: Offline
Re: MFH 1/12 Ferrari 315S/335S
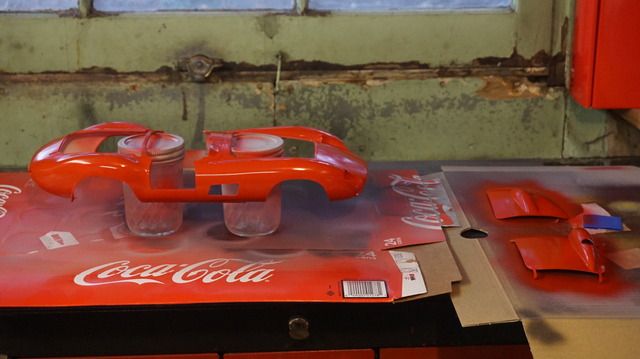
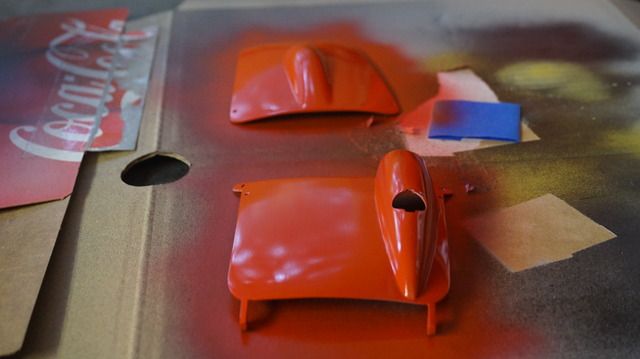
Just a little update. I've got some color on the body, first coat of TS49 bright red. This is just the first coat of many with gentle polishing between coats.
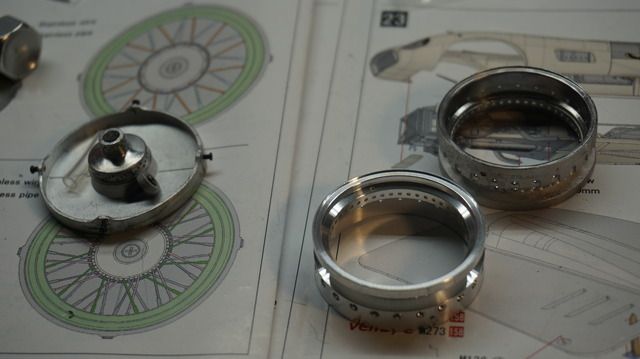
While waiting for the paint to dry I'll try my hand at the wire wheels which I think will be interesting. I'll begin with the spare tire which is white metal as opposed to the polished rims provided for the other wheels. though it seems a shame to do it I'll be painting the wheels as I believe was done on the original car so I'll paint the center hub and rim before assembling the wires then I guess give it another coat of paint after they are assembled. I think that's the only way to not get shadows behind the many wires where I don't get paint. I'm not sure how else to do it?
Here is the car I'm building, Interesting enough, I found in my research that this car is located in Oregon, probably less than a day from my home. I wish I knew the right people, it would be great to see in in person.
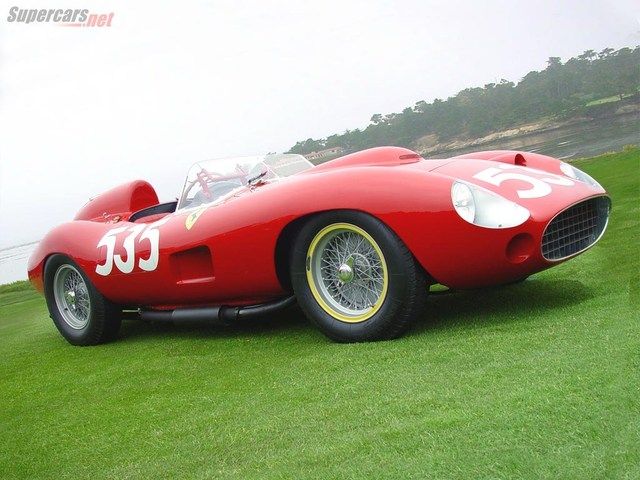
I was contemplating leaving the wheels polished until I saw this photo. I'd be curious to hear if anyone had any thoughts on what silver to use on the wheels. They aren't a high gloss and have a bit of a grey/blue tint to them. Any thoughts?
Thanks
Dan


While waiting for the paint to dry I'll try my hand at the wire wheels which I think will be interesting. I'll begin with the spare tire which is white metal as opposed to the polished rims provided for the other wheels. though it seems a shame to do it I'll be painting the wheels as I believe was done on the original car so I'll paint the center hub and rim before assembling the wires then I guess give it another coat of paint after they are assembled. I think that's the only way to not get shadows behind the many wires where I don't get paint. I'm not sure how else to do it?

Here is the car I'm building, Interesting enough, I found in my research that this car is located in Oregon, probably less than a day from my home. I wish I knew the right people, it would be great to see in in person.

I was contemplating leaving the wheels polished until I saw this photo. I'd be curious to hear if anyone had any thoughts on what silver to use on the wheels. They aren't a high gloss and have a bit of a grey/blue tint to them. Any thoughts?
Thanks
Dan

Re: MFH 1/12 Ferrari 315S/335S
Awesome build so far! Where do you live ? I live in Newberg about 45 minutes from Portland I've seen this car at the historic races but didn't know it was in Oregon
-
blakebirk
Topic author - Backmarker
- Posts: 318
- Joined: Wed Jan 12, 2011 3:29 pm
- Your Name: Dan
- Favorite F1 Team or Driver: Ferrari fan
- Location: Seattle Wa.
- Status: Offline
Re: MFH 1/12 Ferrari 315S/335S
I'm up in Seattle but grew up in Sherwood just up the street from you. Apparently the car is owned by one of the McCaw's. If you know the chassis # on these classic Ferraris it's easy to research the history.15badcats wrote:Awesome build so far! Where do you live ? I live in Newberg about 45 minutes from Portland I've seen this car at the historic races but didn't know it was in Oregon
-
 CBartholomew4677
- FOTA Chairman
- Posts: 3178
- Joined: Sat May 14, 2005 8:50 am
- Your Name: Chris Bartholomew
- Favorite F1 Team or Driver: Forza Ferrari!!!
- Location: Michigan, USA
- Status: Offline
Re: MFH 1/12 Ferrari 315S/335S
The Ferrari is coming along fantastically, I love it!!! Your attention to detail really brings it to life. Great work!
Cheers,
Chris
Cheers,
Chris
-
- Similar Topics
- Replies
- Views
- Last post
-
- 4 Replies
- 221 Views
-
Last post by marlborored