
The lights look fantastic. When i do paint over paint like that I try to use acrylic. That way if the masking is not perfect i can clean up with a wet Q-tip and the water will not harm the body color.
Nevertheless, it looks perfect.
Regards,
Joe.
MFH 1/12 Ferrari 315S/335S
-
 Schumi
- Top Designer

- Posts: 703
- Joined: Tue Jul 01, 2014 5:13 am
- Your Name: Martijn
- Favorite F1 Team or Driver: -Ferrari
-Benetton
-Michael Schumacher
-Ayrton Senna - Location: Netherlands
- Status: Offline

Re: MFH 1/12 Ferrari 315S/335S
This looks amazing, very accurate and smooth.. just gorgeous 
Cheers Martijn
Cheers Martijn

-
wargrider
- F2 Champion

- Posts: 93
- Joined: Tue Jan 27, 2015 3:22 am
- Your Name: Jean-Michel
- Favorite F1 Team or Driver: Ferrari
- Status: Offline

Re: MFH 1/12 Ferrari 315S/335S
Fantastic work, great result with the headlight, I don't like vacuum parts too 
-
 blakebirk
Topic author - Backmarker

- Posts: 318
- Joined: Wed Jan 12, 2011 3:29 pm
- Your Name: Dan
- Favorite F1 Team or Driver: Ferrari fan
- Location: Seattle Wa.
- Status: Offline

Re: MFH 1/12 Ferrari 315S/335S
time for a little update
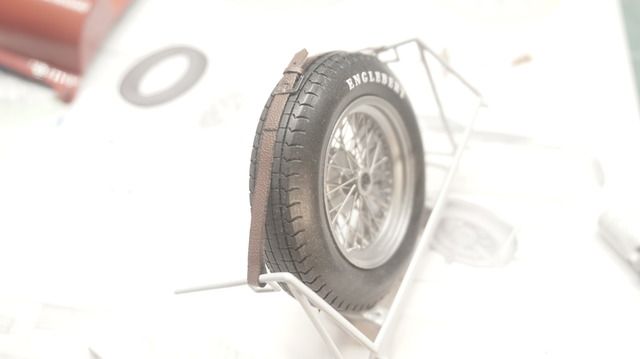
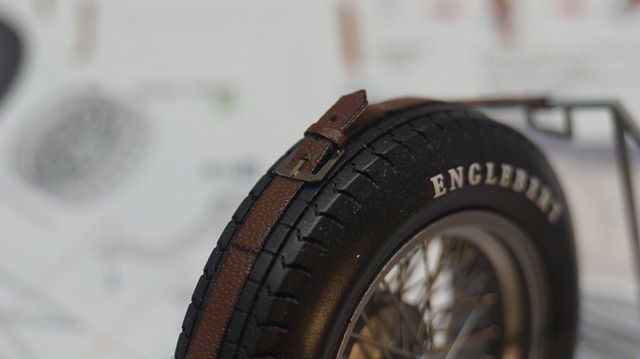
built the frame work that holds the spare tire in the trunk. this gets inserted into the body before it is mounted to the chassis, tricky to do, it fell apart on me the first attempt.
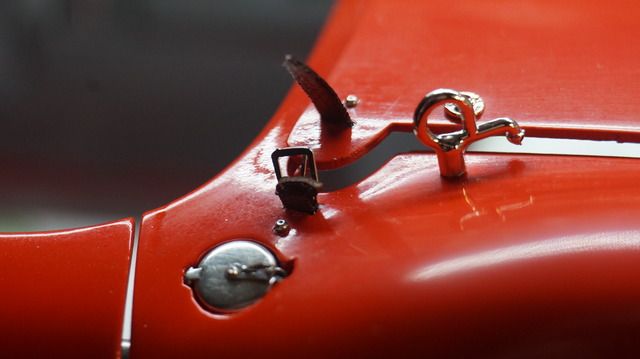
Some of the trunk hardware
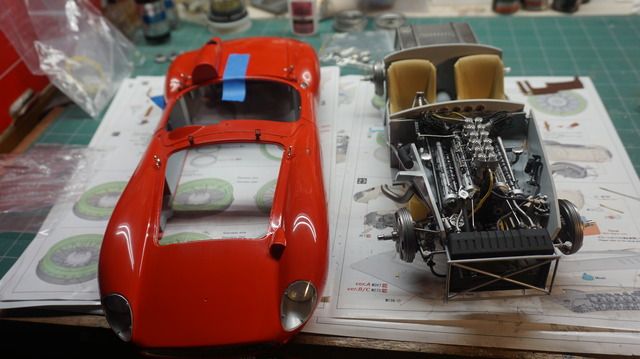
ready to bring these two together
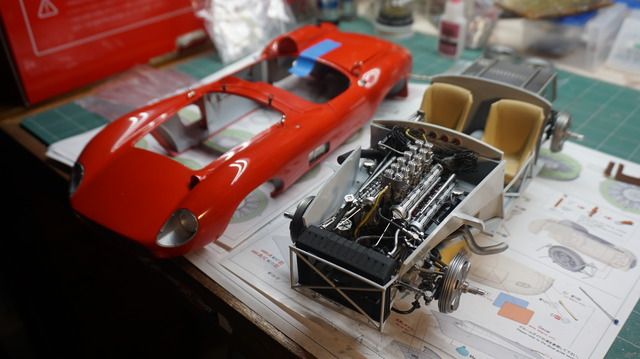
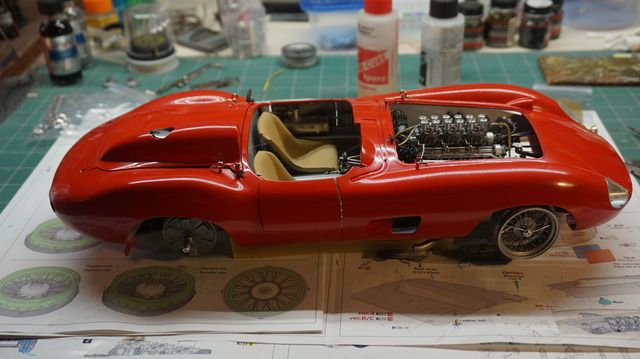
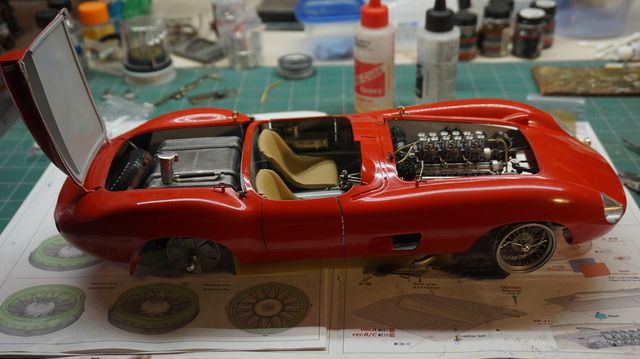
It all went together pretty well. I had to do it twice because one of the hood latches hit the side of the engine bay and didn't let the body go on all the way. it is a little tense when mounting the body because you have to man handle it a little, which makes me nervous that I'll brake something but it all went well. this thing weighs a lot!
thanks for watching.

built the frame work that holds the spare tire in the trunk. this gets inserted into the body before it is mounted to the chassis, tricky to do, it fell apart on me the first attempt.


Some of the trunk hardware

ready to bring these two together


It all went together pretty well. I had to do it twice because one of the hood latches hit the side of the engine bay and didn't let the body go on all the way. it is a little tense when mounting the body because you have to man handle it a little, which makes me nervous that I'll brake something but it all went well. this thing weighs a lot!
thanks for watching.
-
Sennafan
- Constructors Champion

- Posts: 1307
- Joined: Sun Mar 07, 2010 12:59 pm
- Favorite F1 Team or Driver: Ferrari
Mansell - Location: Houston
- Status: Offline
Re: MFH 1/12 Ferrari 315S/335S
Very nice work
Enjoying your build
I'm skipping the wire wheeled cars after my 250 GTO
Alex Hague
Enjoying your build
I'm skipping the wire wheeled cars after my 250 GTO
Alex Hague
Re: MFH 1/12 Ferrari 315S/335S
It looks great. I know what you mean about the weight!!
What red did you use?
Thanks,
joe.
What red did you use?
Thanks,
joe.
-
 CBartholomew4677
- FOTA Chairman

- Posts: 3178
- Joined: Sat May 14, 2005 8:50 am
- Your Name: Chris Bartholomew
- Favorite F1 Team or Driver: Forza Ferrari!!!
- Location: Michigan, USA
- Status: Offline
Re: MFH 1/12 Ferrari 315S/335S
Awesome work!!! Your work is fantastic, realy coming along nicely. Looking forward to seeing more.
Cheers,
Chris
Cheers,
Chris
-
blakebirk
Topic author - Backmarker
- Posts: 318
- Joined: Wed Jan 12, 2011 3:29 pm
- Your Name: Dan
- Favorite F1 Team or Driver: Ferrari fan
- Location: Seattle Wa.
- Status: Offline
Re: MFH 1/12 Ferrari 315S/335S
Thanks for the kind comments.
I used decanted TS-49 for this model.
The wheels aren't to bad, but they each take a few hours to assemble.
Dan
I used decanted TS-49 for this model.
The wheels aren't to bad, but they each take a few hours to assemble.
Dan

Re: MFH 1/12 Ferrari 315S/335S
Great work on it! Clean and nice build, enjoying to see it coming together 
Take a stand!
-
blakebirk
Topic author - Backmarker
- Posts: 318
- Joined: Wed Jan 12, 2011 3:29 pm
- Your Name: Dan
- Favorite F1 Team or Driver: Ferrari fan
- Location: Seattle Wa.
- Status: Offline
Re: MFH 1/12 Ferrari 315S/335S
Last post for me in this thread. I will be posting some photos in a Completed Project post shortly.
Finished up the dash board and the windshield. It all went together well.
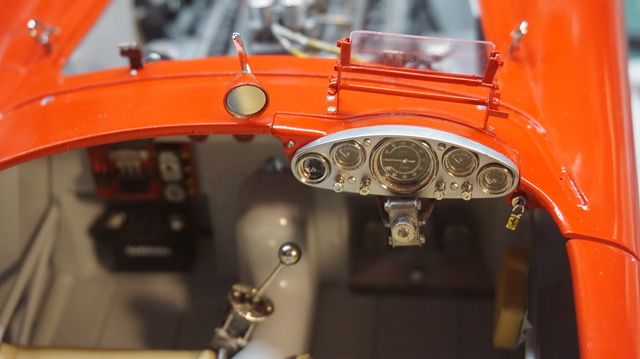
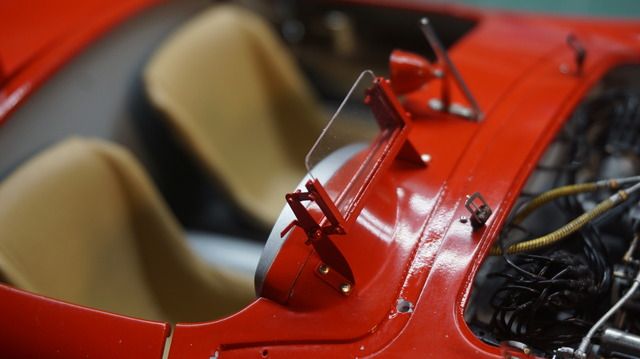
This little windshield has a lot of kittle parts but went together fairly well. After I got it mounted and tried to install the larger wind screen I realized that I had mounted it to far forward so the main wind shield hit it and therefore could not be mounted. after contemplating what to do about it for a while, I decided that it couldn't be taken off and moved because there were holes drilled in the dash to mount it I tried to bent it. luckily for me it bent on the joints that it is intended to bend instead of just crushing and everything fit together ok.
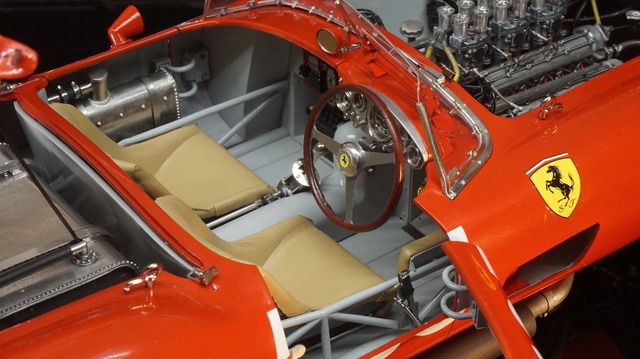
The steering wheel went together fine. the photo etched center is a bit thin around the rim so it doesn't really show on the outside. I thought if I sanded the wood rim all the way to the metal it would look to thin.
I thought about making a real wood one but I didn't want to mess it up so I didn't. the kit came with two rims, 3 spoke that this car has and a 4 spoke, I may experiment with the other rim and see how it goes.
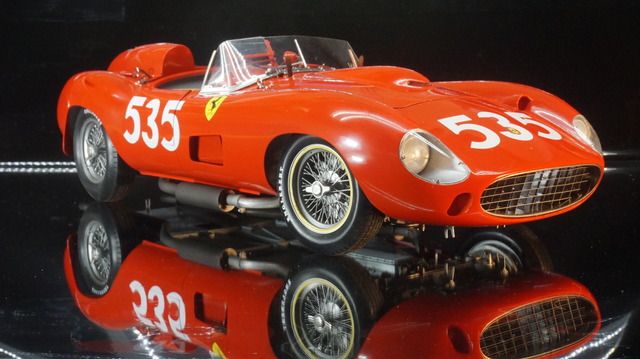
I really enjoyed this kit! very challenging and I'm very happy with the outcome. This car has the classic lines of the 50's Ferrari cars that I have always loved.
Thanks for watching
Dan
-
- Similar Topics
- Replies
- Views
- Last post
-
- 4 Replies
- 215 Views
-
Last post by marlborored