Ferrari 500 F2 Ascari
-
 Jeff
Jeff
- FOTA Chairman

- Posts: 2757
- Joined: Wed Jan 25, 2006 1:36 am
- Location: Melbourne, Australia
- Status: Offline
Re: Ferrari 500 F2 Ascari
Super wip, good idea to keep the seat removable, so can see the detail underneath
-
 steinietrabi
- Constructors Champion

- Posts: 1378
- Joined: Mon Mar 30, 2020 1:56 pm
- Your Name: Thomas
- Favorite F1 Team or Driver: Williams, Ferrari, McLaren... Michael Schumacher
- Location: Crottendorf / Germany
- Status: Offline

Re: Ferrari 500 F2 Ascari
The parts somehow don't get any bigger. 
Great WIP! Great work!
Great WIP!
Greetings Thomas
-
Schummie
Topic author - F2

- Posts: 58
- Joined: Sun May 24, 2020 9:26 am
- Your Name: Eric
- Favorite F1 Team or Driver: RBR and Max Verstappen
- Location: Almelo, Netherlands
- Status: Offline

Re: Ferrari 500 F2 Ascari
As promised, here the next update.
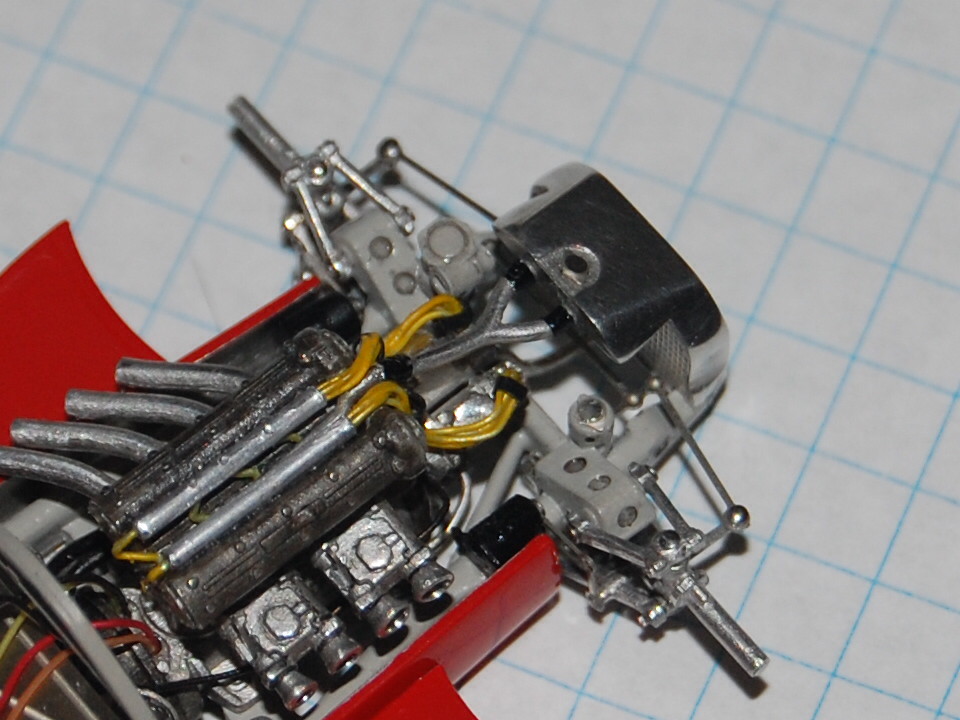
First the exhausts fitted on the engine. After asssembly of the engine this is not possible anymore.

The engine in the chassis. A fiddly job with all the connected pipes.


The "butt" for a fitting with the tank in place, but without the tank caps. This way I'm sure that if the caps are in place and the fit isn't right its not the tank itself.

The oil and the fule tank on the final resting place. Also the wires of the instuments connected with the engine at the correct places.
[imghttps://live.staticflickr.com/65535/50620901436_730b0d59f6_b.jpg][/img]
[imghttps://live.staticflickr.com/65535/50621007477_d5548d07a3_b.jpg][/img]
Seen from the under side the fuel line (silver) and the oil line (black) are still visible.

The polished caps of the oil and the fuel tank in place.


The engine connected with the gearbox with the drive shaft. The U-joints with a littke wash to bring up the details.

The front grille in the nose.
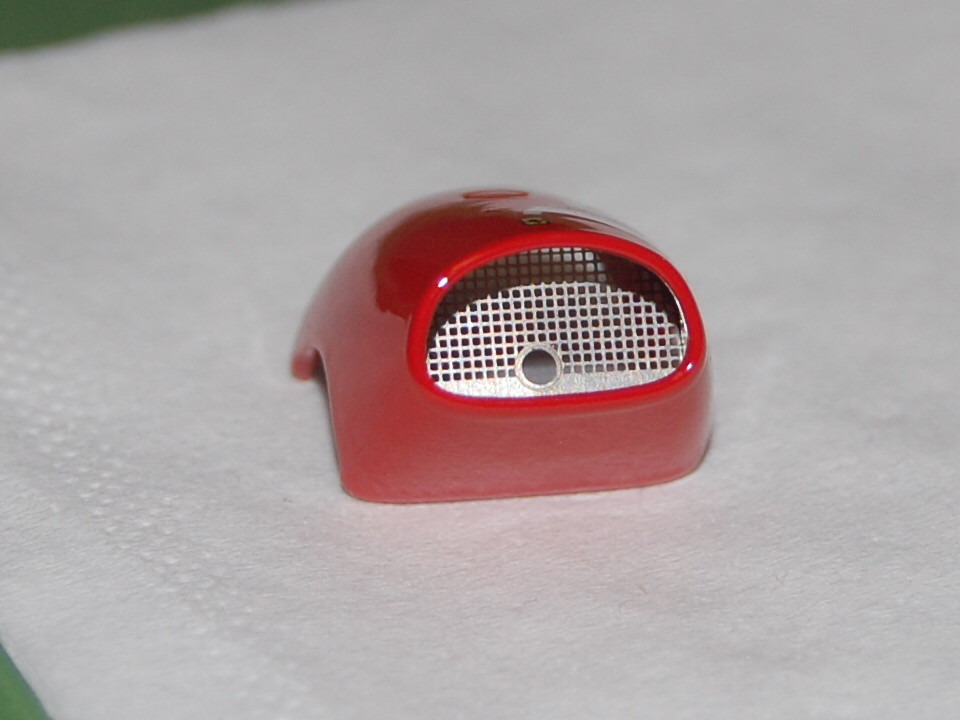
And test fitting the radiator to check if the nose still fits and to look how to fit the cooling tube with all its bends.

The mentioned cooling tube wresteled in place.

Almost forgot the clutch pedal. A bit hidden in the manual.
[imghttps://live.staticflickr.com/65535/50621009307_5b05248823_b.jpg][/img]
The FE parts before any work on them.

The pedal after the acid treatment and connected to the rod.

The pedal from underneath with a rod to the clutch.

And from the inside.

Break lines in place to be connected with the breaks.

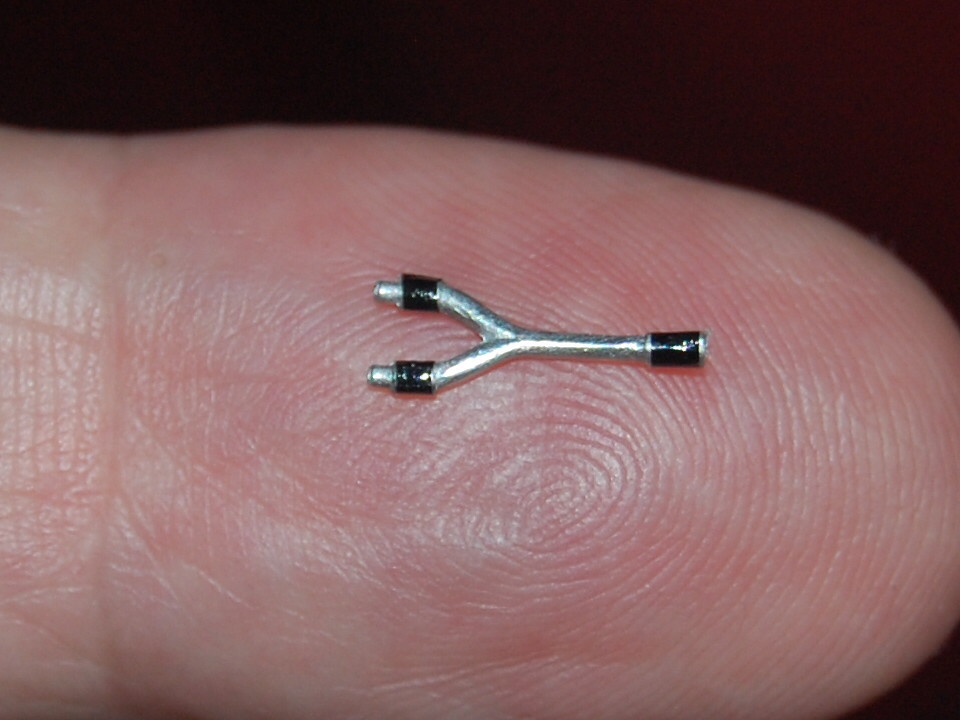
Another part of the cooling system. This goes from the top side of the engine to the top of the radiator.

The connectors not painted but made from small pieces of black decal.
And on with the steering .


And the radiator connected.

And from above.
That's it for today. Slowly the pieces together begin a bit to look as a car.
Untill next update.
First the exhausts fitted on the engine. After asssembly of the engine this is not possible anymore.
The engine in the chassis. A fiddly job with all the connected pipes.
The "butt" for a fitting with the tank in place, but without the tank caps. This way I'm sure that if the caps are in place and the fit isn't right its not the tank itself.
The oil and the fule tank on the final resting place. Also the wires of the instuments connected with the engine at the correct places.
[imghttps://live.staticflickr.com/65535/50620901436_730b0d59f6_b.jpg][/img]
[imghttps://live.staticflickr.com/65535/50621007477_d5548d07a3_b.jpg][/img]
Seen from the under side the fuel line (silver) and the oil line (black) are still visible.
The polished caps of the oil and the fuel tank in place.
The engine connected with the gearbox with the drive shaft. The U-joints with a littke wash to bring up the details.
The front grille in the nose.
And test fitting the radiator to check if the nose still fits and to look how to fit the cooling tube with all its bends.
The mentioned cooling tube wresteled in place.
Almost forgot the clutch pedal. A bit hidden in the manual.
[imghttps://live.staticflickr.com/65535/50621009307_5b05248823_b.jpg][/img]
The FE parts before any work on them.
The pedal after the acid treatment and connected to the rod.
The pedal from underneath with a rod to the clutch.
And from the inside.
Break lines in place to be connected with the breaks.
Another part of the cooling system. This goes from the top side of the engine to the top of the radiator.
The connectors not painted but made from small pieces of black decal.
And on with the steering .
And the radiator connected.
And from above.
That's it for today. Slowly the pieces together begin a bit to look as a car.
Untill next update.
-
Schummie
Topic author - F2
- Posts: 58
- Joined: Sun May 24, 2020 9:26 am
- Your Name: Eric
- Favorite F1 Team or Driver: RBR and Max Verstappen
- Location: Almelo, Netherlands
- Status: Offline
Re: Ferrari 500 F2 Ascari
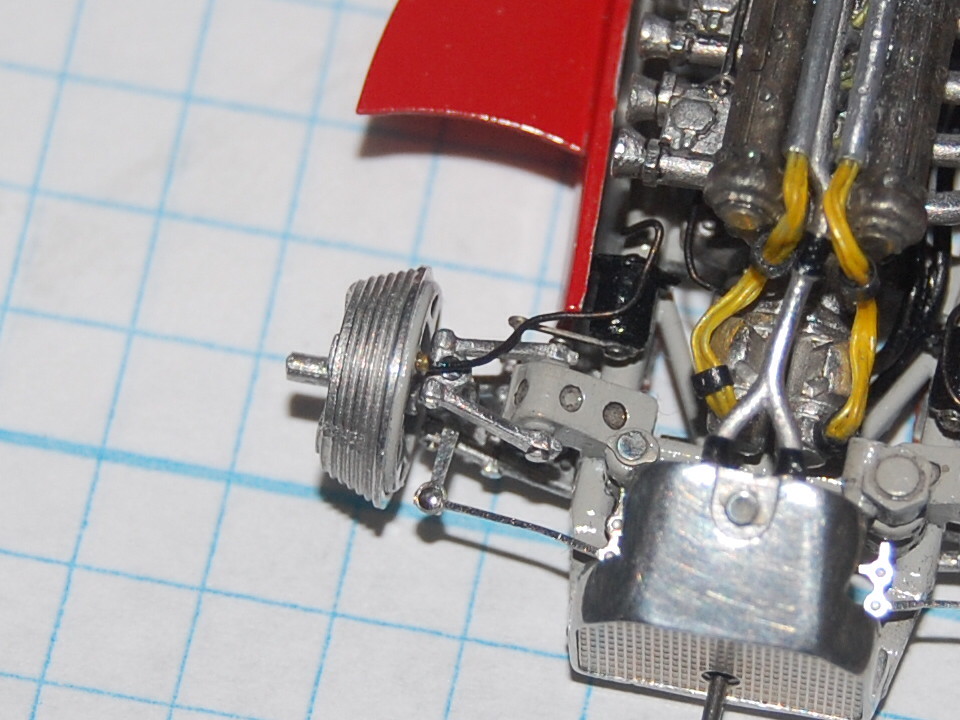
On with the rest.
The gas rod from the carburators to the gas pedal.

The hollow rod for starting the engine.


From underneat all the pipes and tubes can be seen.

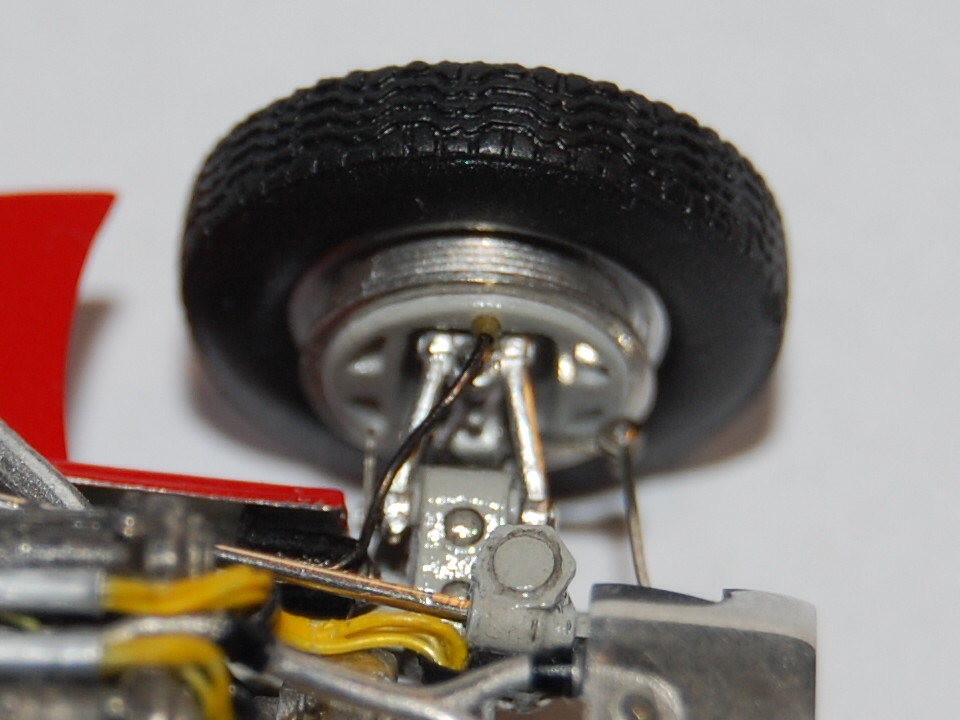
Preparations for adding break lines on the front side. Also dry fitting of a break drum.

The present states. It can't get out of the hands now, now can it?

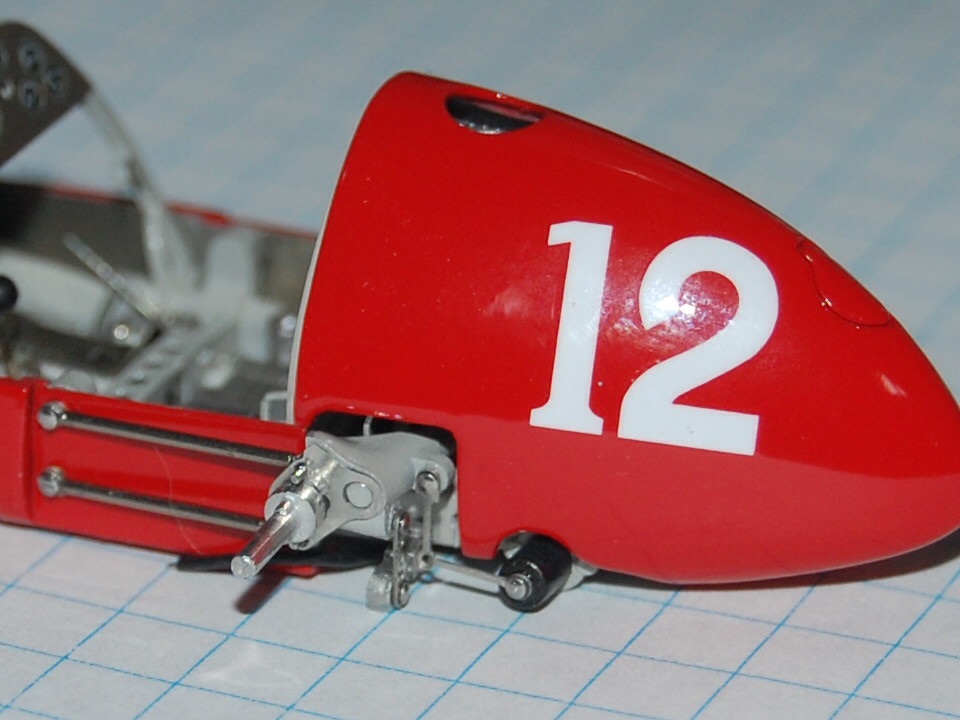
Fitting, bending and pushing of the body panels to keep seams as small as possible.


Break drums aft in place and connected with the break kines.

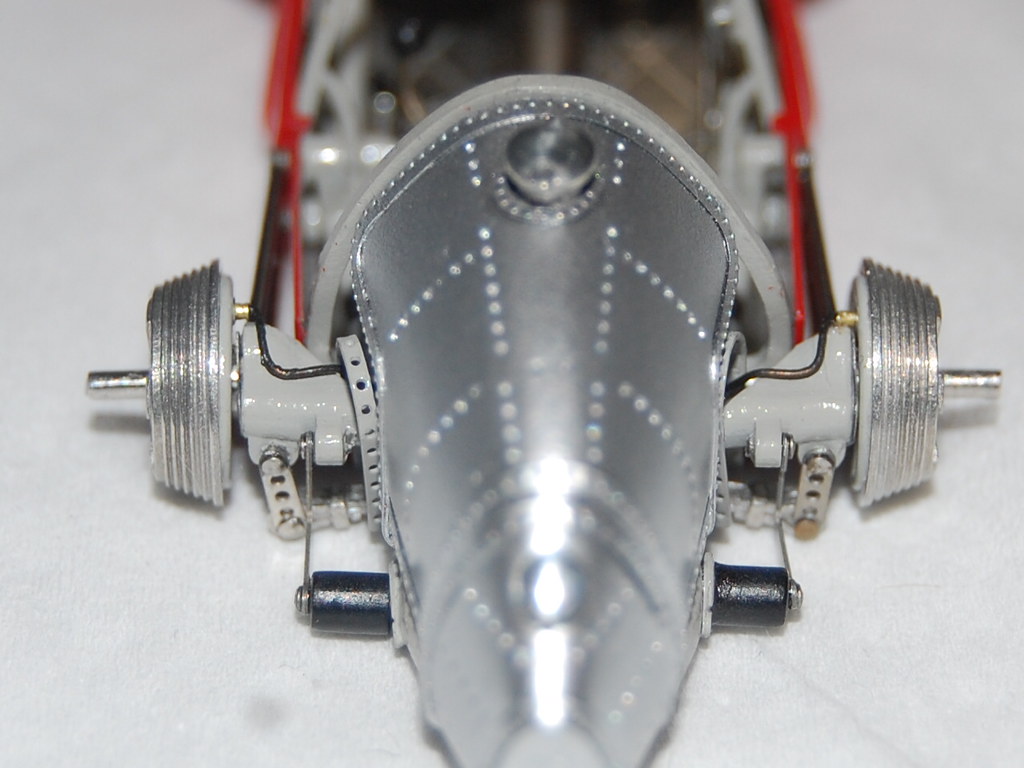
Break drums and lines on the front ready.

Dry fitting of the wheels. Luckily my build was accurate enough to get all 4 wheels tough the ground.

And also right aligned and straight.
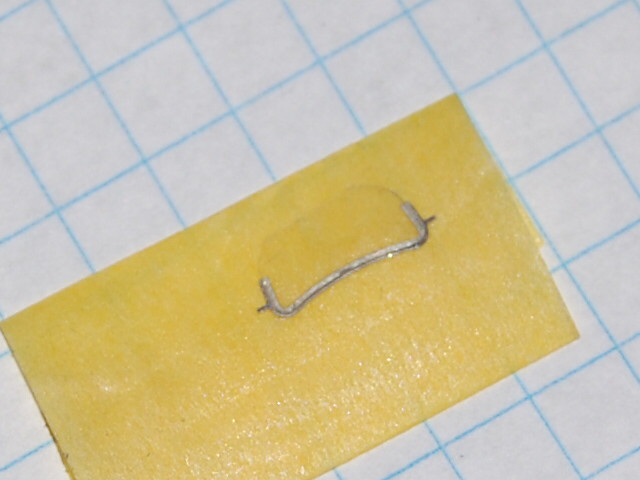
On with the cockpit window. Only a few parts. You get 4 attempts from Tameo to cut out the window.
They do this for a reason!!

The FE part has an etched rim where the window must fit. Because it kep moving, I first fixated the FE part on a piece of tape.
And on the body.


And the reflecting pieces on the mirrors.

On with the steering.

And the steering wheel.

The result; the driver can steer now.

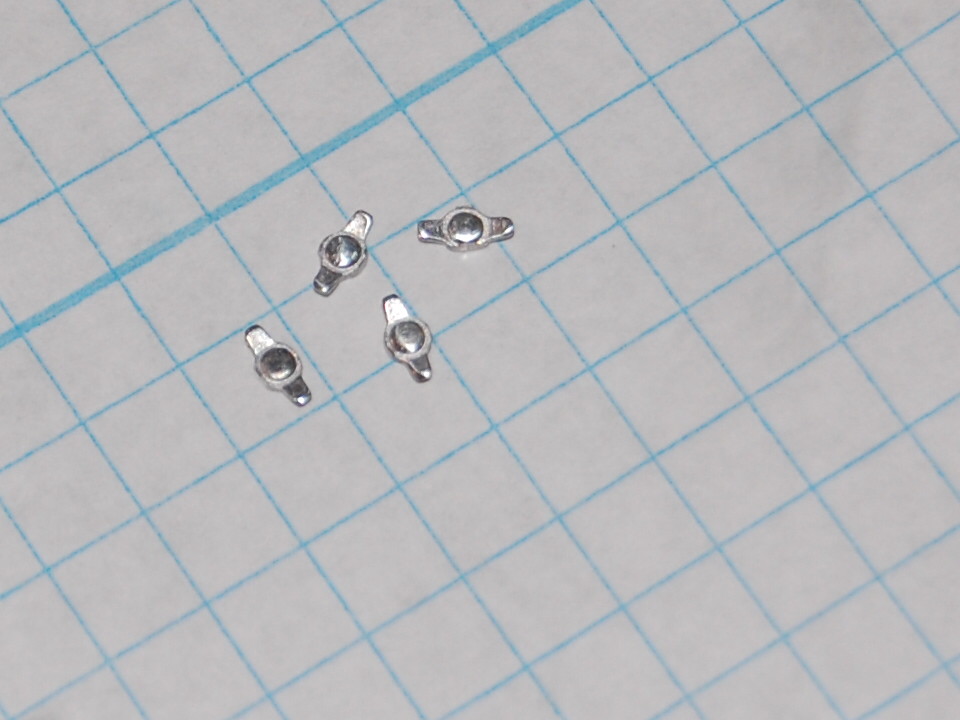
The wheel nuts. I decided to use the white metal ones. I have FE ones also, but the white metal ones are more 3-dimensional.

It's a bit more work, but I think it looks better. Half an hour added because one fell on the floor. Magnet doesn't work on white metal.
The final connection of the wheels.

And the wheel nuts in place.

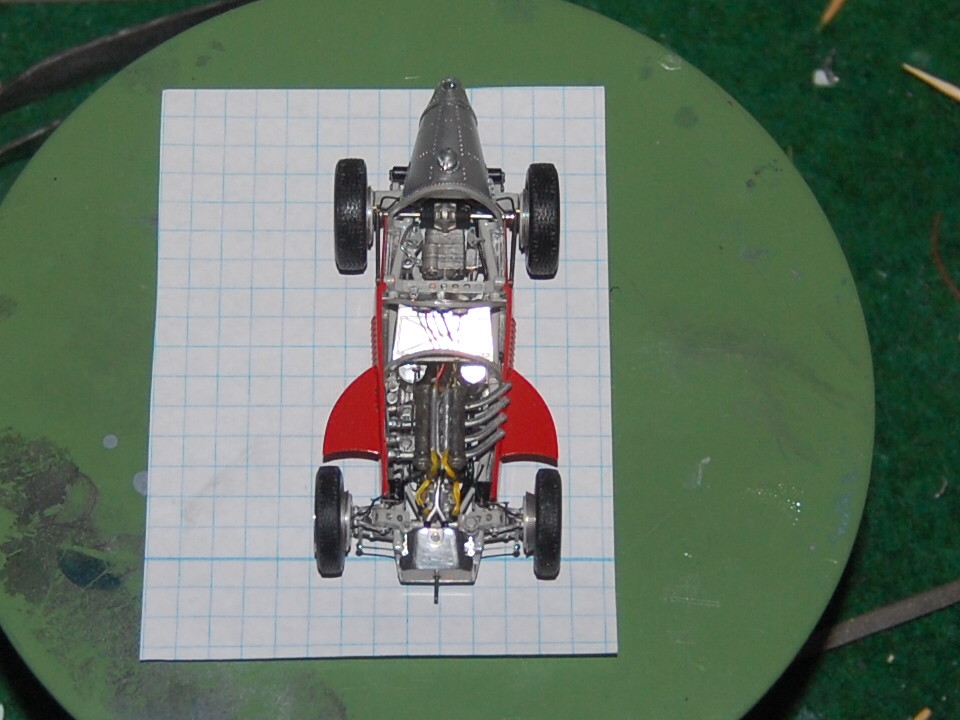
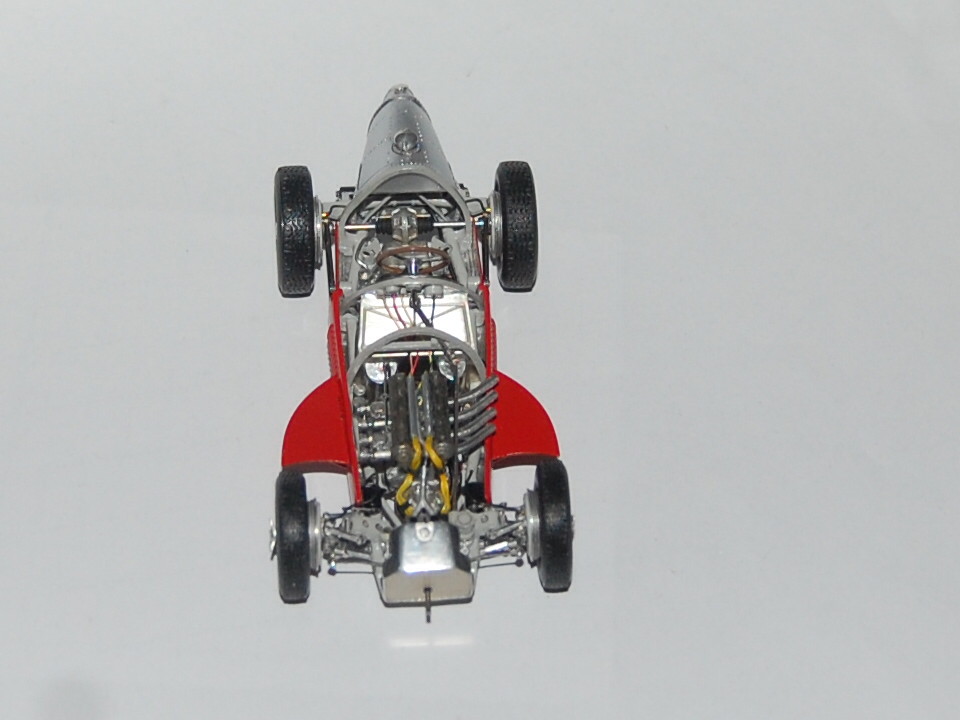
We are getting near the end result. An overvieuw from down under.

Next time the end game.
The gas rod from the carburators to the gas pedal.
The hollow rod for starting the engine.
From underneat all the pipes and tubes can be seen.
Preparations for adding break lines on the front side. Also dry fitting of a break drum.
The present states. It can't get out of the hands now, now can it?
Fitting, bending and pushing of the body panels to keep seams as small as possible.
Break drums aft in place and connected with the break kines.
Break drums and lines on the front ready.
Dry fitting of the wheels. Luckily my build was accurate enough to get all 4 wheels tough the ground.
And also right aligned and straight.
On with the cockpit window. Only a few parts. You get 4 attempts from Tameo to cut out the window.
They do this for a reason!!
The FE part has an etched rim where the window must fit. Because it kep moving, I first fixated the FE part on a piece of tape.
And on the body.
And the reflecting pieces on the mirrors.
On with the steering.
And the steering wheel.
The result; the driver can steer now.
The wheel nuts. I decided to use the white metal ones. I have FE ones also, but the white metal ones are more 3-dimensional.
It's a bit more work, but I think it looks better. Half an hour added because one fell on the floor. Magnet doesn't work on white metal.
The final connection of the wheels.
And the wheel nuts in place.
We are getting near the end result. An overvieuw from down under.
Next time the end game.
-
 dozman
- Best of the Rest

- Posts: 514
- Joined: Wed Nov 17, 2004 8:30 pm
- Favorite F1 Team or Driver: McLaren, Lotus, Williams
- Location: Queanbeyan
- Status: Offline

Re: Ferrari 500 F2 Ascari
Nice work Schummie, you're not wasting any time getting this one done.
Paul
Paul
-
Schummie
Topic author - F2
- Posts: 58
- Joined: Sun May 24, 2020 9:26 am
- Your Name: Eric
- Favorite F1 Team or Driver: RBR and Max Verstappen
- Location: Almelo, Netherlands
- Status: Offline
Re: Ferrari 500 F2 Ascari
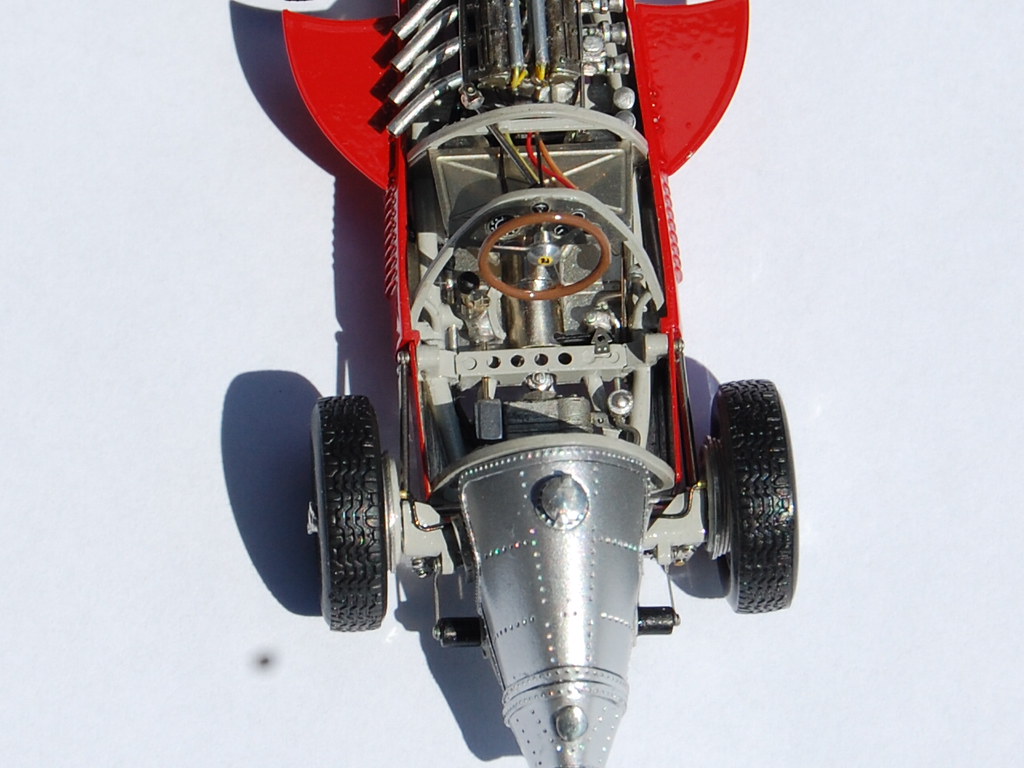
Here the last pictures of this build.
A vieuw from above without the chair.

And the last pictures of the final results.


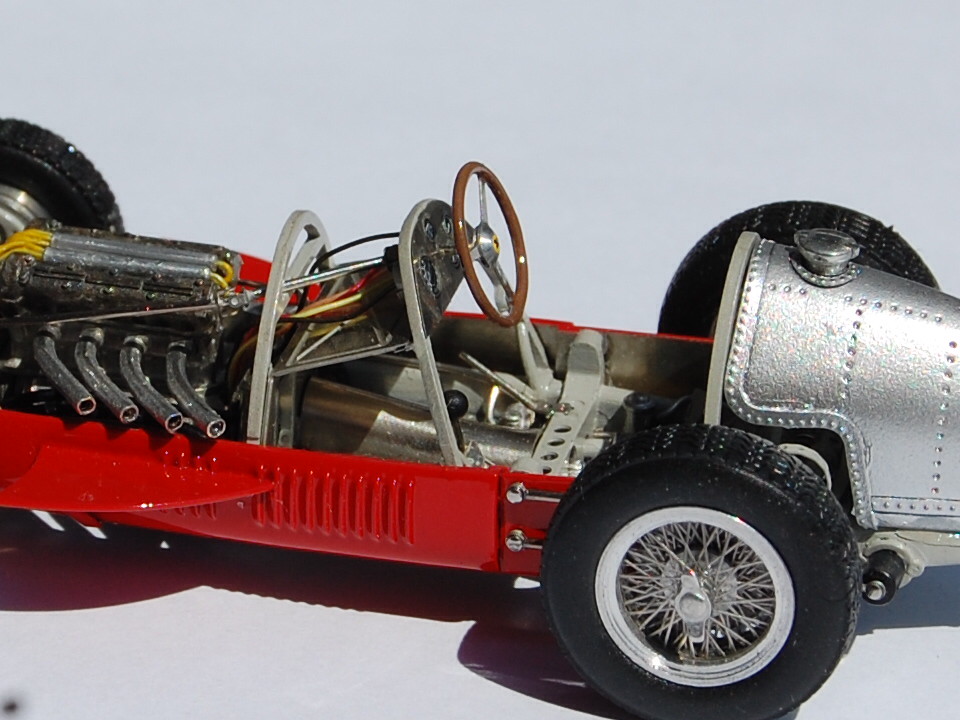


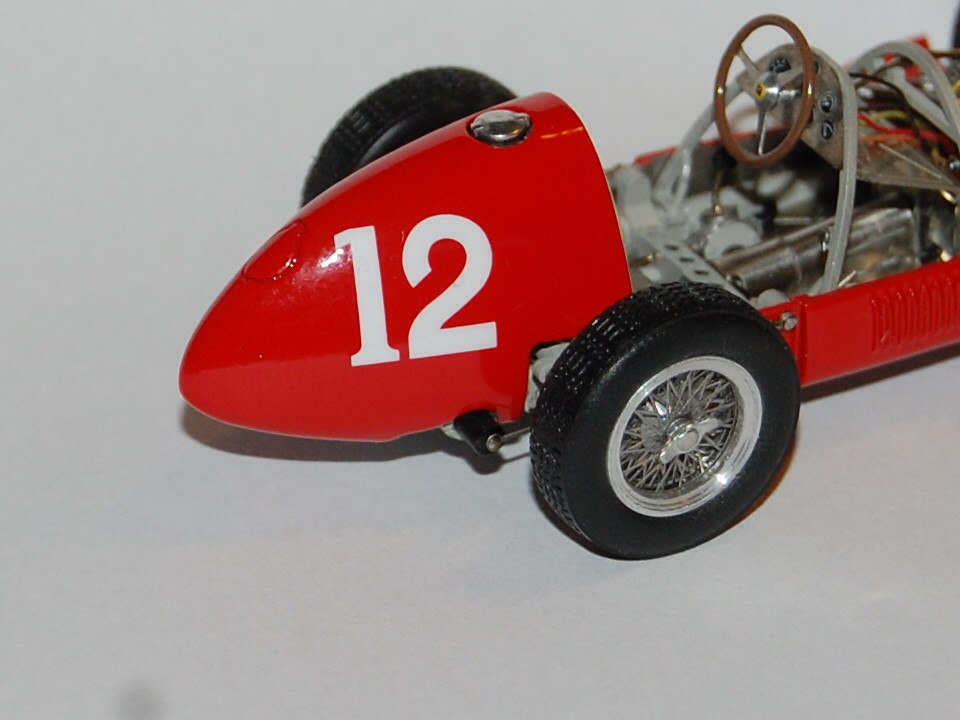


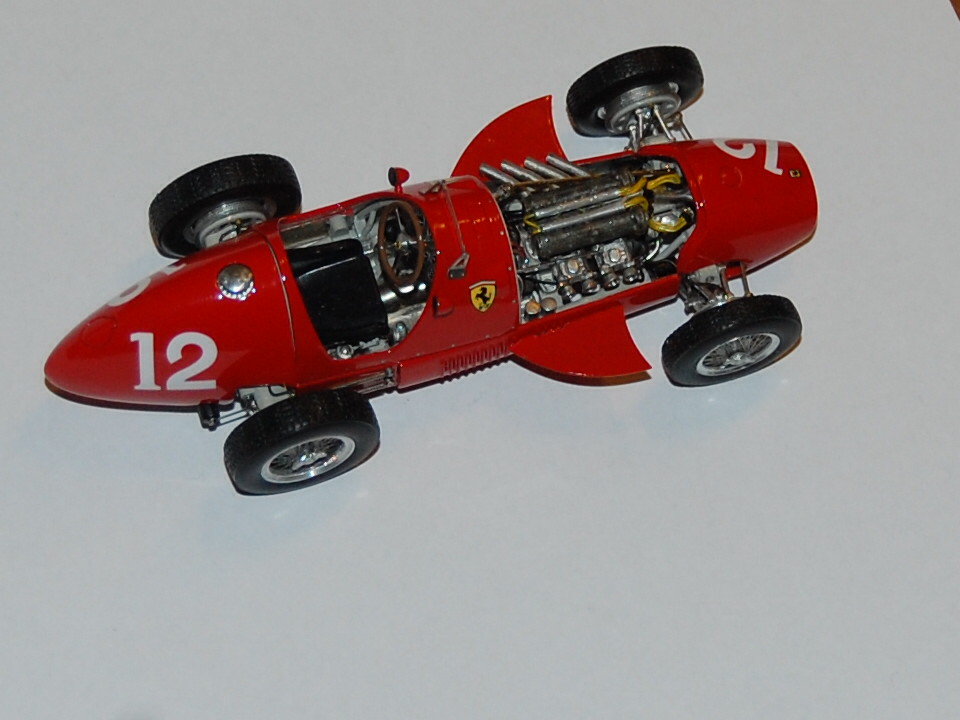
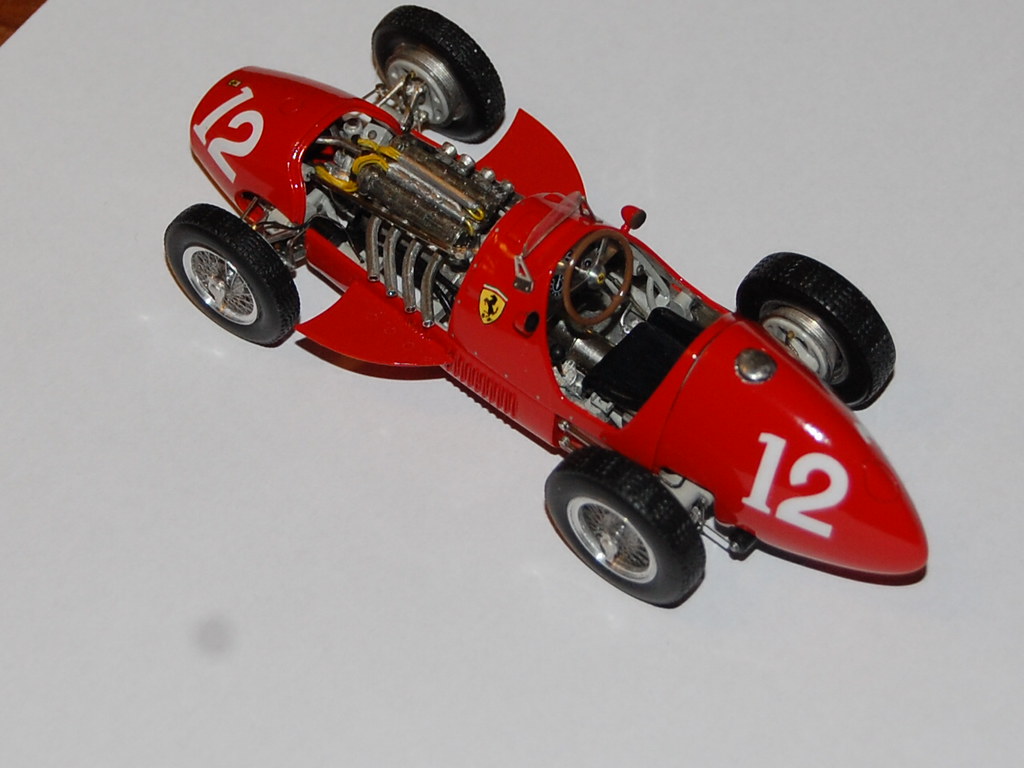


It was by far the most detailed 1/43 kit I build thusfar. I hope you liked the pictures.
The next project is on the total other end of the spectrum. The ATS HS1 in which the Dutch driver Michael Bleekemolen drove a few F1 races. Because there are no good kits available I purchases a rather crappy one.
And try with some scratch building make it acceptable.
If interested I can post it also here.
Regards, and stay safe.
A vieuw from above without the chair.
And the last pictures of the final results.
It was by far the most detailed 1/43 kit I build thusfar. I hope you liked the pictures.
The next project is on the total other end of the spectrum. The ATS HS1 in which the Dutch driver Michael Bleekemolen drove a few F1 races. Because there are no good kits available I purchases a rather crappy one.
And try with some scratch building make it acceptable.
If interested I can post it also here.
Regards, and stay safe.
-
 racingkars
- FOTA Chairman
- Posts: 2379
- Joined: Mon May 21, 2012 1:55 pm
- Favorite F1 Team or Driver: Ferrari
- Location: Assen; The Netherlands
- Contact:
- Status: Offline
Re: Ferrari 500 F2 Ascari
Super! Well done.
Kars
http://www.racingkars.nl (WIPs)
http://www.racingkars.com (sales)
Websites in Nederlands/English
English is not my native language, so sorry for any incorrect words or style... I have no intention to offend you.
http://www.racingkars.nl (WIPs)
http://www.racingkars.com (sales)
Websites in Nederlands/English
English is not my native language, so sorry for any incorrect words or style... I have no intention to offend you.
-
 fastbackfreddie
- F2 Champion

- Posts: 149
- Joined: Wed Apr 22, 2020 5:17 am
- Favorite F1 Team or Driver: Alain Prost, Mark Webber, Daniel Ricciardo.
- Status: Offline
Re: Ferrari 500 F2 Ascari
Excellent work Schummie...that is a gem and looks perfect. Congratulations.
I for one would like to see the construction of the ATS.
Cheers. Tim
I for one would like to see the construction of the ATS.
Cheers. Tim
-
 vekkuli
- FOTA Chairman
- Posts: 4438
- Joined: Wed Dec 21, 2005 3:20 pm
- Favorite F1 Team or Driver: Stake Sauber
- Location: Oulu-Uleåborg Finland
- Status: Offline

Re: Ferrari 500 F2 Ascari
Wow  ! Hard work & commitment, here's the result.
My completed Models:
https://www.flickr.com/photos/150229040 ... 3349714787
https://www.flickr.com/photos/150229040 ... 3349714787
-
Formulamike
- World Champion

- Posts: 671
- Joined: Fri Jan 09, 2009 7:00 am
- Favorite F1 Team or Driver: Lotus
- Status: Offline
Re: Ferrari 500 F2 Ascari
Looks great, good work eric
Mike
Mike
-
- Similar Topics
- Replies
- Views
- Last post
-
- 4 Replies
- 221 Views
-
Last post by marlborored